
Planting
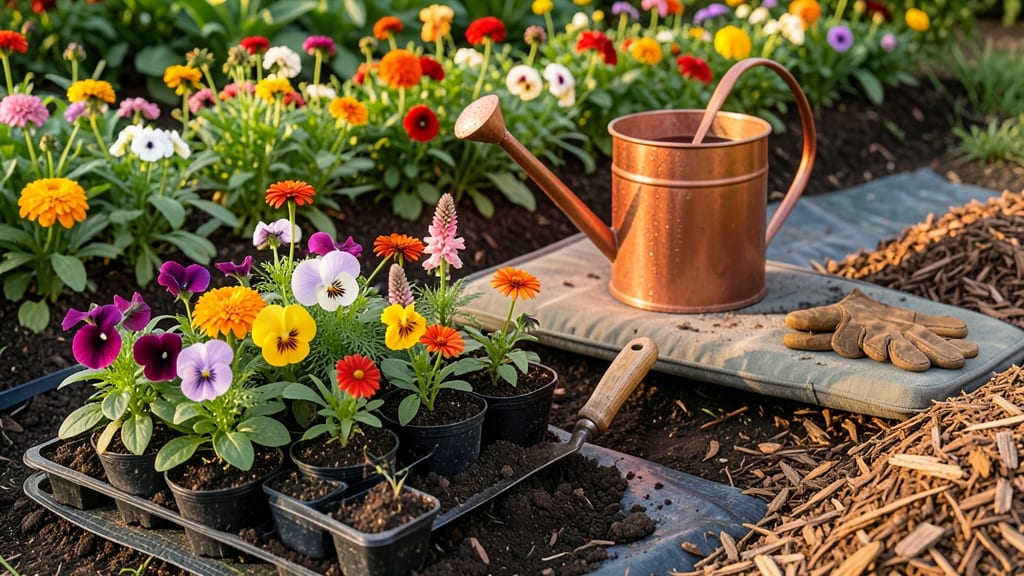
Planting your first flower bed doesn’t have to be overwhelming—just six simple steps separate you from a stress-free garden that blooms with confidence. 🌸 I’ve designed this layout to avoid the most common beginner mistakes, like overcrowding plants or skipping soil prep, which can leave you frustrated by summer.
The key is starting small: a 4-foot-by-4-foot bed is plenty for your first try, and it gives you room to experiment without feeling pressured.
You’ll need basic tools—a shovel, gloves, and a rake—and a handful of low-maintenance plants like marigolds, petunias, or coneflowers. These thrive with minimal fuss and forgive beginner spacing errors. The real secret?
Amending your soil with compost before planting—it’s the difference between wilting flowers and a bed that stays vibrant all season. Even if your yard’s soil is rocky or clay-heavy, a few inches of compost will transform it into a plant-friendly foundation.
By the time you’re done, you’ll have a bed that’s easy to maintain, looks intentional, and gives you the confidence to expand next year. The first wave of blooms will arrive in just 6-8 weeks, and you’ll be snapping photos to show off your progress.
No more guessing—just a clear, foolproof process that works even if you’ve never gardened before.
This method scales to any size bed, from a tiny windowsill garden to a full backyard border. Once you master the basics, you can mix in perennials for long-term color or add mulch to cut down on weeding.
The goal? A garden that feels like an extension of your home—not a chore. Let’s get those plants in the ground!
📚 In This Guide
- What you need
- Instructions
- Tips and common mistakes
- Wrapping up and next steps
What you need
- ● Garden soil or potting mix: 1-2 bags (depending on bed size; opt for well-draining mix with compost or peat moss).
- ● Topsoil: 1 bag (for amending existing soil if needed).
- ● Compost: 1 small bag (to enrich soil and boost plant health).
- ● Mulch: 1-2 bags (pine bark, shredded leaves, or straw; 2-3 inches thick after planting).
- ● Flower seeds or young plants: Choose 3-5 types (mix perennials, annuals, and fillers for texture/color). Pro tip: Buy 💡 blank">locally adapted varieties for easier care!
- ● Garden gloves: 1 pair (to protect your hands from thorns and dirt).
- ● Hand trowel: 1 (for digging small holes and transplanting).
- ● Garden rake: 1 (to level soil and remove debris).
- ● Hose with spray nozzle or watering can: 1 (for gentle watering).
- ● Measuring tape or ruler: 1 (to plan spacing—check plant tags for guidelines!).
- ● Stakes or labels: 5-10 (to mark plant locations and varieties).
- ● Edging tools: Metal or plastic (to define bed borders neatly).
- ● Garden kneeler: 1 (to save your knees—trust me!).
- ● Organic fertilizer: Slow-release granules (follow package instructions).
- ● Decorative rocks or pebbles: For a polished, low-maintenance look.
- ● Pruners: Small pair (for trimming dead foliage or shaping plants).
- ● Wheelbarrow or bucket: To haul soil and tools easily.
Step-by-step instructions for planting a beginner-friendly flower bed
Here’s how to create a beautiful, low-maintenance flower bed without the stress.
🪴 Step 1: Choose and Prepare Your Space
Pick a sunny spot—most flowers thrive in 6+ hours of direct sunlight daily. Clear the area of grass, weeds, or debris, then mark your bed’s shape with a garden hose or spray paint. A rectangular or curved design works best for beginners. I like to sketch a rough layout first to visualize how plants will fill the space.
Use a shovel to dig out the top 6 inches of soil and set it aside. Loosen the remaining soil with a garden fork to improve drainage. If your soil feels compacted or clay-heavy, mix in 2-3 inches of compost to lighten it up. This step ensures roots won’t struggle to spread later.
☀️ Step 2: Plan Your Plant Layout
Group plants by height, color, and bloom time for a polished look. Tall flowers (like sunflowers or delphiniums) go in the back, medium-height plants (like coneflowers or black-eyed Susans) in the middle, and low-growing varieties (like marigolds or petunias) in the front. For a stress-free bed, stick to 3-5 different types of plants—too many varieties mean more maintenance.
Space plants based on their mature size. Check the plant tags for spacing guidelines—usually 12-24 inches apart for perennials and 6-12 inches apart for annuals. I like to lay down a string or use a measuring tape to keep rows straight. This prevents overcrowding and makes future weeding easier.
🌱 Step 3: Dig Holes and Plant Carefully
Dig holes twice as wide and just as deep as the plant’s root ball. Gently remove each plant from its container, loosen the roots if they’re circling, and place it in the hole. Fill the hole with soil, pressing lightly to eliminate air pockets. Water each plant deeply to help settle the roots—you’ll see the soil sink slightly as it absorbs moisture.
Don’t bury the plant too deep; the top of the root ball should sit 1 inch below soil level. If the plant was in a pot, the soil line on the stem is your guide. Mulch around each plant with 1-2 inches of shredded bark or straw to retain moisture and suppress weeds. This step keeps your bed looking neat and reduces watering needs.
💧 Step 4: Water Thoroughly After Planting
Give your new flower bed a deep watering right after planting to encourage root growth. Use a garden hose with a gentle spray nozzle or a watering can to soak the soil 6-8 inches deep. You’ll know it’s enough when water runs out the bottom of the holes you dug earlier. Avoid overhead watering, which can spread disease and waste water.
Water again in 3-5 days, then adjust based on rainfall. Aim for 1 inch of water per week, either from rain or irrigation. Check the soil with your finger—if the top 1-2 inches feel dry, it’s time to water. Consistent moisture is key, especially in the first few weeks.
✂️ Step 5: Maintain and Enjoy Your Flower Bed
Remove weeds regularly to keep your bed looking tidy and reduce competition for nutrients. I pull weeds when the soil is moist—it’s easier on the roots and less frustrating. Deadhead spent blooms (trim faded flowers) to encourage more blooms and keep the bed looking fresh. This simple step extends the flowering season for many plants.
Fertilize lightly in early spring with a balanced, slow-release fertilizer (like 10-10-10) if your soil isn’t rich. Over-fertilizing can harm plants, so follow the package instructions closely. Step back and admire your work—your flower bed will reward you with color and beauty all season long.
Tips & tricks for planting a beginner-friendly flower bed
These simple strategies will help you create a stunning flower bed that thrives with minimal effort.
Sunlight Strategy: Most garden centers sell plants labeled "full sun," "partial shade," or "full shade." Before buying, check your space's sunlight exposure—use a solar calculator app or observe your yard for 6+ hours of direct sun. This ensures you pick the right plants for your flower bed's specific light conditions.
Soil Prep Secret: In Step 1, when mixing in 2-3 inches of compost, don't skimp on the tilling. Break up any large soil clumps with your garden fork to create a loose, crumbly texture. This improves drainage and root penetration, which is especially important if your soil feels compacted or clay-heavy. Think of it as giving your plants a fluffy bed to settle into!
Planting Precision: For Step 3, when digging holes, use a small garden trowel to create a shallow well around each hole's edge. This helps guide where to place the roots and prevents them from spreading outward. Also, gently squeeze the sides of the hole after planting to eliminate any remaining air pockets—this encourages immediate root contact with moist soil.
Watering Wisdom: After your deep watering in Step 4, let the soil dry slightly between waterings in the first few weeks. This encourages roots to grow deeper in search of moisture. You'll know you're doing it right when the top 1-2 inches of soil feel dry to the touch before your next watering session.
Pro Tips for Plant A Flower Bed For Beginners
- These simple strategies will help you create a stunning flower bed that thrives with minimal effort.
- Sunlight Strategy: Most garden centers sell plants labeled "full sun," "partial shade," or "full shade."
- Soil Prep Secret: In Step 1, when mixing in 2-3 inches of compost, don't skimp on the tilling.
Frequently asked questions
Got questions about planting your first flower bed? You’re not alone—every beginner does! Here are answers to the most common concerns to help you feel confident and avoid pitfalls.
What’s the best time of year to plant a flower bed?
For most regions, spring (after the last frost) or early fall (6 weeks before the first frost) are ideal. These seasons give plants time to establish roots before extreme heat or cold. Check your USDA Plant Hardiness Zone for local timing tips!
Do I need to remove all the grass before planting?
Not necessarily! Use a landscape fabric or cardboard barrier to smother grass, then cover with mulch. For stubborn grass, dig it out manually or apply vinegar or glyphosate (follow safety instructions). Pro tip: Smaller patches are easier to tackle by hand!
Can I plant flowers in a flower bed without spending a lot?
Start with seeds (cheaper than transplants) or divide existing plants from friends/family. Use free mulch (leaves, grass clippings) and repurpose materials like pallets or bricks for borders. Native plants are budget-friendly and low-maintenance!
How do I keep pests and weeds out of my new flower bed?
Prevent pests with healthy soil (compost + mulch) and neem oil for organic deterrence. For weeds, mulch heavily (3–4 inches) and pull them early. Troubleshooting: If pests strike, handpick or use soapy water spray (1 tsp mild soap per quart of water).
How long does it take for a flower bed to look established?
With proper care, 3–6 months is typical! Fast-growing annuals (like marigolds or zinnias) may bloom in weeks, while perennials or shrubs take longer. Water consistently (1–1.5 inches per week) and fertilize lightly (every 4–6 weeks) to speed up growth.
| Quick Fixes for Common Issues |
|---|
| Yellow leaves? Overwatering or nutrient deficiency. Check soil moisture and add balanced fertilizer (10-10-10). |
| No blooms? Too much nitrogen (focus on phosphorus-rich fertilizer) or not enough sun. Prune dead flowers to encourage reblooming. |
| Soil too hard to dig? Loosen it with a broadfork or mix in compost to improve drainage. |
Wrapping up and next steps
You’ve got this! 🌸 Planting a flower bed is all about preparation, patience, and a little creativity—and now you’re equipped with the confidence to start. Remember, even the most stunning gardens begin with small, intentional steps, so don’t stress over perfection.
Once your bed is planted, the real magic happens: watching your flowers bloom and thrive under your care.
Ready to take the next step? Sketch a rough design on paper or use a free garden-planning app to visualize your layout before digging in. Happy gardening—your future flower bed is waiting! 🌱