
Planting
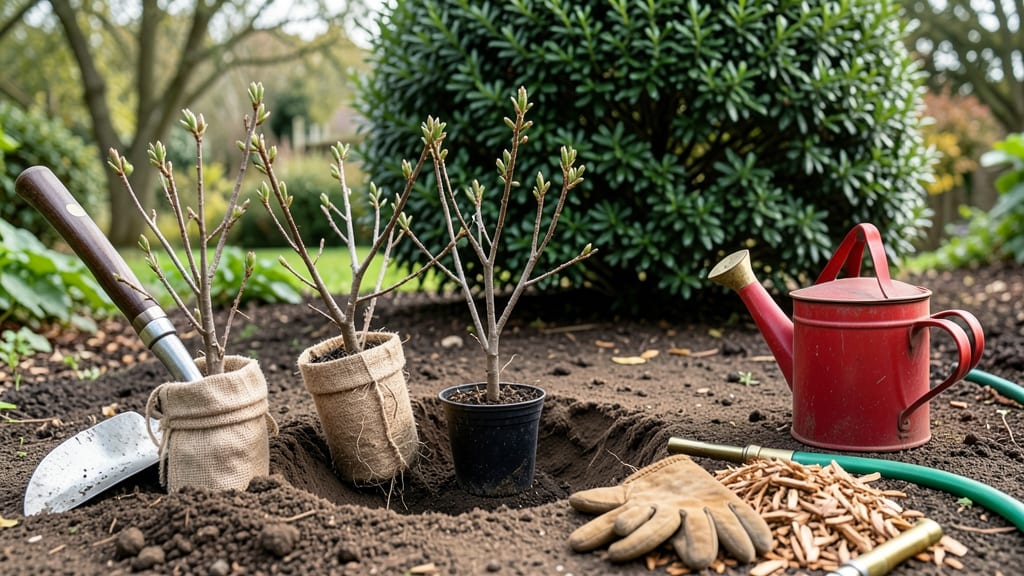
The best time of year to plant boxwoods is early spring or fall, when cool-season roots set them up for year-round lushness. 🌱 I’ve learned the hard way—summer heat stresses young plants, while winter frost can stunt their growth before they even take hold.
The ideal window is 4-6 weeks before your first frost or when soil temps hit 50°F in spring, giving roots time to establish before summer’s heat arrives.
Boxwoods thrive when planted in well-draining soil with a pH between 6.0 and 7.0. Amend heavy clay with compost or sand, and avoid soggy spots—they hate wet feet. In colder zones (5-7), fall planting is best; in warmer zones (8-10), early spring wins.
Mulch heavily after planting to lock in moisture and protect roots from temperature swings.
Within a year, you’ll see dense, glossy foliage that stays vibrant through winter. The key is keeping soil consistently moist (not soggy) for the first 12 months6-12 inches per year and outperform those struggling through heat or frost.
Regional tweaks matter: In the South, plant in late fall to avoid summer heat; in the North, aim for early spring to beat frost. Whether you’re lining a driveway or shaping a hedge, timing makes all the difference. Here’s how to nail it every season.
📚 In This Guide
- What you need
- Instructions
- Tips and common mistakes
- Wrapping up and next steps
What you need
- ● Boxwood plants: 1–5+ (depending on your design), preferably Buxus sempervirens or Buxus microphylla varieties, 1–3 gallons in size for mature growth.
- ● Shovel or spade: 1 medium-sized (16–18 inches long) for digging holes.
- ● Garden trowel: 1 for precision planting and backfilling soil.
- ● Pruning shears: 1 pair for trimming roots or shaping plants post-planting.
- ○ Compost or well-aged manure: 2–3 gallons (optional but recommended for nutrient boost).
- ● Mulch: 2–3 inches of organic mulch (e.g., shredded bark or pine straw) to retain moisture.
- ● Watering can or hose with a gentle nozzle: 1 for thorough watering.
- ● Gloves: 1 pair to protect your hands from thorns or rough soil.
- ● Soil test kit: 1 to check pH (ideal range: 6.0–7.0 for boxwoods).
- ● Slow-release fertilizer: 1 bag (10–20 lbs) for a nutrient kickstart.
- ● Plant stakes or cages: 1–2 for support if planting in windy areas.
- ● Soil amendment: Peat moss or perlite (1–2 bags) to improve drainage in heavy clay.
- ● Planting grid or measuring tape: 1 to maintain consistent spacing (typically 3–6 feet apart).
Step-by-Step guide to planting boxwoods for maximum success
Timing matters more than you might think—plant at the right moment, and your boxwoods will thrive for decades.
🌱 Step 1: Choose the Ideal Planting Window
Boxwoods establish roots best in cool, moist soil when temperatures average 50-65°F. In most climates, this means early spring (March-April) or fall (September-October)—just as summer heat or winter frosts begin to fade. I always aim for 4-6 weeks before the first hard frost or after the last frost date in spring.
Here's the thing—planting in late summer or winter stresses boxwoods. The roots can't establish before extreme heat or cold sets in. Watch your local weather forecast for steady rainfall during your planting window. If drought hits, you'll need to water deeply 3 times weekly until roots take hold.
☀️ Step 2: Select the Perfect Location
Boxwoods love partial shade to full sun—but there's a trick. In hot climates (Zones 8-10), plant them where they get morning sun and afternoon shade to prevent leaf scorch. In cooler regions (Zones 3-7), they handle full sun beautifully. I test spots by watching how long shade lasts—4+ hours of shade works for sun-sensitive varieties like 'Green Mountain'.
Check soil drainage by digging a 6-inch hole—if water pools after 30 minutes, amend with 2 inches of compost or plant on a slight mound. Boxwoods hate soggy roots, and poor drainage is the #1 reason they decline. You'll know you've got it right when the soil feels crumbly but moist, like a wrung-out sponge.
🪴 Step 3: Prepare the Planting Hole
Dig a hole twice as wide as the root ball but no deeper—boxwoods hate being buried too deep, which suffocates roots. I use a shovel to loosen the sides of the hole so roots can spread easily. Mix the removed soil with 1 part compost to improve fertility without overwhelming the plant.
Gently remove the boxwood from its container and loosen any circling roots with your fingers. If the root ball is tightly packed, score the edges with a knife to encourage outward growth. Place the plant in the hole so the top of the root ball sits 1 inch above soil level—this prevents rot when you water.
💧 Step 4: Plant and Water Deeply
Backfill the hole with your amended soil, tamping lightly every 2 inches to remove air pockets. Water deeply right away—this settles the soil and eliminates gaps. You'll see the soil surface sink slightly as it absorbs moisture. After planting 4 boxwoods, I always water each one with 1 gallon of water to ensure roots make contact with moist soil.
Mulch around the base with 2-3 inches of shredded bark, keeping it 3 inches away from the stem to prevent rot. The mulch should look like a donut, not a mound. This keeps roots cool in summer and insulated in winter. Check moisture weekly—boxwoods need 1 inch of water per week, either from rain or you.
⏰ Step 5: Monitor and Maintain for First Year
For the first 30 days, water twice weekly if rainfall is light. You'll know it's working when new growth appears in 4-6 weeks. If leaves yellow or wilt, it's usually overwatering—boxwoods prefer consistent moisture, not soggy soil. I always check by sticking my finger 2 inches down—if it's dry, water; if damp, wait.
Fertilize once in spring with a slow-release, balanced fertilizer (10-10-10). Avoid high-nitrogen mixes—they encourage leafy growth at the expense of root strength. By year two, your boxwoods will be established enough to handle normal seasonal care. That's when you'll see the dense, glossy foliage they're famous for!
Tips & tricks for perfect boxwood planting
These game-changing insights will help you avoid the most common pitfalls and get your boxwoods off to the strongest possible start.
The Timing Factor: I can't stress this enough—those 4-6 weeks before the first hard frost or after the last frost date are non-negotiable for root establishment. In my experience, planting too early in spring (when soil is still cold) or too late in fall (when winter's edge is near) stresses the plants. Check your local frost dates and aim for when daytime highs consistently reach 50-65°F for at least a week. This gives roots time to establish before dormancy sets in.
Root Ball Rescue: When you remove boxwoods from their containers, you'll often find circling roots that strangle growth. I've learned the hard way that simply cutting these roots with a knife isn't enough—you need to score the edges of the root ball in a crosshatch pattern. This encourages roots to spread outward into the surrounding soil rather than staying compacted. Think of it like giving your plant permission to explore!
Drainage Detective Work: That 6-inch hole test in Step 2 is your best friend. If water pools after 30 minutes, you're dealing with heavy clay soil. My go-to fix is mixing in 2 inches of compost with the native soil when backfilling. For extreme cases, consider planting on a slight mound to improve drainage. Remember, boxwoods will forgive many mistakes, but soggy roots won't.
Watering Wisdom: Those first 30 days are critical for root development. I've seen too many gardeners overwater in excitement, thinking more is better. Instead, aim for 1 inch of water per week—either from rainfall or your hose. The soil should feel like a wrung-out sponge: moist but not saturated. Use your finger as a gauge: if the top 2 inches are dry, it's time to water. This consistency is what builds strong, resilient roots.
Pro Tips for Best Time Of Year To Plant Boxwoods
- These game-changing insights will help you avoid the most common pitfalls and get your boxwoods off to the strongest possible start.
- The Timing Factor: I can't stress this enough—those 4-6 weeks before the first hard frost or after the last frost date are non-negotiable for root establishment.
- Root Ball Rescue: When you remove boxwoods from their containers, you'll often find circling roots that strangle growth.
Frequently asked questions
Got questions about planting boxwoods? You’re not alone!
Here are answers to the most common queries to help you grow thriving, lush hedges with confidence.
What’s the absolute latest I can plant boxwoods in fall without risking winter damage?
While early fall (September–October) is ideal, you can plant boxwoods up to 6 weeks before your first hard frost—typically mid-to-late November in most U.S. zones. Just ensure the soil isn’t frozen, and mulch heavily (3–4 inches) to insulate roots. In colder climates (zones 4–6), aim for October to give roots time to establish before winter.
Can I plant boxwoods in spring instead of fall? If so, what’s the catch?
Yes! Spring planting (March–May) works, but watering is critical—boxwoods struggle more with transplant shock in hot weather. Plant on a cool, cloudy day and keep soil consistently moist for the first 2–3 months. Avoid spring in drought-prone areas unless you’re committed to deep, frequent watering.
How do I know if my boxwoods are planted too deep or too shallow?
Boxwoods hate soggy roots but despise being buried too deep. The root flare (where roots meet the trunk) should sit 1–2 inches above soil level. If planted too deep, roots suffocate; too shallow, and they dry out. Dig a shallow trench around the base to check—if you see roots circling the soil line, it’s time to adjust!
Are there any boxwood varieties that tolerate late planting better than others?
Some varieties are more forgiving for late-season planting. Look for ‘Winter Gem’ or ‘Wintergreen’ (disease-resistant and cold-hardy) or ‘Dwarf Korean’ (compact and resilient). Avoid ‘American’ boxwoods if planting late—they’re more prone to winter burn. Always check your zone’s last frost date and adjust timing accordingly.
What should I do if my newly planted boxwoods look wilted or stressed after planting?
Wilting is normal for the first few days post-planting, but if it persists beyond a week, act fast! Trim any damaged foliage, water deeply (1–1.5 inches), and apply a root stimulator (like mycorrhizal fungi). Mulch with 2–3 inches of shredded bark to retain moisture, and avoid fertilizing for 6–8 weeks—stressed roots need time to recover.
Pro Tip: Mulch matters!
Whether planting in fall or spring, mulch is your best friend. Use organic mulch (pine straw, shredded bark) and keep it 3–4 inches away from the trunk to prevent rot. Replenish as it breaks down—this keeps roots cool in summer and insulated in winter.
Wrapping up and next steps
Planting boxwoods at the right time—early spring or fall—sets the stage for thriving, lush foliage year-round. 🌱 With cooler temperatures and ample moisture, your boxwoods will establish strong roots, weathering heat and drought with ease.
Whether you’re a seasoned gardener or just starting, now is the perfect moment to dig in and transform your landscape!
Ready to get growing? Mark your calendar for early spring or fall, gather your supplies, and watch your boxwoods flourish. Start planting today—your future garden will thank you!