
Planting
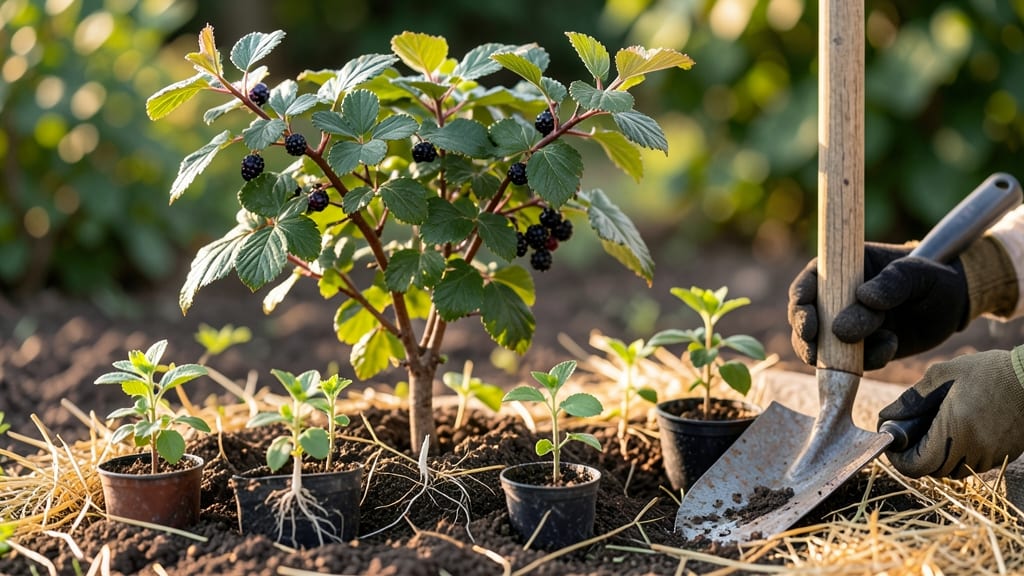
Planting black currant bushes means three years of waiting before your first harvest—but the tart-sweet berries are worth it. 🌿 These hardy shrubs thrive in zones 3–7, where cold winters actually improve flavor by breaking seed dormancy.
My first batch took root in a shady corner of the yard, and now they’re the most productive plants in the garden.
Start with bare-root plants in early spring or fall—they establish faster than potted seedlings. Dig a hole twice as wide as the root ball but no deeper, then loosen the roots before placing them in soil mixed with compost.
Space bushes 6 feet apart to prevent overcrowding, and water deeply right after planting to settle the roots. Mulch with straw to retain moisture and keep weeds at bay.
📚 In This Guide
- What you need
- Instructions
- Tips and common mistakes
- Wrapping up and next steps
What you need
- ● Black currant plants: 1–3 bare-root or container-grown bushes (choose disease-resistant varieties like Consort or Ben Connan).
- ● Shovel or spade: For digging planting holes (12–18 inches wide/deep).
- ● Garden trowel: For fine adjustments and backfilling soil.
- ● Compost or well-aged manure: 5–10 gallons to enrich planting soil.
- ● Mulch (straw, wood chips, or pine needles): 2–3 inches to retain moisture and suppress weeds.
- ● Pruning shears: For trimming dead or damaged branches post-planting.
- ● Garden hose or watering can: To keep soil moist during the first 2–3 weeks.
- ○ Planting gloves: Optional but recommended for comfort and hygiene.
- ● Soil test kit: To check pH (ideal range: 6.0–7.0 for black currants). Adjust with lime or sulfur if needed.
- ● Fertilizer (balanced 10-10-10 or organic options): Apply lightly in spring after planting.
- ● Plant support (stakes or cages): Useful if your bushes grow tall or in windy areas.
- ● Drip irrigation system: Saves time and ensures consistent watering.
- ● Row cover or frost cloth: Protect young plants from late frosts (if planting early spring).
Step-by-step instructions for planting black currant bushes
Here’s how to plant black currants for a thriving, frost-resistant berry patch that bears fruit in just three years.
🌱 Step 1: Choose the Right Location and Prepare the Soil
Black currants thrive in full sun to partial shade—at least 6 hours of sunlight daily—but tolerate light shade in hotter climates. Avoid low spots where cold air settles, as these bushes need winter hardiness. Test your soil’s pH: aim for 5.5 to 6.5, slightly acidic. If your soil is heavy clay, amend it with 2-3 inches of compost mixed into the top 12 inches of soil.
Dig a hole twice as wide as the root ball but only as deep—planting too deep can suffocate roots. Loosen the sides of the hole to encourage root spread. I like to add a handful of organic matter (like leaf mold or compost) to the backfill soil to give roots a nutrient boost right away.
🌿 Step 2: Plant the Bushes at the Correct Depth and Spacing
Remove the bush from its container and loosen any circling roots gently with your fingers. Place it in the hole so the top of the root ball sits level with the surrounding soil—never bury the stem deeper than it was in the container. Black currants need space to breathe: plant bushes 6-8 feet apart in rows 8-10 feet apart for proper airflow and sunlight penetration.
Fill the hole with soil, pressing lightly around the roots to remove air pockets. Water deeply to settle the soil and eliminate gaps. You’ll see the soil surface sink slightly—this is normal. Mulch around the base with 2-3 inches of wood chips or straw, keeping it 3 inches away from the stem to prevent rot.
💧 Step 3: Water and Monitor for the First Growing Season
Water deeply once a week for the first month, ensuring the soil stays moist but not soggy—black currants hate waterlogged roots. After establishment, they’re drought-tolerant but produce better berries with consistent moisture. You’ll know watering is right when the top 2 inches of soil feel damp but not wet.
Fertilize lightly in early spring with a balanced organic fertilizer (10-10-10) to encourage new growth. Avoid high-nitrogen fertilizers—they promote leafy growth at the expense of fruit. Prune only to remove dead or crossing branches in the first year; let the bush focus on root development.
✂️ Step 4: Prune for Shape and Productivity in Year Two
By year two, your black currant will need structured pruning to encourage fruit-bearing branches. In late winter or early spring, remove any dead, diseased, or weak wood first. Then, cut back last year’s growth by one-third to stimulate new, productive shoots. Look for strong, upright branches—these will bear the most fruit.
Thin out crowded stems to improve airflow, which reduces fungal diseases like powdery mildew. Leave 3-5 of the strongest canes per bush, cutting others back to the ground. You’ll see new growth emerge from the base in spring—these are your future fruit producers.
☀️ Step 5: Maintain for Maximum Berry Production
Black currants are self-pollinating, so you don’t need multiple bushes for fruit—but planting at least two improves yield. Harvest berries when they’re deep purple and plump, usually in mid to late summer. Pick gently to avoid damaging the branches. Spread a thin layer of mulch each fall to protect roots from freezing and retain moisture.
Watch for birds and pests—net young bushes if needed, and treat aphids or spider mites with neem oil if they appear. With proper care, your bushes will produce heavy crops in years three and four, rewarding your patience with juicy, tart berries perfect for jams, juices, or fresh eating.
Tips & tricks for planting black currant bushes
These little tricks will help you avoid common mistakes and set your black currant bushes up for success from day one.
Soil Prep Secret: If your soil is sandy, mix in 1 part compost to 3 parts soil when amending the hole—this helps retain moisture better than clay-heavy soil. I've seen sandy soil dry out too quickly, leading to stressed plants. Test your soil's moisture retention by squeezing a handful: if it crumbles easily, it needs more organic matter. The 2-3 inches of compost in the top 12 inches of soil creates the perfect foundation for root growth.
Planting Depth Visual: The top of the root ball should sit level with the surrounding soil—this is your visual cue. I like to use a small stick or pencil as a reference marker when placing the bush. If you bury the stem too deeply, it can suffocate; if it's too high, roots won't anchor properly. Think of it like planting a tree: the root flare (where roots meet stem) should be visible above ground.
Watering Wisdom: Those first 4 weeks are critical for root establishment. I've learned the hard way that watering "when the soil looks dry" isn't precise enough—black currants need consistent moisture. Use your finger to check the top 2 inches of soil daily. If it feels dry, water deeply until moisture reaches 6 inches down. A moisture meter helps if you're unsure—aim for 40-60% moisture in that top layer.
Mulching Matters: The 2-3 inches of wood chips or straw should form a donut shape around your bush, keeping it 3 inches away from the stem. This prevents moisture buildup that causes rot while protecting roots from temperature swings. I've noticed that mulched bushes handle winter better—especially in colder climates. Replenish mulch annually as it breaks down, but never pile it against the trunk.
Pro Tips for Planting Black Currant
- These little tricks will help you avoid common mistakes and set your black currant bushes up for success from day one.
- Soil Prep Secret: If your soil is sandy, mix in 1 part compost to 3 parts soil when amending the hole—this helps retain moisture better than clay-heavy soil.
- Planting Depth Visual: The top of the root ball should sit level with the surrounding soil—this is your visual cue.
Frequently asked questions
about planting black currant bushes—because even the best gardeners need a little extra guidance! Here are answers to the most common queries to help you grow thriving bushes with ease.When is the best time to plant black currant bushes?
Plant black currants in early spring (just as buds swell) or fall (4-6 weeks before the first frost). Avoid planting in extreme heat or cold—roots need time to establish without stress. If planting in fall, mulch well to protect roots over winter.
Are black currants truly frost-hardy?
Yes! Most varieties (like Consort or Ben Connan) thrive in USDA Zones 3-8. They handle winter well but may need winter mulch in colder climates. Young plants benefit from frost cloth until established.
Do black currants need cross-pollination?
Nope! Black currants are self-fertile, meaning one bush produces fruit on its own. Planting multiple bushes doesn’t increase yield, but it can encourage better pollination by insects (like bees) for slightly sweeter berries.
Why aren’t my black currants fruiting?
Common reasons include:
- Young age: Bushes need 2-3 years to mature and fruit.
- Poor pollination: Even self-fertile plants need bees—plant near flowers!
- Over-pruning: Avoid cutting back old wood (fruiting stems).
- Nutrient deficiency: Test soil—black currants love acidic, fertile soil (pH 5.5-6.5).
What’s a good alternative if black currants are banned in my area?
Some regions restrict black currants due to white pine blister rust. Try these rust-resistant alternatives:
Check local regulations before planting!
Wrapping up and next steps
Planting black currant bushes is a rewarding journey that yields delicious, nutrient-packed berries in just three years—and with the right care, they’ll thrive for decades! 🌱 Whether you’re drawn to their tart-sweet flavor, health benefits, or stunning foliage, these frost-hardy plants are a fantastic addition to any garden.
Now that you’re equipped with the how-to and answers to common questions, it’s time to roll up your sleeves and get growing!
Your next step? Mark your calendar for early spring or fall—the ideal planting windows—and pick a sunny spot with well-draining soil. Pro tip: Start small with 2-3 bushes to enjoy a bountiful harvest without overwhelming your space.
Happy planting, and may your black currant adventure be as sweet as the berries themselves! 🍇