
Planting
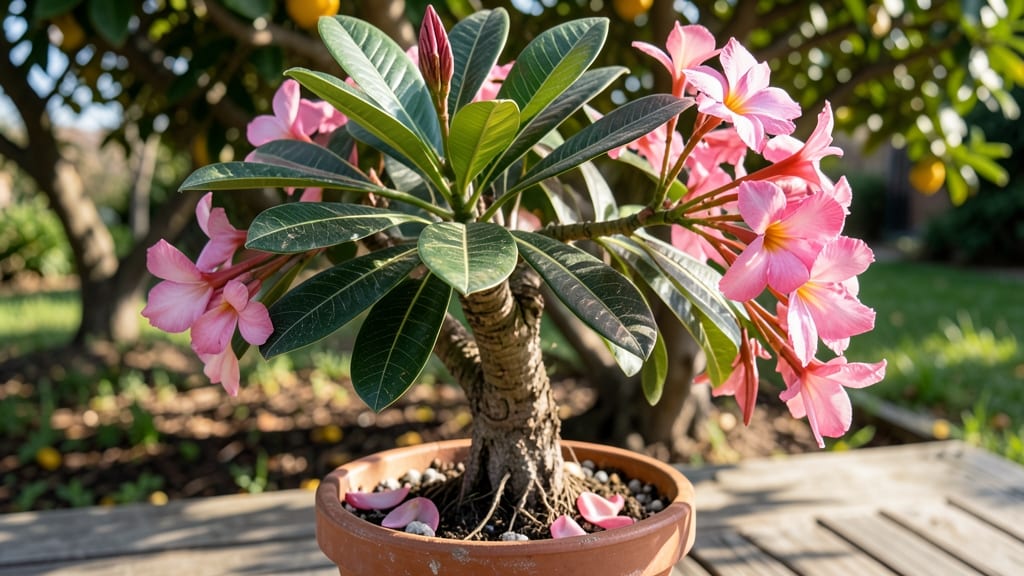
Growing a pink plumeria plant means waking up to sweet, tropical fragrance that smells like a Hawaiian vacation. 🌺 I’ve had mine thriving in containers for years—it’s all about the right balance of sun, soil, and occasional pruning to keep those glossy leaves and fragrant blooms coming back every season.
The secret isn’t complicated: full sun (6+ hours daily), well-draining soil, and a warm climate (or a cozy indoor spot in winter).
Plumerias are forgiving, but they will reward you with bold pink blooms if you give them consistent care—no fancy equipment needed, just a few basic supplies and a little patience.
Once established, your plant will flower twice a year with minimal effort, and the fragrance alone makes it worth the work. The key is avoiding overwatering (they hate soggy roots) and giving them a light trim after blooming to encourage new growth.
Perfect for balconies, patios, or even as a houseplant in winter. Let’s get yours growing!
📚 In This Guide
- What you need
- Instructions
- Tips and common mistakes
- Wrapping up and next steps
What you need
- ● Pink Plumeria Cuttings or Seedlings: 1-2 healthy cuttings (4-6 inches long) or a young plant from a nursery. Choose Plumeria rubra or Plumeria obtusa varieties for vibrant pink blooms.
- ● Well-Draining Potting Mix: 1 bag (10-15 liters) of a cactus/succulent blend or a mix of 60% inorganic material (perlite, pumice) and 40% organic matter (peat moss, coconut coir).
- ● Pot with Drainage Holes: 1 container (12-18 inches in diameter) with drainage holes. Terra cotta or ceramic pots work best!
- ○ Rooting Hormone (Optional but Helpful): 1 small tube to boost root growth for cuttings.
- ● Pruning Shears or Sharp Knife: Sterilized to make clean cuts on your cuttings.
- ● Spray Bottle: For misting cuttings or seedlings to maintain humidity.
- ○ Gloves (Optional): To protect your hands from sap or prickly stems.
- ● Sunlight Spot: A bright, indirect light area (6+ hours of sunlight daily). A south-facing window or grow light works great!
- ● Watering Can with Narrow Spout: For gentle watering to avoid disturbing the roots.
- ● Fertilizer (Balanced or Orchid-Specific): 1 bottle of diluted liquid fertilizer (20-20-20 or 10-10-10) for feeding once blooms fade.
- ● 💡 Test Your Soil: Ensure it drains fast—plumerias hate soggy roots! Mix in extra perlite if needed.
- ● 🌡️ Warmth is Key: Plumerias thrive in 70-90°F temps. If you’re in a cooler climate, grow them in containers and bring them indoors in winter.
- ● ✨ Humidity Helpers: Place a tray of water with pebbles near your plant to mimic tropical conditions.
Step-by-Step guide to growing a thriving pink plumeria plant
Here's how to coax those fragrant pink blooms from a container-grown plumeria with just a few key techniques.
🌱 Step 1: Select the Right Container and Drainage
Plumerias despise soggy roots, so choose a container with drainage holes at least 12 inches deep for mature plants. I prefer terracotta pots because they breathe and help regulate moisture—critical for tropical plants that hate wet feet. If using plastic, add 1-2 extra drainage holes to prevent root rot.
Place a 2-inch layer of coarse gravel or broken pottery at the bottom before adding soil. This creates an air pocket that prevents waterlogging while allowing excess moisture to escape. Your container should be slightly larger than the root ball—plumerias grow slowly and resent crowded pots.
☀️ Step 2: Prepare Well-Draining Soil Mix
Plumerias demand fast-draining soil to thrive. Mix 50% premium cactus/succulent mix with 30% perlite and 20% orchid bark for the perfect airy blend. Avoid garden soil—it compacts and suffocates roots. I like to add a slow-release fertilizer (like Osmocote) at planting time to give the plant a nutrient boost without overfeeding.
Fill the container halfway with your mix, then tap the sides gently to settle it. The goal is a light, fluffy texture that water can penetrate quickly. Press down just enough to create a stable base—plumerias don't need heavy soil to stay upright.
🌿 Step 3: Plant and Water Deeply
Remove the plumeria from its nursery pot and loosen any circling roots with your fingers. Position it so the top of the root ball sits ½ inch below the container rim—this prevents water from spilling over during irrigation. Backfill with your mix, pressing lightly around the edges to eliminate air pockets.
Water deeply until it drains freely from the bottom holes. Plumerias need thorough watering but hate sitting in moisture. Let the top 2 inches of soil dry completely between waterings—stick your finger in to check. Overwatering is the #1 killer of container plumerias.
⏰ Step 4: Position for Bright, Indirect Light
Plumerias crave bright light but burn easily in direct afternoon sun. Place your container near an east-facing window or 6 feet from a south-facing window where it gets 6-8 hours of filtered sunlight daily. If indoors, supplement with a grow light for 12-14 hours/day during winter months.
Rotate the pot a quarter turn weekly so the plant grows evenly. You'll notice new growth leaning toward the light—this is your cue to adjust its position. Plumerias grown in low light become leggy and sparse, while those in too-hot sun develop brown leaf tips.
✂️ Step 5: Prune and Fertilize for Continuous Blooms
After the first flush of blooms fades, prune back leggy stems to encourage bushier growth. Cut just above a leaf node (the bump where leaves attach) using clean, sharp pruners. This redirects energy into stronger stems and more flowers. I prune in early spring right before new growth begins.
Feed your plumeria monthly with a balanced 20-20-20 fertilizer diluted to half-strength during the growing season (spring through fall). Reduce to every 6-8 weeks in winter when growth slows. Flush the soil with plain water every 3 months to prevent salt buildup from fertilizers.
Tips & tricks for perfect pink plumeria blooms
Between us, these simple adjustments make all the difference when nurturing your pink plumeria to full, fragrant bloom.
Drainage Layer Detail: That 2-inch layer of coarse gravel in Step 1 isn't just about drainage—it's about creating an oxygen-rich zone at the roots. I like to use broken terracotta pots instead of gravel because they naturally break down over time, adding mineral content to the soil. This mimics the volcanic soil plumerias grow in naturally.
Soil Texture Test: After mixing your 50-30-20 soil blend in Step 2, do this quick test: Scoop a handful and squeeze gently. It should crumble easily when dry, but hold its shape when lightly pressed. If it sticks together like wet sand, add more perlite. If it falls apart completely, mix in a bit more orchid bark for structure.
Watering Rhythm: The "2 inches dry between waterings" guideline in Step 3 works best when you water in the morning. This gives roots all day to absorb moisture before evening. I've found that watering at the base (not overhead) prevents fungal issues, especially in humid climates. A moisture meter is worth the investment—plumerias hate both thirst and soggy roots.
Light Positioning: For that critical 6-8 hours of bright indirect light in Step 4, I recommend placing your plumeria where it gets morning sun and afternoon shade. If you notice leaves turning yellow, it's getting too much direct sun. For winter grow lights, position them 6-12 inches above the plant—they should be close enough to see gentle movement in the leaves when on.
Pro Tips for Pink Plumeria Plant
- Between us, these simple adjustments make all the difference when nurturing your pink plumeria to full, fragrant bloom.
- Drainage Layer Detail: That 2-inch layer of coarse gravel in Step 1 isn't just about drainage—it's about creating an oxygen-rich zone at the roots.
- Soil Texture Test: After mixing your 50-30-20 soil blend in Step 2, do this quick test: Scoop a handful and squeeze gently.
Frequently asked questions
Got questions about your pink plumeria plant? You’re not alone!
Here are answers to the most common queries to help you grow this fragrant beauty with confidence.
How often should I water my pink plumeria plant?
Water your pink plumeria deeply but infrequently—about once a week (or less in cooler months). Let the top 2–3 inches of soil dry out between waterings. Overwatering causes root rot, so drainage is key! Use well-draining soil and a pot with drainage holes.
When is the best time to prune a pink plumeria?
Prune your plumeria right after blooming (late spring/early summer) to encourage new growth. Avoid heavy pruning in fall/winter—this plant needs its energy to survive cooler temps. Use sterilized shears and cut just above a leaf node for cleaner regrowth.
Can I grow a pink plumeria indoors?
Pink plumerias thrive outdoors in warm climates, but you can grow them indoors near a sunny, south-facing window with supplemental grow lights (12+ hours/day). Keep humidity high (mist leaves or use a pebble tray) and avoid drafts. Expect smaller blooms than outdoor plants.
Why aren’t my pink plumeria leaves turning green?
Yellowing or pale leaves often signal nutrient deficiency, overwatering, or pests. Check for:
- Nitrogen deficiency: Use a balanced fertilizer (20-20-20) every 4–6 weeks.
- Scale insects: Wipe leaves with soapy water or use neem oil.
- Root rot: Repot in fresh, dry soil if soil smells sour.
How do I make my pink plumeria bloom more?
Plumerias bloom best with full sun (6+ hours/day), warm temps (60°F+), and a slight "stress" period. Try these tricks:
- Reduce water slightly in late summer to trigger dormancy.
- Fertilize lightly with phosphorus-rich food (like 10-30-20) to boost flowers.
- Prune spent blooms to encourage new buds.
Wrapping up and next steps
Growing a pink plumeria plant is a rewarding journey that brings fragrant beauty to your space with surprisingly little effort! Whether you’re a beginner or a seasoned gardener, these vibrant blooms thrive in containers and reward you with their sweet scent and striking color. 🌸
Now that you’re armed with the right tips—from choosing the perfect pot to mastering light and watering—it’s time to roll up your sleeves and plant! Start small, experiment with care routines, and soon you’ll be enjoying a thriving pink plumeria that’s the envy of every room. Happy planting! 🌱