
Planting
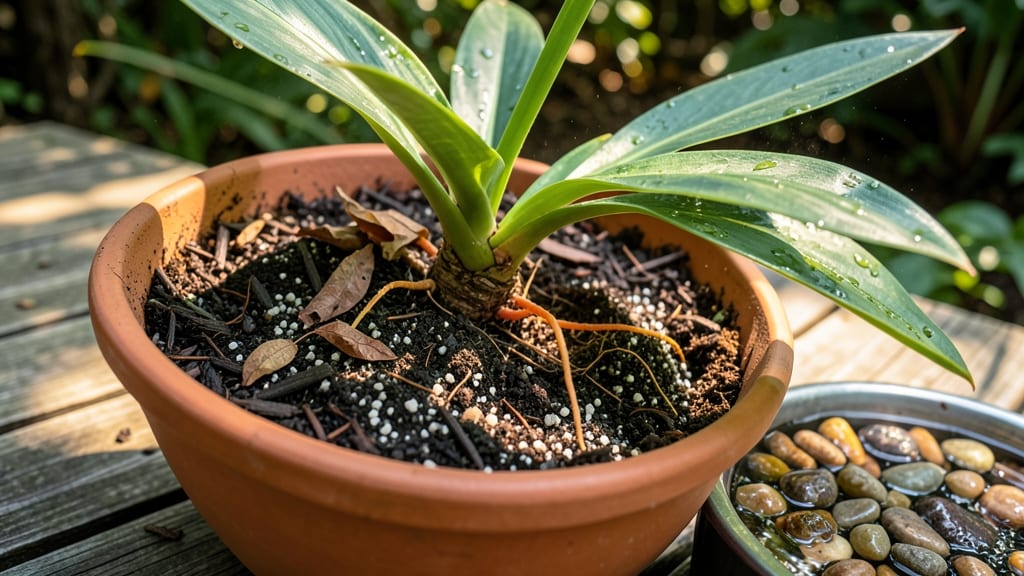
Caring for curcuma plants means turning your patio into a mini tropical paradise with those bold, lance-shaped leaves and fragrant blooms. 🌿 I’ve grown turmeric for years, and the secret to success lies in mimicking its natural tropical habitat—warmth, humidity, and rich soil.
Most people struggle because they treat it like a typical houseplant, but curcuma thrives when you give it the right conditions. Start with well-draining, slightly acidic soil mixed with compost—think of it as a sponge that holds moisture but never stays soggy.
Water when the top inch feels dry, and keep the air around it humid, like a steamy jungle morning. A sunny spot with 6+ hours of indirect light will keep those leaves vibrant, but avoid harsh afternoon sun that can scorch them.
You’ll know you’re doing it right when the plant sends up its signature bright yellow flowers followed by the rhizomes we harvest. Prune any yellow or damaged leaves to redirect energy, and fertilize lightly every 4-6 weeks during growing season.
The rhizomes take 8-10 months to mature, but the journey is worth it for that earthy, golden harvest. This plant is forgiving—even if you forget to water occasionally, it bounces back. Just watch for pests like spider mites (wipe leaves with soapy water) and root rot (ensure good drainage).
With a little patience, you’ll have a thriving curcuma that’s both beautiful and useful!
📚 In This Guide
- What you need
- Instructions
- Tips and common mistakes
- Wrapping up and next steps
What you need
- ● Curcuma rhizomes: 3–5 healthy, plump rhizomes (ensure they have "eyes" or buds for sprouting).
- ● Well-draining potting mix: 5–10 gallons of a blend of peat moss, perlite, and coconut coir (or 60% garden soil + 40% sand/perlite for outdoor planting).
- ● Containers (if potted): 1–2 large pots (12–18 inches deep) with drainage holes, or a raised bed (for outdoor planting).
- ● Watering can or hose: With a gentle spray nozzle for moisture control.
- ● Fertilizer: Balanced liquid fertilizer (10-10-10) or organic options like composted manure.
- ○ Slow-release granular fertilizer (optional, for long-term growth).
- ● Pruning shears: Sharp, sterilized shears for trimming dead leaves or harvesting.
- ○ Mulch (optional but helpful): Straw, wood chips, or pine needles to retain moisture.
- ● Sunlight: 6+ hours of direct sunlight daily (partial shade in hot climates).
- ● Temperature: Ideal range: 70–90°F (21–32°C); avoid frost (below 50°F/10°C harms the plant).
- ● Humidity: 60–80% (mist leaves occasionally in dry climates).
- ● Water source: Access to soft, slightly acidic water (pH 6.0–7.0) (avoid hard water with high chlorine).
- ● 🌡️ Soil test kit: Check pH levels—curcuma thrives in slightly acidic to neutral soil (pH 6.0–7.0).
- ○ ✨ Drip irrigation system: (Optional) Automates watering for consistent moisture.
- ● 🔥 Thermometer/hygrometer: Monitors temperature and humidity for optimal growth.
Step-by-Step instructions for growing a healthy curcuma plant
Curcuma—better known as turmeric—thrives with just a few key adjustments. Here's how to keep yours lush and productive.
🌿 Step 1: Position for Bright, Indirect Light
Curcuma loves warmth and bright light but burns easily in harsh sun. Place your plant near a south-facing window where it gets 6-8 hours of filtered light daily. If leaves start looking pale or crispy, move it back a few feet—you'll see the difference within a week as the foliage turns a deeper, richer green.
I keep mine on a rotating stand so all sides get even exposure. Without this, stems tend to lean toward the light, which weakens growth. Watch for new leaves emerging from the center—this is your sign the plant is happy with its light conditions.
💧 Step 2: Water Deeply but Infrequently
Curcuma roots despise soggy soil but need consistent moisture. Water once a week (or when the top 2 inches of soil feel dry to the touch), pouring enough to saturate the entire root zone. Let excess water drain completely—no saucers or trays underneath, as this plant hates wet feet.
I use the "finger test" method: stick my index finger into the soil. If it comes out clean, it's time to water. Overwatering causes yellow leaves and root rot, while underwatering leads to crispy edges. The ideal balance is soil that stays lightly moist but never soggy.
☀️ Step 3: Maintain Warm, Humid Conditions
Curcuma thrives in 70-85°F temperatures and 60%+ humidity. If your home runs dry, place the pot on a pebble tray with water or mist the leaves 2-3 times weekly. You'll notice the plant perking up immediately—older leaves stay vibrant instead of turning brown at the tips.
In winter, keep it away from drafts or cold windows. If leaves start curling or dropping, it's too cold. A small space heater near the plant (not too close!) helps maintain ideal warmth without drying out the air.
✂️ Step 4: Fertilize Lightly During Growing Season
Feed your curcuma with a balanced liquid fertilizer (10-10-10) diluted to half-strength every 4-6 weeks during spring and summer. I skip fertilizing in fall and winter when growth slows. Too much food causes weak stems and excessive foliage at the expense of rhizome development.
Look for dark green, glossy leaves as a sign the plant is absorbing nutrients well. If leaves yellow between veins, it's a classic sign of over-fertilization. Always water before applying fertilizer to prevent root burn.
🪴 Step 5: Repot Only When Necessary
Curcuma grows slowly and doesn't need frequent repotting. Move it to a slightly larger container (1-2 inches wider) only when roots circle the pot or new growth appears stunted. I repot in early spring using fresh well-draining potting mix with added perlite.
Gently loosen the root ball when transplanting—curcuma roots are delicate and break easily. After repotting, hold off on watering for 3-4 days to let any damaged roots heal. You'll see fresh growth within 2-3 weeks if the transition was smooth.
Tips & tricks for perfect curcuma plant care
Here's what nobody tells you about keeping your curcuma plant thriving without the guesswork.
Lighting Secret: That 6-8 hours of filtered light in Step 1 is non-negotiable for vibrant growth. I've learned the hard way—direct sun causes those beautiful leaves to bleach out like ghostly apparitions. Try placing a sheer curtain over the window if your south-facing spot gets harsh afternoon rays. You'll notice the difference within days as the leaves maintain their rich, deep green instead of turning pale.
Soil Savvy: Curcuma roots need that perfect balance of moisture without becoming soggy. I've found that mixing in extra perlite (about 20% of your potting mix) creates the ideal drainage while retaining just enough moisture. This prevents the dreaded root rot that can kill your plant in weeks. The finger test mentioned in Step 2 is your best friend—if the soil feels like a damp sponge, hold off on watering.
Humidity Hack: That 60%+ humidity requirement in Step 3 might seem tricky if you live in a dry climate. My solution? I place the pot on a bed of pebbles with water underneath—just make sure the pot isn't sitting directly in the water. This creates a natural humid microclimate around the plant. For extra insurance, I group my curcuma with other houseplants to boost the humidity levels naturally. The result? Leaves that stay lush and glossy instead of developing those unsightly brown tips.
Fertilizer Timing: The 4-6 week feeding schedule in Step 4 is perfect, but here's the pro move: I always fertilize right after watering. This prevents root burn from the concentrated fertilizer. And watch for those dark green, glossy leaves—they're your plant's way of saying "thank you" for the nutrients. If you see yellowing between the veins, flush the soil with water immediately to remove excess salts that can build up from fertilizer.
Pro Tips for Care For Curcuma Plant
- Here's what nobody tells you about keeping your curcuma plant thriving without the guesswork.
- Lighting Secret: That 6-8 hours of filtered light in Step 1 is non-negotiable for vibrant growth. I've learned the ha...
- Soil Savvy: Curcuma roots need that perfect balance of moisture without becoming soggy. I've found that mixing in ext...
Frequently asked questions
Got questions about keeping your Curcuma longa (turmeric plant) thriving? You’re not alone! Here are answers to the most common concerns—from troubleshooting to timing—so you can enjoy lush, golden rhizomes with confidence.
How often should I water my curcuma plant?
Water your curcuma plant deeply but infrequently—about once a week during the growing season (spring/summer), letting the top 2–3 inches of soil dry out between waterings. In winter or drought, reduce to every 2–3 weeks. Overwatering is the #1 killer—yellow leaves or mushy stems? You’re watering too much!
When is the best time to harvest turmeric rhizomes?
Harvest rhizomes in late fall or early winter (after 8–10 months of growth), when the plant’s leaves turn yellow and die back. Dig gently, rinse, and dry in sunlight for 3–5 days. Pro tip: Save 1–2 healthy rhizomes to replant—each can regrow a new plant!
Why are my curcuma leaves turning yellow?
Yellow leaves usually mean overwatering or nutrient deficiency. Check soil moisture first—if soggy, reduce watering. For yellowing with brown edges, your plant may need more potassium (use a balanced fertilizer). Pests like spider mites can also cause stress—spray with neem oil if needed.
Can I grow curcuma in pots indoors?
Yes! Use a large pot (12+ inches wide) with drainage holes and well-draining soil (mix garden soil with perlite). Place in bright, indirect light (a south-facing window or grow lights). Pots dry out faster—monitor soil moisture closely. Bonus: Pots make harvesting easier and protect rhizomes from pests!
What if my curcuma plant doesn’t flower?
Don’t worry—curcuma flowers are rare in home gardens and aren’t needed for rhizome growth. Focus on healthy foliage (6+ hours of sunlight daily) and well-draining soil. If your plant looks weak, boost nutrients with compost or a balanced fertilizer. Patience pays off—rhizomes grow best without flowers!
Wrapping up and next steps
Caring for a curcuma plant is a rewarding journey that brings vibrant color and tropical charm to your space—with just a little patience and love! 🌿 By mastering the basics like well-draining soil, bright indirect light, and consistent moisture, you’ll help your plant thrive and even harvest its prized rhizomes for cooking or healing.
Remember, even the most experienced gardeners face challenges, so don’t hesitate to troubleshoot with the tips shared above.
Now that you’re armed with knowledge, take the next step: Start with a single plant or expand your collection! Share your progress with fellow plant enthusiasts or experiment with propagating your curcuma to gift to friends. Happy growing—your green thumb is about to shine! ✨