
Planting
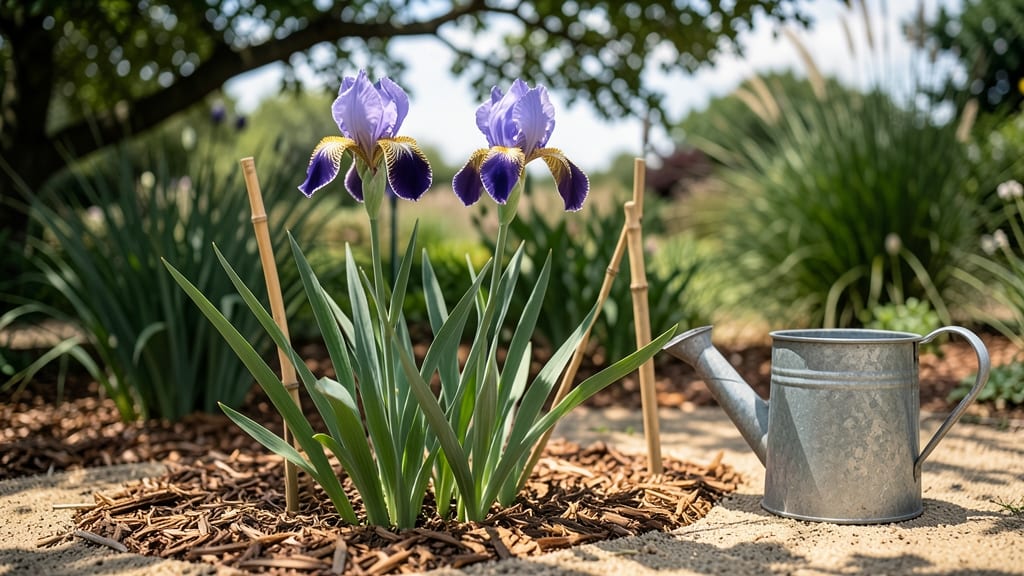
Taking care of an iris plant means bold purple blooms that turn heads every spring. 🌸 I’ve watched mine multiply over the years—now they’re the star of my garden, with thick clumps of sword-like foliage and flowers that last for weeks.
The secret isn’t complicated: irises thrive on neglect once established, but they do need the right soil, sunlight, and a little seasonal attention to reward you with showstopping color. The soil should drain like a sandy loam—irises hate soggy roots. Mix in some compost at planting, then let them be.
They love full sun (at least 6 hours daily) but handle partial shade in hot climates. Water only when the top inch of soil feels dry, and avoid wetting the leaves to prevent fungal issues.
Fertilize lightly in early spring with a balanced formula—too much nitrogen makes them floppy and flowerless. Pruning is minimal: cut back old foliage after blooms fade, but leave the leaves until they yellow naturally—they feed next year’s flowers. In winter, mulch lightly if your zone dips below freezing.
My irises have bloomed for 15+ years with almost no effort, proving they’re the perfect plant for gardeners who want drama without daily fuss. Here’s the kicker: divide clumps every 3-4 years to keep them vigorous.
The rhizomes (those thick, fleshy stems) multiply fast—just dig up, separate, and replant in early fall. You’ll end up with free plants to share, and your garden will look like a painter’s palette every spring.
📚 In This Guide
- What you need
- Instructions
- Tips and common mistakes
- Wrapping up and next steps
What you need
- ● Iris rhizomes or bulbs: Choose healthy, firm rhizomes (for bearded irises) or bulbs (for Dutch or Siberian irises). Aim for 3-5 per square foot for a lush display.
- ● Well-draining potting mix or garden soil: For containers: A blend of 50% potting soil, 30% perlite or coarse sand, and 20% compost.
- ● For in-ground planting: Amend clay-heavy soil with sand or grit (1 part sand to 3 parts soil) to prevent rot.
- ● Organic fertilizer (low-nitrogen): Look for a 5-10-10 or 10-10-10 NPK ratio (e.g., bone meal or bulb fertilizer). 1 tbsp per plant is a great starting point.
- ○ Mulch (optional but helpful): 2-3 inches of pine bark, straw, or shredded leaves to retain moisture and regulate soil temp.
- ● Garden trowel or transplant spade (for digging and dividing rhizomes).
- ● Pruning shears or sharp scissors (to trim dead foliage and spent blooms).
- ● Gloves (irises can have sharp rhizome tips—protect your hands!).
- ● Watering can or hose with a gentle spray nozzle (irises hate soggy roots!).
- ○ pH test kit (optional but useful): Irises thrive in slightly acidic to neutral soil (pH 6.0–7.0).
- ● Sunlight: A full-sun location (6+ hours of direct light daily). Partial shade may reduce blooms.
- ● Drainage: No standing water! Ensure containers have drainage holes or plant in a raised bed.
- ● Patience: Irises can take 2–3 years to reach peak blooming potential after planting.
How to take care of an iris plant: year-round maintenance for stunning blooms
Iris care isn't complicated once you know the key moments—watering, dividing, and seasonal adjustments make all the difference.
💧 Step 1: Water Deeply After Planting and During Drought
After planting, water your iris deeply once a week for the first month to encourage strong root establishment. You'll know it's enough when water drains through the soil and the rhizomes (those thick, fleshy stems) feel firm to the touch. Irises hate soggy soil—never let water pool around the base.
Once established, irises are drought-tolerant, but during hot, dry spells, give them 1 inch of water weekly. The leaves should stay upright and firm—if they wilt or droop, that's your signal to water immediately. Rainwater is ideal, but if using tap water, let it sit out overnight to remove chlorine.
☀️ Step 2: Provide Full Sun and Well-Draining Soil
Irises thrive in full sun (6+ hours daily), but they'll tolerate partial shade in hot climates. I've seen them bloom beautifully with 4-5 hours of morning sun and afternoon shade, though colors may fade slightly. The key is avoiding afternoon sun in scorching zones—it burns the leaves.
Plant rhizomes just above the soil line in well-draining soil. Amend heavy clay with coarse sand or gravel to prevent rot. You'll know drainage is right when water disappears within 30 minutes of watering. If it pools, amend the soil immediately—irises will sulk and refuse to bloom.
✂️ Step 3: Deadhead and Fertilize at the Right Times
After blooms fade, snip the spent flower stalk 1 inch above the leaf to redirect energy to next year's blooms. Never cut the leaves—they feed the rhizome until late summer. I fertilize irises once in early spring with a balanced 10-10-10 fertilizer, then again after blooming with a low-phosphorus formula like 5-10-10 to encourage roots, not foliage.
Over-fertilizing leads to lush leaves but few blooms. You'll see healthy growth without fertilizer, but that single spring boost ensures vibrant, abundant flowers. Water thoroughly after fertilizing to prevent root burn.
🌱 Step 4: Divide Rhizomes Every 3-4 Years
When clumps grow too crowded (usually after 3-4 years), dig up the rhizomes in early fall and separate them with a sharp knife. Each section should have 1-2 healthy fans of leaves and a piece of the rhizome. Discard any that feel mushy or smell rotten—those won’t recover.
Replant immediately, spacing rhizomes 12-24 inches apart. The rhizome's top should remain exposed—burying it too deep causes rot. Water lightly after replanting, then resume normal care. Dividing rejuvenates blooms and prevents overcrowding, which leads to smaller, weaker flowers.
⏰ Step 5: Prepare for Winter and Spring Awakening
In colder climates, mulch lightly with 2-3 inches of straw or leaves after the first frost to insulate the rhizomes. Remove mulch in early spring before new growth appears. You'll see fresh leaves emerge in late winter to early spring—that's your cue to reduce watering slightly until blooms appear.
Irises are tough once established, but a little winter care ensures they bounce back strong. Avoid pruning leaves until they yellow naturally in late summer—they're still feeding the rhizome. A well-cared-for iris will reward you with bold blooms for decades.
Tips & tricks for perfect iris plant care
These simple strategies will help you avoid common pitfalls and keep your irises thriving year after year.
Watering Wisdom: The once-weekly watering for the first month is non-negotiable—skipping this can stunt root growth. I've seen irises struggle when people water lightly or too frequently. Use a moisture meter to check soil depth; it should be dry 2-3 inches down before watering again after that initial month. For established plants, that 1-inch weekly guideline during droughts is perfect, but always check leaf firmness first.
Sunlight Strategy: When I first planted irises in afternoon shade, the blooms lost their vibrancy. The 6+ hours of full sun is ideal, but if you must compromise, prioritize morning sun—it's gentler on the leaves. Watch for signs of stress: leaves that curl or yellow suggest too much heat, while pale blooms indicate insufficient light. A simple shade cloth can help in extreme climates.
Fertilizing Finesse: That spring 10-10-10 application is your power move for blooms. I learned this the hard way—over-fertilizing my irises last year gave me lush leaves but zero flowers. After blooming, switch to the low-phosphorus 5-10-10 to build roots without encouraging more foliage. Always water thoroughly after fertilizing to prevent root burn, which can happen even with the right ratios.
Division Timing: The early fall division window is crucial—it gives rhizomes time to establish before winter. I've tried dividing in spring and noticed slower recovery. When separating, look for rhizomes with at least one healthy fan of leaves; these will bounce back strongest. The 12-24 inch spacing gives each plant room to grow without competing for nutrients, which directly impacts bloom size.
Pro Tips for Take Care Of An Iris Plant
- These simple strategies will help you avoid common pitfalls and keep your irises thriving year after year.
- Watering Wisdom: The once-weekly watering for the first month is non-negotiable—skipping this can stunt root growth. ...
- Sunlight Strategy: When I first planted irises in afternoon shade, the blooms lost their vibrancy. The 6+ hours of fu...
Frequently asked questions
Got questions about keeping your iris plant thriving? You’re not alone! Here are answers to the most common concerns—from blooming tips to troubleshooting—so you can enjoy those stunning blooms all season long.
When is the best time to plant iris bulbs?
The ideal time to plant iris rhizomes (not bulbs!) is in early fall, 6–8 weeks before the first frost. This gives roots time to establish before winter. If you miss fall, spring planting works too—just avoid extreme heat. Pro tip: Plant rhizomes partially above soil (1/3 exposed) to prevent rot.
Do iris plants need winter care?
Iris plants are hardy perennials and handle cold well, but mulch lightly after the ground freezes to protect roots. In harsh winters (below 0°F), add a thin layer of straw or leaves—just avoid smothering the rhizomes. No need for pots or greenhouses!
Why aren’t my irises blooming?
No blooms? Check these fixes:
- Too much fertilizer (especially nitrogen) = leafy growth, no flowers. Use a low-nitrogen, high-phosphorus fertilizer in early spring.
- Overcrowded rhizomes? Divide clumps every 3–4 years in summer for better blooms.
- Not enough sun? Irises need 6+ hours of direct sunlight daily.
How do I get rid of iris borers?
Iris borers are sneaky pests that tunnel into rhizomes. Prevent them by:
- Removing leaf debris in fall (their winter home!).
- Spraying neem oil or insecticidal soap on leaves in spring/summer.
- Planting resistant varieties like Iris germanica.
Can I grow irises in containers?
Yes! Use a well-draining pot (minimum 12" deep) with sandy, gritty soil. Plant rhizomes half-buried and water only when the top inch is dry. Move pots to bright light in winter if indoors. Warning: Container irises may bloom less than in-ground plants.
Wrapping up and next steps
Caring for an iris plant is a rewarding journey—with the right light, soil, and a little patience, you’ll be greeted by stunning blooms year after year. 🌸 Remember, these hardy beauties thrive on consistency, whether it’s dividing clumps every few years or protecting them from pests.
Now that you’re armed with these year-round care secrets, why not share your newfound knowledge? Invite a friend over to admire your iris garden or even start their own with a few divisions from yours!