
Planting
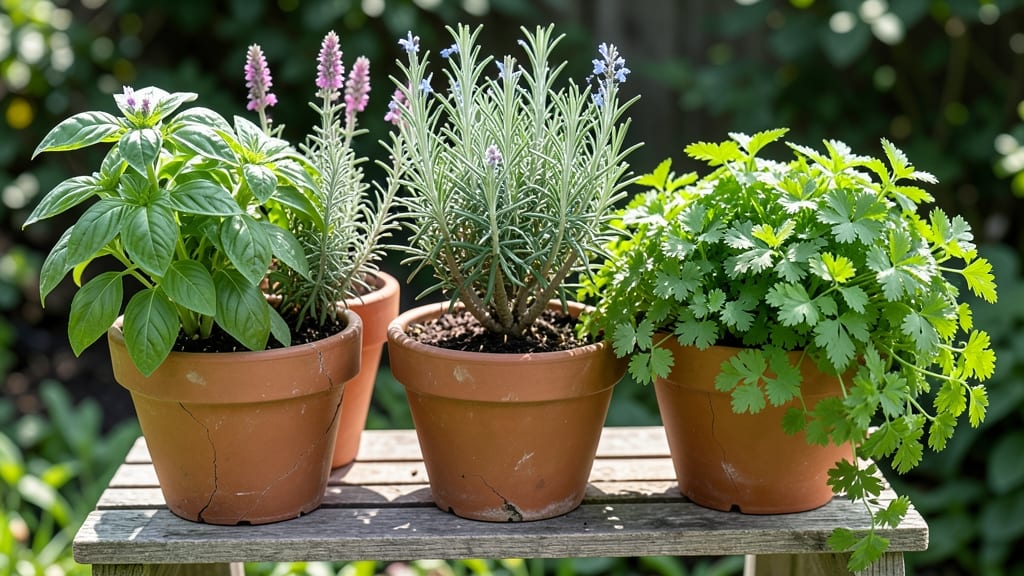
An old outdoor bakers rack plant stand becomes the ultimate vertical garden hack for herbs and flowers. ✨ I stumbled upon this idea after struggling to fit my basil, thyme, and petunias into my tiny patio—until I repurposed a thrifted rack into a space-saving dream.
The slatted design gives roots room to breathe while keeping foliage airy and pest-free, and the rustic charm blends perfectly with cottage-style gardens.
You’ll need just a few supplies: the rack itself (wood or metal), lightweight potting mix, small pots or grow bags, and your chosen plants. Herbs like oregano and chives thrive in the shallow soil, while trailing flowers such as nasturtiums or sweet alyssum cascade beautifully between the slats.
For extra stability, anchor it to a wall or place it against a fence—no complicated assembly required.
The payoff? A lush, low-maintenance vertical garden that adds height, texture, and fragrance to any outdoor space. Snip fresh herbs for cooking or cut flowers for bouquets without stepping into the yard. Plus, the open design makes watering and harvesting a breeze—no more bending or crowded pots.
Works for balconies, small yards, or even urban patios. Try grouping racks at different heights for a layered look, or paint them to match your outdoor decor. The possibilities are endless, and the best part? You’re already halfway there if you’ve got a spare rack gathering dust.
📚 In This Guide
- What you need
- Instructions
- Tips and common mistakes
- Wrapping up and next steps
What you need
- ● Bakers rack (or wire shelving unit): 1 unit (preferably 2-3 tiers, ~24"–36" wide, with sturdy metal or wood construction). Look for one with open grids for drainage.
- ● Plant pots or containers: 5–10 units (6"–12" diameter, with drainage holes). Opt for lightweight materials like plastic, terracotta, or fabric grow bags.
- ● Screws or brackets: 4–6 units (1/4"–3/8" stainless steel or galvanized, ~1"–2" long) to secure the rack to a wall or post.
- ● Drill & drill bits: 1 set (for pilot holes and securing brackets). A cordless drill makes this easier!
- ● Level: 1 unit (to ensure your rack is straight and stable).
- ○ Outdoor-rated paint or sealant: 1 can (optional but recommended for metal racks to prevent rust). Choose a non-toxic, weather-resistant formula.
- ● Potting soil: 1–2 bags (lightweight, well-draining mix for herbs/flowers). Avoid heavy garden soil.
- ● Measuring tape: 1 unit (to mark drill holes and ensure even spacing).
- ● Drip irrigation kit: 1 set (for hands-free watering—perfect for herbs like basil or thyme!).
- ● Self-watering planters: 1–2 units (if you love low-maintenance greens or succulents).
- ● Decorative hooks or baskets: 2–4 units (hang trailing plants like nasturtiums or strawberries for a cute touch!).
- ● Solar-powered LED lights: 1–2 strings (to highlight your stand at night and deter pests).
- ● Wooden planks or pallets: 1–2 units (if building a custom stand from scratch—adds rustic charm!).
Step-by-Step instructions for building an outdoor bakers rack plant stand
Here's how to transform a simple bakers rack into a sturdy, space-saving vertical garden for your herbs and flowers.
🪴 Step 1: Assemble the Bakers Rack Frame
Start by laying out all the rack components—you’ll need the two vertical supports, the crossbars, and any connecting hardware included. I like to begin with the base: attach the two vertical supports to the bottom crossbar using the provided screws or bolts. Make sure they’re perfectly level by checking with a small carpenter’s level or even a book balanced on the crossbar.
Next, add the middle crossbar about 12-18 inches from the base, depending on the height of your plants. For herbs like basil or thyme, I keep it closer to 12 inches so they don’t get too leggy. Tighten the bolts securely but don’t overtighten—you want the rack to stay sturdy but not warp over time. If your rack came with a top crossbar, skip it for now unless you’re growing taller plants like sunflowers or hollyhocks.
☀️ Step 2: Prepare the Growing Surface
Line each crossbar with landscape fabric or burlap strips to prevent soil from slipping through the gaps. Secure it tightly with staples or zip ties—you don’t want any loose edges that could catch wind and unravel. This is especially important if you’re using a rack without built-in trays, as soil can easily wash away during watering.
Now, fill each crossbar with a mix of potting soil and compost (about 3-4 inches deep for herbs, 4-6 inches for flowers). I like to add a handful of perlite or vermiculite to improve drainage, especially if your rack is exposed to afternoon sun. Press the soil down gently but don’t compact it too much—you want roots to grow freely. Leave about 1 inch of space at the edges to prevent spillage when watering.
🌱 Step 3: Plant Your Herbs and Flowers
Start by spacing your plants evenly along the crossbars. For herbs, I plant them 6-8 inches apart—this gives them room to grow without crowding, which is crucial for airflow and preventing disease. If you’re using seedlings, dig a hole slightly larger than the root ball and place the plant in, then gently firm the soil around it. For flowers, follow the spacing guidelines on the seed packet or plant tag, as some varieties need more room than others.
Here’s the thing—if you’re planting from seed, wait until the soil is warm (at least 60°F) and moist before sowing. I like to water the soil thoroughly the day before planting to give the seeds a head start. Once planted, give everything a light watering to settle the soil around the roots. Avoid heavy watering at this stage, as it can dislodge young plants or wash away soil.
💧 Step 4: Position and Water Your Rack
Place your bakers rack plant stand in a location that gets at least 4-6 hours of sunlight daily. A south or west-facing spot is ideal for most herbs and flowers, but if you’re growing shade-loving plants like parsley or impatiens, a north or east-facing area will work better. Make sure the rack is on a stable, level surface—uneven ground can cause the soil to shift and plants to topple.
Water your plants gently but thoroughly, aiming for the soil rather than the leaves to avoid fungal issues. I use a watering can with a long spout to reach all the plants without disturbing the soil. Water in the morning so the leaves have time to dry out during the day. You’ll know you’re doing it right when the soil feels moist but not soggy—stick your finger about 1 inch deep to check. Most herbs and flowers need watering every 2-3 days in warm weather, but this can vary depending on your climate.
✂️ Step 5: Maintain and Harvest Regularly
Keep an eye on your plants as they grow. If you notice any leggy stems or yellowing leaves, it’s a sign they need more light or nutrients. I like to add a balanced liquid fertilizer every 4-6 weeks during the growing season to keep my herbs and flowers thriving. Prune regularly to encourage bushier growth—snip the tips of herbs like basil or mint just above a set of leaves to promote new branches.
Harvest your herbs and flowers as needed, but never take more than one-third of the plant at a time. This ensures your plants keep producing without getting stressed. For flowers, deadhead spent blooms to encourage more flowers and keep the plant looking neat. With a little care, your bakers rack plant stand will be a productive and attractive addition to your outdoor space for years to come.
Tips & tricks for perfect vertical herb and flower gardens
Transforming your bakers rack into a thriving vertical garden is easier than you think—here are the game-changing details that'll make all the difference.
Leveling is Everything: In Step 1, when assembling your rack frame, take that extra 30 seconds to check for level—trust me, it prevents soil spills and plant stress. I use a book balanced on the crossbar as a quick DIY level when I don't have a carpenter's tool. Uneven racks cause soil to shift during watering, and your herbs will thank you for the stability later.
Soil Depth Matters: The 3-4 inch depth for herbs in Step 2 might seem shallow, but it's perfect for their shallow root systems. For flowers needing 4-6 inches, consider adding a second layer of landscape fabric between soil depths to create a barrier. This prevents soil from mixing and keeps drainage consistent across all plants.
Plant Placement Strategy: When spacing your herbs 6-8 inches apart in Step 3, think about their mature size. Basil stays compact but mint spreads aggressively—give mint its own dedicated corner of the rack. For flowers, check the seed packet spacing but reduce by 20% if growing in containers on the rack, as they'll have less root space.
Sunlight Optimization: The 4-6 hours of sunlight in Step 4 is a guideline, not a rule. If your rack gets intense afternoon sun, rotate it every few weeks so all plants receive even exposure. For shade-loving plants like parsley, place them on the north-facing side of the rack if possible, even if it means slightly less total sunlight.
Pro Tips for Outdoor Bakers Rack Plant Stand
- Transforming your bakers rack into a thriving vertical garden is easier than you think—here are the game-changing details that'll make all the difference.
- Leveling is Everything: In Step 1, when assembling your rack frame, take that extra 30 seconds to check for level—trust me, it prevents soil spills and plant stress.
- Soil Depth Matters: The 3-4 inch depth for herbs in Step 2 might seem shallow, but it's perfect for their shallow root systems.
Frequently asked questions
Got questions about transforming your outdoor space with a bakers rack plant stand? You’re not alone! Here are some of the most common queries—and their easy answers—to help you get started.
What’s the best way to clean and maintain my outdoor bakers rack plant stand?
Rinse shelves and frames with a mild soap-and-water solution every 2–4 weeks to remove dust, pollen, and debris. For stubborn grime, use a vinegar-water mix (1:3 ratio). Avoid harsh chemicals that could harm plants. Pro tip: Disassemble removable parts for deeper cleaning!
How long does it take for plants to grow well on a bakers rack?
Most herbs and small flowers thrive within 4–8 weeks of planting, depending on sunlight and care. Leafy greens like basil or parsley may show noticeable growth in 2–3 weeks, while flowers like petunias take slightly longer. Patience is key—consistent watering and sunlight accelerate results!
Can I build a bakers rack plant stand for under $50?
Skip pre-made racks and use repurposed materials like wooden pallets, metal shelves, or even a sturdy ladder. Thrift stores often have trays or baskets for pennies. Just ensure your DIY design supports weight and has drainage holes. Budget hack: Check local hardware stores for discounted brackets!
How do I protect my plants from rain or strong winds?
Place your rack under a covered patio, pergola, or awning to shield plants from heavy rain. For windy areas, anchor the stand with stakes or weights (like cinder blocks) and group plants together to reduce sway. Bonus tip: Use lightweight pots with drainage to avoid waterlogging!
What if my plants look leggy or weak after a few weeks?
Leggy growth usually means your plants aren’t getting enough light. Rotate the rack to ensure even sun exposure (aim for 6+ hours/day) or move it to a sunnier spot. Overwatering can also weaken plants—let soil dry slightly between waterings. Fix it: Prune leggy stems to encourage bushier growth!
Wrapping up and next steps
Transforming your outdoor space into a thriving vertical garden has never been easier—or more rewarding! An outdoor bakers rack plant stand is the perfect solution for maximizing small spaces while keeping herbs and flowers within arm’s reach.
Whether you’re a seasoned gardener or just starting out, this versatile setup lets you grow lush greens, fragrant blooms, and flavorful herbs without sacrificing precious ground space.
Ready to get started? Grab your materials, follow the steps, and watch your garden grow—literally and figuratively! 🌱✨ Next, sketch your design, gather supplies, and turn that empty corner into a green oasis today.