
Planting
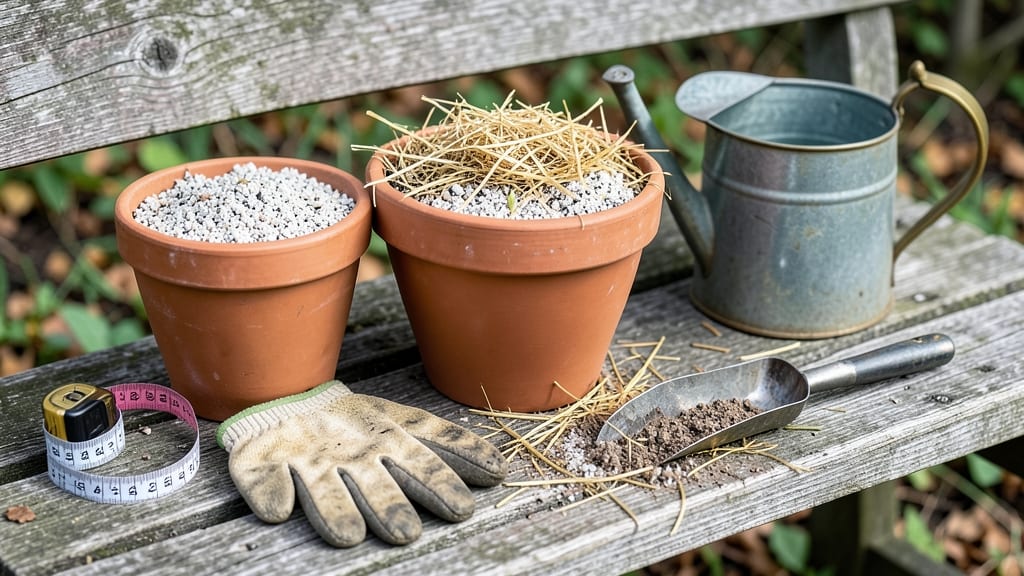
Fall is the perfect time to plant tulip bulbs in pots—just 6-8 weeks before the ground freezes, and you'll get vibrant blooms next spring. 🌱 I discovered this trick after struggling with bare spots in my winter garden, and now my patio bursts with color every March.
The secret isn't complicated: bulbs need cold dormancy to bloom, and containers give you control over soil and drainage.
Start with pots at least 6 inches deep—shallower containers stunt root growth. Use well-draining potting mix (no garden soil) and add a handful of perlite or sand for extra airflow. Place bulbs pointy end up, 6-8 inches deep, with their bases just touching the soil.
Three bulbs in a 12-inch pot creates a lush display, and spacing them close mimics their natural clumping in meadows.
Water thoroughly after planting, then let the soil dry slightly between waterings until winter. Once snow falls, move pots to a sheltered spot (like a garage or unheated shed) where temps stay 35-50°F.
This mimics outdoor conditions without freezing. By late winter, you'll see shoots pushing through—proof the bulbs are waking up for their spring performance.
Pro tip: Add a slow-release bulb fertilizer when planting for extra vigor. And don't rush to bring pots indoors in spring—they'll bloom better if left outside until flowers fade. This method works for daffodils too, so you can layer colors all season long.
📚 In This Guide
- What you need
- Instructions
- Tips and common mistakes
- Wrapping up and next steps
What you need
- ● Tulip bulbs: Choose high-quality, disease-free bulbs (1-2 bulbs per 6-inch pot or 3-5 bulbs per 12-inch pot). Opt for fall-planting varieties like Darwin Hybrids, Parrot Tulips, or Fosteriana.
- ● Containers: Pots with drainage holes (6-inch for small varieties, 12-inch for larger blooms). Use terracotta, plastic, or fabric grow bags (avoid metal).
- ● Potting mix: A well-draining, sterile mix (60% potting soil + 40% perlite, sand, or vermiculite). Avoid garden soil—it compacts and retains too much moisture.
- ● Gravel or pebbles: 1-2 inches for the pot’s base to improve drainage.
- ○ Slow-release fertilizer: Balanced (10-10-10) or bulb-specific fertilizer (follow package rates). Optional: Add a handful of bone meal for extra nutrients.
- ● Watering can or spray bottle: With a gentle spray nozzle to avoid displacing bulbs.
- ● Gloves: Garden or work gloves to protect your hands from dirt and sharp bulb edges.
- ● Mulch: Straw, shredded leaves, or pine needles (1-2 inches) to insulate bulbs in winter.
- ● Plant labels: To track varieties and planting dates.
- ● Pest control: Diatomaceous earth or copper tape for pots to deter slugs and snails.
- ● Pot feet or saucers: To elevate pots and protect surfaces from water overflow.
- ● Tulip bulb food: Specialized bulb fertilizer for an extra bloom boost.
Step-by-step instructions for planting tulip bulbs in pots
Here's how I get vibrant tulips blooming in containers—no yard required.
🪴 Step 1: Choose the Right Containers and Drainage
Select pots at least 6 inches deep with drainage holes—tulip bulbs rot if they sit in soggy soil. I use terra cotta pots because they breathe and prevent moisture buildup. For 4 bulbs, a 10-inch diameter pot works perfectly. If using multiple pots, add 1-2 bulbs per container to avoid overcrowding.
Place a layer of pebbles or broken pottery at the bottom to improve drainage. This prevents water from pooling around the bulbs' base, which is critical for winter survival. I like to add a handful of perlite mixed into the bottom layer—it keeps the soil loose and airy where roots will develop.
🌱 Step 2: Layer Soil and Plant Bulbs Correctly
Fill the pot halfway with well-draining potting mix—never garden soil, which compacts and holds too much moisture. Gently press the soil down to create a firm base, but don't pack it tightly. Place 4 tulip bulbs close together, with their pointed ends facing upward. The bulbs should sit 2-3 inches below the soil surface—this depth protects them from freezing temperatures.
Here's the thing—I always plant bulbs at the same depth they were in their original packaging. If the bulb is large, it needs more soil coverage; smaller bulbs can sit slightly shallower. After positioning, cover them with another 2 inches of soil, leaving about 1 inch of space between the soil and the pot's rim for watering.
💧 Step 3: Water and Prepare for Winter
Water the pot thoroughly until water drains from the bottom. You'll know it's right when the soil feels damp but not soggy. After watering, place the pot in a sheltered spot outdoors—like a garage or covered porch—where temperatures stay above freezing but below 50°F. This mimics natural winter conditions and encourages strong root growth.
Don't water again until spring. The bulbs need this dormancy period to develop the energy required for blooming. I mark the pots with the planting date so I remember when to check for sprouts. If your winters are mild, you might see green shoots as early as late fall, but most bulbs wait until early spring.
☀️ Step 4: Bring Pots Indoors for Bloom Time
Move the pots indoors to a bright, cool spot—like a basement or garage—when nighttime temperatures drop below 40°F consistently. This chilling period is what triggers tulips to bloom. Once you see shoots emerge in spring, bring the pots to a sunny window or under grow lights for 6+ hours of light daily. Tulips need this light to develop strong stems and vibrant flowers.
Water sparingly—just enough to keep the soil lightly moist. Overwatering now causes the stems to flop. I like to mist the leaves occasionally to keep them crisp, but the soil should never feel damp more than an inch deep. Watch for buds to form; they'll appear as small green swellings at the stem tips, usually 4-6 weeks after bringing the pots indoors.
⏰ Step 5: Enjoy Blooms and Plan for Next Year
The moment you'll love most: those first tulip blooms. Once the flowers fade, don't remove the foliage—let it yellow naturally. This process returns nutrients to the bulbs for next year's growth. I usually leave the leaves until they're 50% brown before trimming them back. After that, you can store the bulbs in a cool, dry place or replant them in the ground if you have one.
If you're keeping the bulbs in pots, fertilize lightly in early fall before replanting. A slow-release bulb fertilizer mixed into the soil gives them a nutrient boost for next season. I've done this for years, and my tulips keep blooming bigger and brighter each time—proof that a little patience pays off in spectacular color.
Tips & tricks for perfectly blooming potted tulips
These little details make all the difference between tulips that thrive and ones that struggle in containers.
Container Material Matters: Terra cotta pots are ideal because they breathe and prevent moisture buildup, but plastic or ceramic pots work too—just add extra drainage holes if needed. I've found that glazed ceramic pots can trap too much moisture, so I avoid them. The key is ensuring water drains freely; otherwise, those bulbs will rot before they bloom.
Bulb Selection Tip: Choose large, firm bulbs with no soft spots or mold—these are your best bet for strong blooms. I always look for bulbs that feel heavy for their size, which means they're packed with energy for growth. Smaller bulbs will still work, but they may produce fewer flowers. For a dramatic display, mix bulb sizes in the same pot!
Winter Prep Strategy: When placing pots outdoors for winter, group them together to create a microclimate that retains warmth. I like to nestle them against a north-facing wall where they're protected from harsh winds. This little trick helps maintain the critical 40-50°F temperature range they need to develop properly.
Spring Transition Hack: When you bring pots indoors for blooming, place them near a window first and gradually increase light exposure over a week. This prevents shock from sudden bright light. I also rotate the pots daily so all sides get equal light—this keeps stems straight and prevents them from leaning toward the window.
Pro Tips for Plant Tulip Bulbs In Pots In Fall
- These little details make all the difference between tulips that thrive and ones that struggle in containers.
- Container Material Matters: Terra cotta pots are ideal because they breathe and prevent moisture buildup, but plastic or ceramic pots work too—just add extra drainage holes if needed.
- Bulb Selection Tip: Choose large, firm bulbs with no soft spots or mold—these are your best bet for strong blooms.
Frequently asked questions
Got questions?
Here are answers to the most common queries about potting tulip bulbs in fall—so you can bloom like a pro!
When is the exact best time to plant tulip bulbs in pots?
Plant your bulbs 6–8 weeks before the ground freezes (typically late September to early November in most U.S. zones). This gives roots time to establish before winter. If you miss this window, wait until early spring—just know blooms may be smaller or delayed.
Can I reuse the same pot next year?
Yes, but refresh the soil first! Remove old bulbs (they’ll shrivel), mix in fresh potting soil, and add a slow-release fertilizer. Avoid reusing the same pot year after year without soil renewal—it can lead to poor drainage and disease.
What if my potted tulips don’t bloom?
No blooms? Check these fixes:
- Not enough sunlight (tulips need 6+ hours/day).
- Overcrowded bulbs (dig up and separate clumps).
- Lack of nutrients (feed with bulb fertilizer in early spring).
- Too warm in winter (tulips need cold dormancy—keep pots in a garage or unheated shed if temps stay above 40°F).
Do I need to fertilize potted tulips?
Yes! Use a bulb-specific fertilizer (high in phosphorus) when planting, then top-dress with a balanced 10-10-10 in early spring as shoots emerge. Skip fall fertilizing—it can encourage weak growth before dormancy. Pro tip: Add a handful of compost to the soil mix for extra nutrients!
Can I grow tulips in pots indoors year-round?
Nope! Tulips require a cold period (vernalization) to bloom. After flowering, move pots outside for summer, let foliage die back, then store them in a cool, dark place (like a fridge) until fall replanting. Indoor-only pots = no blooms.
Wrapping up and next steps
Planting tulip bulbs in pots this fall is a simple, rewarding way to bring vibrant spring blooms to your balcony, patio, or windowsill—even with limited space! 🌸 By following these steps, you’ll ensure healthy roots, stunning flowers, and a head start on the growing season. Now that you’re ready to plant, why not take it a step further?
🌱 Next Steps: Extend the Magic!
- Label your pots for easy tracking of varieties and planting dates.
- Plan your spring display—consider pairing tulips with other cold-hardy plants like pansies or snapdragons for a cohesive look.
- Mark your calendar for late winter/early spring when you’ll start fertilizing and prepping for blooms!
You’ve got this—your future garden (and future neighbors admiring your blooms) will thank you! 😊