
Planting
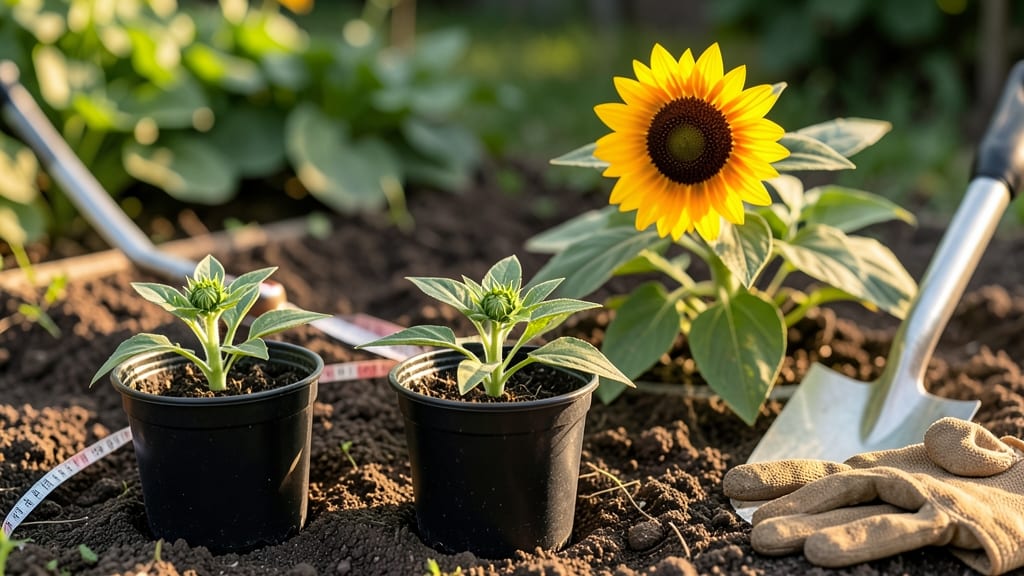
Black-eyed Susan planting instructions reveal the secret to bold, golden blooms by July—starting with the right soil and spacing. 🌻 I’ve learned that these tough perennials thrive when planted in well-draining soil with full sun, but the real magic happens when you mimic their natural prairie habitat. Start by loosening the soil to a depth of 6-8 inches, mixing in compost for nutrients. Space plants 12-18 inches apart for in-ground beds or use 5-gallon containers for patios. Water deeply after planting, then let the soil dry slightly between waterings—overwatering is their downfall. Within 60 days, you’ll see those familiar daisy-like flowers popping up, and they’ll keep blooming until frost.
📚 In This Guide
- What you need
- Instructions
- Tips and common mistakes
- Wrapping up and next steps
What you need
- ● Black Eyed Susan seeds or nursery plants: Seeds: 1–2 oz (enough for ~100 plants, depending on spacing)
- ● Nursery plants: 10–20 plants (for quicker blooms)
- ● Garden soil: Well-draining, loamy soil (amend with compost if needed)
- ● Planting container or garden bed: At least 6–12 inches deep (for seeds) or pre-dug holes (for transplants)
- ● Watering can or hose with a gentle spray nozzle
- ● Garden trowel or transplant spade
- ○ Mulch (optional but recommended): 2–3 inches of organic mulch (straw or shredded bark)
- ● Fertilizer: Balanced 10-10-10 or slow-release granular fertilizer (follow package rates)
- ● Seed-starting mix (if sowing indoors early)
- ● Plant markers or stakes (to track varieties)
- ● Garden gloves (to keep hands clean)
- ● Pruning shears (for deadheading spent blooms)
How to plant Black Eyed Susans for stunning summer color
Here's my foolproof method for establishing these hardy perennials that'll reward you with bold blooms for years.
🌱 Step 1: Choose the Perfect Planting Location
Black Eyed Susans thrive in full sun—select a spot that receives at least 6-8 hours of direct sunlight daily. I look for areas with well-draining soil, as these plants despise soggy roots. If your soil drains poorly, amend with a 2-3 inch layer of compost mixed into the top 6 inches of soil before planting.
Loosen the soil to a depth of 12 inches with a garden fork, breaking up any compacted layers. This helps roots establish quickly. The ideal planting time is in early spring, 4-6 weeks before your last frost date, giving plants time to root before summer heat arrives. You'll know you've chosen well when the surrounding area already supports other sun-loving perennials like coneflowers or daylilies.
🪴 Step 2: Prepare Planting Holes and Position Plants Properly
Dig holes that are twice as wide as the plant's root ball but only as deep. Black Eyed Susans prefer to sit slightly higher than the surrounding soil level to prevent water pooling. Gently remove each plant from its container and tease apart any circling roots with your fingers—this encourages outward growth.
Space plants 18-24 inches apart for single varieties or 12-18 inches apart if using dwarf cultivars. I always plant in clusters of 3-5 for a natural, full look. Place each plant in its hole so the top of the root ball sits ½ inch above soil level. The plant's crown should never be buried—this causes rot and weakens growth.
💧 Step 3: Water Thoroughly and Add Mulch
Fill the planting holes with water until it drains completely, then backfill with native soil while keeping the plant upright. Water again until the soil settles around the roots. After planting, water deeply to 12 inches down—this encourages roots to grow downward rather than staying shallow. You'll see soil settle around the base, which is normal.
Spread 2-3 inches of mulch around each plant, keeping it 2 inches away from stems to prevent moisture buildup. I use shredded hardwood mulch because it breaks down slowly and improves soil structure over time. This layer helps retain moisture, suppress weeds, and protect roots from temperature swings. Water lightly after mulching to settle everything in place.
☀️ Step 4: Provide Consistent Care for First Season Establishment
Keep the soil evenly moist but not soggy for the first 4-6 weeks, watering when the top 2 inches of soil feel dry. Avoid overhead watering after planting—water at the base instead to prevent fungal diseases. Fertilize lightly with a balanced 10-10-10 formula at planting time, then again in early summer when you see new growth.
Watch for leggy growth or yellowing leaves—these are signs of either too much shade or overwatering. Black Eyed Susans are drought-tolerant once established, but they need consistent moisture during their first year. You'll know they're settling in when you see new leaves emerge within 3-4 weeks and stems begin thickening noticeably.
⏰ Step 5: Deadhead and Maintain for Continuous Blooms
When flowers fade, deadhead spent blooms by pinching off the flower head just above the first set of leaves. This encourages the plant to produce more flowers and prevents self-seeding if you don't want volunteers popping up everywhere. I do this regularly throughout the blooming season to keep plants looking tidy and promote continuous flowering.
In late fall, cut back stems to 4-6 inches above ground level to remove any diseased foliage and improve next year's blooms. Leave the mulch in place over winter—it protects roots from freezing temperatures. By early spring, you'll see fresh growth emerging, signaling that your Black Eyed Susans are ready for another vibrant season of color.
Tips & tricks for perfect Black Eyed Susan planting
These sun-loving perennials thrive when you pay attention to a few key details—here's what I've learned after years of growing them successfully.
Sunlight Secret: While 6-8 hours of sunlight is ideal, I've found these plants can tolerate as little as 4 hours if you're in a hotter climate—just expect slightly smaller blooms. In shadier spots, space plants closer together (12 inches apart) since they'll grow more horizontally. The key is observing their leaves: if they start yellowing between veins, that's your cue to move them to sunnier conditions.
Root Establishment: The 12-inch deep soil loosening in Step 1 is crucial—it prevents roots from hitting compacted layers that can strangle growth. I like to add a handful of perlite or coarse sand to the bottom of each planting hole for extra drainage, especially if your native soil is heavy clay. This small step makes all the difference in preventing root rot during those first critical weeks.
Watering Wisdom: That first deep watering to 12 inches down might seem excessive, but it's what gets roots growing downward rather than staying shallow. I've seen plants with roots only 2 inches deep struggle through droughts—don't skip this step! For the first 4-6 weeks, I water at the same time every morning to establish a routine, which helps prevent overwatering mistakes.
Mulch Matters: The 2-3 inches of mulch isn't just for looks—it creates a microclimate that maintains even soil temperatures. I've noticed plants with proper mulch handle summer heat better and recover faster after frost. Just remember to keep that mulch 2 inches away from stems to prevent moisture buildup that can cause rot.
Pro Tips for Black Eyed Susan Planting Instructions
- These sun-loving perennials thrive when you pay attention to a few key details—here's what I've learned after years o...
- Sunlight Secret: While 6-8 hours of sunlight is ideal, I've found these plants can tolerate as little as 4 hours if y...
- Root Establishment: The 12-inch deep soil loosening in Step 1 is crucial—it prevents roots from hitting compacted lay...
Frequently asked questions
Got questions about growing Black Eyed Susans?
Here are answers to the most common ones—from timing to troubleshooting—so you can plant with confidence!
When is the best time to plant Black Eyed Susans?
Plant them in early spring (after the last frost) or late summer (6-8 weeks before your first frost). This gives roots time to establish before extreme temperatures. For containers, you can even start seeds indoors 8-10 weeks before your last frost date!
How long does it take for Black Eyed Susans to bloom?
With proper care, you’ll see vibrant blooms in just 60-90 days from planting! Start seeds early, or buy established plants for faster results. Deadhead spent flowers to encourage continuous blooming all summer and fall.
Can I grow Black Eyed Susans from seed, or should I buy plants?
Both work! Seeds are budget-friendly but take longer (60+ days to bloom). For quicker color, buy nursery starts. Pro tip: Soak seeds overnight before planting to speed germination. Direct-sow seeds in spring or start indoors for earlier blooms.
Why aren’t my Black Eyed Susans blooming?
Common culprits include over-fertilizing (too much nitrogen = leafy growth, no flowers), poor sunlight (they need 6+ hours of sun), or crowded roots. Try pruning back leggy stems in early spring to encourage bushier, flower-packed growth.
Are Black Eyed Susans deer-resistant?
While they’re not fully deer-proof, deer usually avoid them unless other food is scarce. For extra protection, plant them near deer-deterrent plants like lavender, Russian sage, or marigolds. A light fence or repellent spray can also help!
How do I get Black Eyed Susans to come back every year?
These perennials (in most climates) will self-seed and return annually with minimal effort. Cut back foliage in late fall or early spring to prevent disease. In colder zones, mulch around the base to protect roots. With time, they’ll naturalize and spread beautifully!
Wrapping up and next steps
Planting Black Eyed Susans is a rewarding journey that brings vibrant color to your garden in just 60 days! Whether you’re a beginner or a seasoned gardener, these cheerful blooms thrive with minimal fuss—just sun, well-drained soil, and a little patience. 🌻
Now that you’re armed with the perfect planting instructions, grab your gloves and get ready to transform your outdoor space. Next up? Mark your calendar for late spring or early fall, prep your soil, and watch your garden burst into golden-yellow cheer! Happy planting! 🌱