
Planting
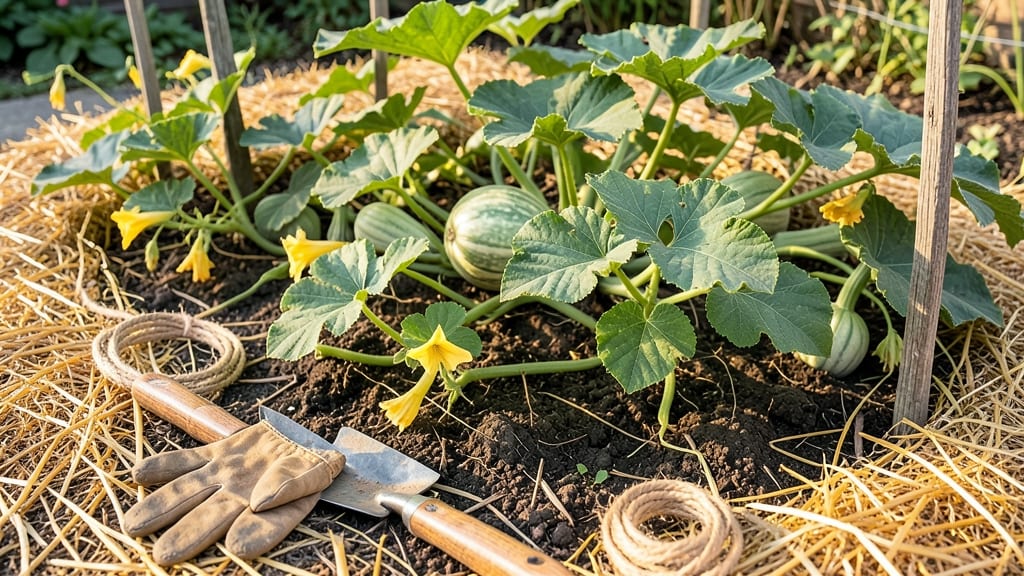
The best way to plant butternut squash starts with a sunny patch where vines can sprawl freely—this is how I tripled my harvest last summer. 🌱 The secret isn’t just the seeds or soil; it’s the right timing, spacious planting, and a few tricks to outsmart pests before they even show up.
I’ll walk you through every step, from soil prep to the first signs of those iconic tendrils breaking through the earth.
You’ll need well-draining soil warmed to at least 60°F, a spot with full sun (6+ hours daily), and patience—these squash take 85-100 days to mature. Plant seeds 1 inch deep, 3-4 feet apart, and watch for those first leaves within 5-7 days.
The key? Space them wide—crowded plants mean smaller squash and more disease. I’ve seen gardeners cram them too close, only to watch their harvests stay tiny and bitter.
By mid-summer, you’ll be harvesting 3-5 pound squash with that classic bumpy shape, ready for roasting or storage. The vines will stretch 6-10 feet, so give them room to roam or train them up a trellis if space is tight.
Prune suckers early to focus energy on fruit, and mulch heavily to keep soil moist—consistent watering is non-negotiable once flowers appear.
Here’s the part most guides skip: thin seedlings to the strongest one per hill, and hand-pollinate flowers if bees are scarce. I lost a whole patch one year by ignoring this—next time, I used a paintbrush to transfer pollen and ended up with twice as many squash.
Whether you’re in a warm climate or cooler zone, these steps work. Let’s get those seeds in the ground!
📚 In This Guide
- What you need
- Instructions
- Tips and common mistakes
- Wrapping up and next steps
What you need
- ● Butternut squash seeds: 3–5 seeds per plant (or 1–2 per hill if direct-sowing). Choose heirloom or hybrid varieties suited to your climate (e.g., 'Waltham Butternut' or 'Gold Rush').
- ● Well-draining soil: Loamy, fertile soil with a pH of 6.0–7.0. Amend with compost or aged manure (2–3 inches mixed into the top 12 inches of soil).
- ● Sunlight: A full-sun location (6–8+ hours of direct sunlight daily).
- ● Space: 3–4 feet between plants (or 5–6 feet between rows) to allow for sprawling vines.
- ● Water: Consistent moisture (1–2 inches per week, especially during flowering and fruiting).
- ● Mulch: Organic mulch (straw, grass clippings, or leaves) to retain moisture and suppress weeds.
- ● Garden trowel or transplanting tool (for planting seeds or seedlings).
- ● Hoe or cultivator (to loosen soil and remove weeds).
- ○ Garden twine or stakes (optional, for trellising vines in small spaces).
- ● Row cover or frost cloth (to protect young seedlings from frost or pests).
- ● Fertilizer: Balanced 10-10-10 or organic options like fish emulsion or compost tea (apply at planting and mid-season).
- ● Seedling trays or biodegradable pots (if starting indoors 2–3 weeks before the last frost).
- ● Gloves and knee pads (for comfort during planting and maintenance!).
Step-by-Step instructions for planting butternut squash
Here's my foolproof method for growing vigorous, productive butternut squash plants—tested in both cool and warm climates.
🌱 Step 1: Choose the Perfect Planting Site
Butternut squash thrives in full sun, so select a spot that receives at least 6-8 hours of direct sunlight daily. I always look for areas with loose, well-draining soil enriched with compost—squash roots need room to spread without becoming waterlogged. Avoid low spots where cold air settles, as butternuts are sensitive to frost even after germination.
Test your soil's drainage by digging a 6-inch deep hole and filling it with water. If it drains within an hour, your site is ideal. If water pools after 2 hours, amend the soil with 2-3 inches of compost and a handful of perlite to improve aeration. Butternuts also prefer slightly acidic to neutral soil (pH 6.0-7.0), so test your soil if possible—you can adjust with lime or sulfur if needed.
🌱 Step 2: Start Seeds Indoors or Direct-Sow After Frost
For a head start, I sow seeds indoors 3-4 weeks before the last frost date in biodegradable pots filled with seed-starting mix. Plant seeds 1 inch deep and keep the soil consistently moist at 70-80°F until germination, which typically occurs in 7-14 days. Once seedlings develop 2-3 true leaves, harden them off by gradually exposing them to outdoor conditions for 1-2 hours daily over 7-10 days.
Alternatively, direct-sow seeds after the soil reaches 60°F and all frost risk has passed. Plant seeds 1 inch deep and 2-3 feet apart in hills of 4-5 seeds each, spacing hills 4-6 feet apart. This spacing gives vines room to sprawl without competing for nutrients. I always thin seedlings to the strongest plant per hill once they reach 3-4 inches tall, using sharp scissors to avoid disturbing roots.
☀️ Step 3: Provide Support and Consistent Care
Butternut squash vines are heavy, so I install 4-foot tall trellises or sturdy cages at planting time to support the sprawling vines and keep fruits off the ground. Train vines gently as they grow, securing them with soft plant ties or old fabric strips—never wire, which can damage tender stems. Mulch around plants with 2-3 inches of straw or shredded leaves to retain moisture, suppress weeds, and regulate soil temperature.
Water deeply 1-2 inches per week, focusing on the base of plants and avoiding overhead irrigation to prevent fungal diseases like powdery mildew. I water in the morning so foliage dries quickly, and I always check soil moisture by sticking my finger 1-2 inches deep—if it feels dry, it's time to water. Fertilize lightly with a balanced organic fertilizer (10-10-10) at planting and again when vines begin to run, but avoid high-nitrogen feeds, which promote leafy growth at the expense of fruit production.
⏰ Step 4: Monitor for Pests and Harvest at Peak Ripeness
Watch for squash vine borers, which lay eggs on leaves and stems. I inspect plants weekly and remove any egg masses or sawdust-like frass (borer droppings). For organic control, I wrap stems with aluminum foil at planting time—borers can't penetrate it, and the trap can be checked daily for early signs of infestation. Handpick adult beetles when possible, especially in the morning when they're sluggish.
Harvest butternut squash when the skin is hard and difficult to pierce with a fingernail, usually 85-100 days after planting. The stem should also turn brown and dry where it meets the fruit. Use a sharp knife to cut stems, leaving 1-2 inches of stem attached to help the squash store longer. Cure harvested squash in a warm (80-85°F), dry place for 7-10 days to toughen the skin and improve flavor—this is the secret to storing them for months in a cool, dark spot.
Tips & tricks for perfect butternut squash planting
These insider tricks will help you avoid common pitfalls and maximize your harvest—no matter your gardening experience.
Soil Preparation Secret: In Step 1, when testing drainage, I go one step further by mixing in 1 cup of bone meal during soil amendment. This adds phosphorus for root development and sets the stage for stronger vines later. The 2-3 inches of compost mentioned is non-negotiable—it's the foundation for that rich, well-draining soil butternuts crave. I've seen plants double in vigor just from this extra boost.
Germination Game-Changer: For Step 2's indoor starting, I've found that placing seeds on a heating mat set to 75°F (instead of just maintaining 70-80°F) cuts germination time to 5-7 days instead of the full 7-14 days. The consistent warmth mimics spring conditions and gives you a head start. Just be sure to remove the mat once sprouts appear to prevent leggy seedlings.
Pest Prevention Strategy: The aluminum foil trick in Step 4 is brilliant, but here's what nobody tells you—wrap the stems with double-layered foil and leave the top 2 inches uncovered. This creates a better trap for borers while allowing the plant to breathe. I check the foil weekly and have caught borers before they could do real damage every single time. This simple upgrade turns a good method into a foolproof one.
Harvest Timing Insight: Those 85-100 days in Step 4 are just a guideline—the real test is the skin's hardness and stem color. I've learned to tap the squash with my knuckles: a hollow sound means it's ready. Also, harvest in the morning when skin turgor is highest. The 7-10 days curing period at 80-85°F is crucial—this toughens the skin and develops those sweet, nutty flavors we all love.
Pro Tips for Best Way To Plant Butternut Squash
- These insider tricks will help you avoid common pitfalls and maximize your harvest—no matter your gardening experience.
- Soil Preparation Secret: In Step 1, when testing drainage, I go one step further by mixing in 1 cup of bone meal duri...
- Germination Game-Changer: For Step 2's indoor starting, I've found that placing seeds on a heating mat set to 75°F (i...
Frequently asked questions
Got questions about growing butternut squash?
Here are the answers to the most common ones—so you can plant with confidence and avoid surprises!
When is the best time to plant butternut squash?
Butternut squash thrives in warm soil. Plant seeds 1-2 weeks after the last frost when soil temps hit at least 60°F (15°C). In cooler climates, start indoors 2-3 weeks earlier or use black plastic mulch to warm the soil faster. Avoid planting too early—cold soil stunts growth!
How long does it take for butternut squash to grow?
From seed to harvest, expect 85-100 days for mature butternut squash. Vines spread quickly, so give them space! Check for readiness when the rind turns hard and the stem dries out. Pro tip: Harvest before frost—cold weather ruins the flavor.
Can I grow butternut squash in containers?
Yes! Choose a 5-gallon container or larger with drainage holes. Use well-draining potting mix and support vines with trellises (they can grow 3-6 feet long!). Just ensure the container gets 6+ hours of sunlight daily—shady spots = smaller squash.
What pests or diseases should I watch for?
Keep an eye out for squash bugs, cucumber beetles, and powdery mildew. Use row covers early to deter pests, rotate crops yearly, and water at the base (not leaves) to prevent mildew. Neem oil is a great organic fix for mild infestations!
Can I save seeds from my butternut squash?
Scoop out seeds, rinse them, and let them dry in a warm, dark place for 2-3 days. Store in a sealed container in the fridge for up to 5 years. Note: Hybrid varieties may not produce true-to-type squash, so check seed packets if you want consistent results.
What can I plant near butternut squash for better growth?
Butternut squash loves companions! Plant with corn (for trellising), marigolds (pest control), or beans (nitrogen boost). Avoid planting near potatoes or other squash varieties—they compete for nutrients and spread diseases.
Wrapping up and next steps
Planting butternut squash is a rewarding journey that leads to a sweet, nutrient-packed harvest—and you’ve got all the sunny patch secrets to make it thrive! 🌱 From choosing the right soil to mastering spacing and care, these steps ensure your squash vines flourish.
Now that you’re armed with knowledge, it’s time to roll up your sleeves and get growing—your future harvest is waiting!
Ready to take the next step? Mark your calendar for planting season (or start seeds indoors now!) and watch your garden transform into a butternut squash paradise. Happy planting—your taste buds will thank you! 🎉