
Planting
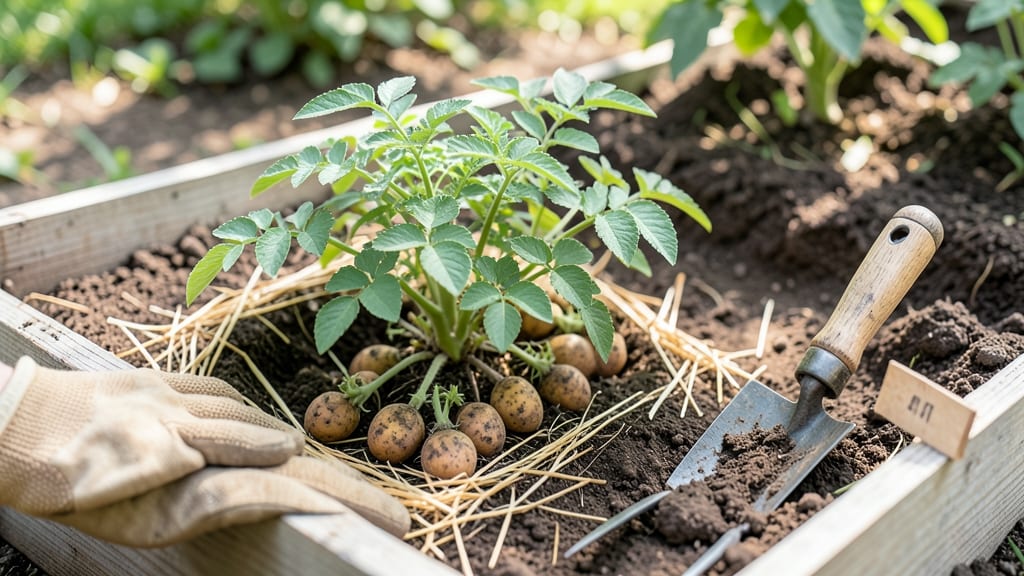
Chitted potatoes hit the ground running—literally. 🌱 Those little sprouts you grow indoors before planting translate to earlier harvests and bigger tubers by summer, and I’ve seen it work every time I skip the store-bought starts.
The secret isn’t complicated: it’s about timing, soil, and giving those sprouts a head start without overdoing it. You’ll need a sunny spot, loose soil (or a deep container), and your chitted potatoes—ready to go when soil temps hit 40-50°F.
The key is planting them 4-6 weeks before your last frost, so they’re established before pests or cold sets in. Too early, and they rot; too late, and they struggle to catch up.
What you end up with is a garden where neighbors ask, “How’d you get such big potatoes?” The plants emerge faster, resist disease better, and produce 20-30% more yield than unchitted seed potatoes. I’ve even grown them in 5-gallon buckets on my balcony—no yard required.
Here’s where it gets interesting: container growers can use a mix of compost and sand for drainage, while in-ground planters should amend heavy soil with compost. Either way, keep the soil moist but not soggy, and watch those sprouts turn into a goldmine of harvests.
📚 In This Guide
- What you need
- Instructions
- Tips and common mistakes
- Wrapping up and next steps
What you need
- ● Seed potatoes: Choose certified disease-free varieties (e.g., Yukon Gold, Russet, or Fingerlings). Buy chitted (pre-sprouted) potatoes from a nursery or chit your own (see tips below!). Aim for 3–5 lbs per 100 sq ft of garden space.
- ● Growing containers or garden bed: Containers: 10–12" deep pots with drainage holes (e.g., 5-gallon buckets or fabric grow bags). Use 1–2 potatoes per container.
- ● In-ground beds: Loose, well-draining soil with organic matter (compost or aged manure). Space rows 24–36" apart.
- ● Potting mix or soil: Lightweight, peat-free mix (e.g., 50% compost + 50% coco coir) for containers. For in-ground, amend soil with compost or well-rotted manure.
- ● Garden trowel or hand fork – For planting and hilling.
- ● Measuring tape or ruler – To ensure proper planting depth (4–6" deep).
- ○ Gloves – Optional but recommended for handling soil and potatoes.
- ● Watering can or hose with gentle nozzle – Avoid blasting sprouts!
- ○ Mulch (straw or grass clippings) – Optional but helps retain moisture and suppress weeds.
- ● Timing: Plant 2–4 weeks before your last frost date (chits should be ½–1" long when planting).
- ● Sunlight: 6–8 hours of full sun daily for optimal growth.
- ● Soil temperature: Wait until soil warms to 45°F+ (use a soil thermometer if unsure).
Step-by-Step instructions for planting chitted potatoes
Here's how to turn those sprouted tubers into a thriving hill with minimal fuss.
🌱 Step 1: Prepare the Planting Site
Choose a location with full sun exposure and well-draining soil—potatoes despise soggy roots. Work in a 6-inch deep trench or mound rows 12-18 inches apart to improve drainage and prevent rot. If your soil is heavy clay, mix in 2-3 inches of compost per foot of row to loosen it.
Test your soil's moisture by squeezing a handful—it should crumble slightly but not stick together. If it's too dry, water the area thoroughly 24 hours before planting so the soil is evenly moist but not waterlogged. I like to mark the trenches with stakes to avoid disturbing them later.
🌿 Step 2: Position Chitted Potatoes Correctly
Place each chitted potato 4-6 inches deep, with the sprouts facing upward—this ensures they grow toward the sun instead of twisting underground. Space tubers 12 inches apart in rows to allow room for expansion (you'll hill soil later). If planting multiple varieties, keep them 18 inches apart to prevent cross-contamination.
Gently cover the potatoes with soil, pressing lightly to eliminate air pockets. Avoid burying the sprouts too deeply—they need light to develop into strong stems. If you notice any sprouts growing downward, turn the potato so the eyes face up before covering.
💧 Step 3: Water and Mulch for Consistent Moisture
Water the planted potatoes immediately after covering them with soil, giving them 1 inch of water to settle the soil around the tubers. Use a soaker hose or drip irrigation to avoid disturbing the soil—potatoes hate being moved once they start growing. Mulch with 2-3 inches of straw or grass clippings to retain moisture and suppress weeds.
Keep the soil consistently moist but never soggy—potatoes need steady hydration, especially during tuber formation. You'll know moisture is right when the mulch looks slightly damp but not wet to the touch. Avoid overhead watering once sprouts appear to prevent disease.
⏰ Step 4: Hill Soil as Plants Grow
When the potato plants reach 6 inches tall, mound soil around the base to cover the lower stems—this encourages more tuber formation and prevents greening. Use a hoe or shovel to pull soil from between rows and pile it 4-6 inches high around each plant, leaving the top leaves exposed.
Repeat this process every 2-3 weeks as the plants grow, adding more soil until the hill reaches 12 inches high or the plant tops. You'll see new growth emerge from the buried stems, signaling healthy tuber development. If your soil is loose, you may need to hill twice before the plants reach maturity.
☀️ Step 5: Monitor and Harvest at Peak Maturity
Watch for flowering as a sign that tubers are forming—this usually happens 4-6 weeks after planting, depending on your variety. Reduce watering slightly once flowers appear to improve flavor and prevent cracking. Harvest new potatoes when plants flower by gently digging around the base with a fork.
For full-sized potatoes, wait until the foliage yellows and dies back—this can take 90-120 days after planting. Dig carefully to avoid piercing the tubers, then cure them in a dark, 50-60°F space for 1-2 weeks to develop skin and improve storage life. Store in a cool, dark place with high humidity to keep them fresh.
Tips & tricks for perfectly planting chitted potatoes
Here's what nobody tells you about getting the most out of your chitted potatoes—these tricks will help you avoid common pitfalls and maximize your harvest.
Soil Preparation Secret: In Step 1, if your soil is particularly dense, consider adding a thin layer of coarse sand to the bottom of your trench before placing the potatoes. This creates a drainage layer that prevents rot, especially important in clay-heavy soils. I've seen potatoes double in size when planted in this slightly looser medium—it's worth the extra 5 minutes of prep. The 24-hour pre-watering is critical too; think of it as giving your soil a chance to absorb moisture evenly rather than just wetting the surface.
Planting Depth Insight: When placing your chitted potatoes 4-6 inches deep in Step 2, aim for the shallower end of that range (around 4 inches) if you're in a cooler climate. Deeper planting helps insulate against temperature swings, but too much depth can delay emergence. Watch for the first green shoots breaking through—this is your signal that the roots have established. If you notice any sprouts growing downward, don't just turn them; gently loosen the soil around them to encourage upward growth.
Hilling Technique: In Step 4, when you're building those hills every 2-3 weeks, use a technique I call "the gentle mound." Instead of piling soil aggressively, create a gradual slope around the stems. This prevents stem breakage while still encouraging tuber formation. The goal is to cover about 6 inches of stem each time—you'll know you're doing it right when you see new growth emerging from the buried stems. This gradual approach also helps prevent greening from exposure to light.
Harvest Timing: The 4-6 week flowering window in Step 5 is your best indicator for new potatoes, but don't rush it. I've found that waiting until the flowers have fully bloomed (not just opened) gives you slightly larger tubers while still being in the "new" category. For full-sized potatoes, the 90-120 day range can vary by 2-3 weeks depending on your last frost date—always check your local growing zone guidelines. The curing period at 50-60°F is non-negotiable; it's what develops that protective skin that keeps potatoes fresh for months.
Pro Tips for Planting Chitted Potatoes
- Here's what nobody tells you about getting the most out of your chitted potatoes—these tricks will help you avoid com...
- Soil Preparation Secret: In Step 1, if your soil is particularly dense, consider adding a thin layer of coarse sand t...
- Planting Depth Insight: When placing your chitted potatoes 4-6 inches deep in Step 2, aim for the shallower end of th...
Frequently asked questions
Got questions about chitting potatoes? You’re not alone!
Here are answers to the most common concerns—so you can plant with confidence and grow a bountiful harvest.
What does "chitting" mean, and why should I do it?
Chitting is pre-sprouting potato seeds in a cool, bright spot (like a sunny windowsill) to encourage early growth. It gives your tubers a head start, leading to faster emergence and bigger yields—especially in short growing seasons. Think of it as giving your potatoes a growth boost before they even hit the soil!
How long does it take for potatoes to chit before planting?
Most potatoes develop 1-2 inch sprouts in 4-6 weeks of chitting, depending on variety and conditions. Plant them as soon as sprouts reach ½ to 1 inch long—longer sprouts can become leggy and weaker. Pro tip: If sprouts turn green or grow too long, trim them back to the tuber before planting.
Can I plant chitted potatoes too early or too late?
Timing matters! Plant chitted potatoes 2-3 weeks before your last frost date (when soil reaches 45°F+). If planted too early, cold soil can stunt growth; if planted too late, you’ll miss the optimal window for tuber formation. Check your zone: Most gardeners aim for spring (March–May in most regions).
What if my chitted potatoes rot or sprout unevenly?
Uneven sprouting or rot usually means too much moisture or warmth during chitting. Store potatoes in a cool (50–60°F), dry place with indirect light until ready to chit. If sprouts rot, discard the tuber—healthy sprouts should be firm and white. For uneven growth, rotate tubers weekly to ensure even light exposure.
Do I need to chit potatoes if I’m planting in a short season?
Chitting is especially valuable in short seasons (like Zone 3–5) because it accelerates growth by 2–3 weeks. Without chitting, potatoes may struggle to mature before frost. For longer seasons (Zones 6+), chitting is still helpful but less critical. Try it: Even a 1-week chit can make a difference!
Wrapping up and next steps
Planting chitted potatoes is your secret weapon for a bountiful, early harvest—no green thumb required! By giving your spuds a head start indoors, you’ll enjoy healthier, faster-growing plants and a garden packed with crisp, homegrown tubers. 🌱
Ready to dig in? Start chitting now—your future harvest (and taste buds) will thank you! Once your potatoes are sprouting, grab those gardening gloves and get them into the soil before the last frost. Happy planting—and may your yield be legendary!