
Planting
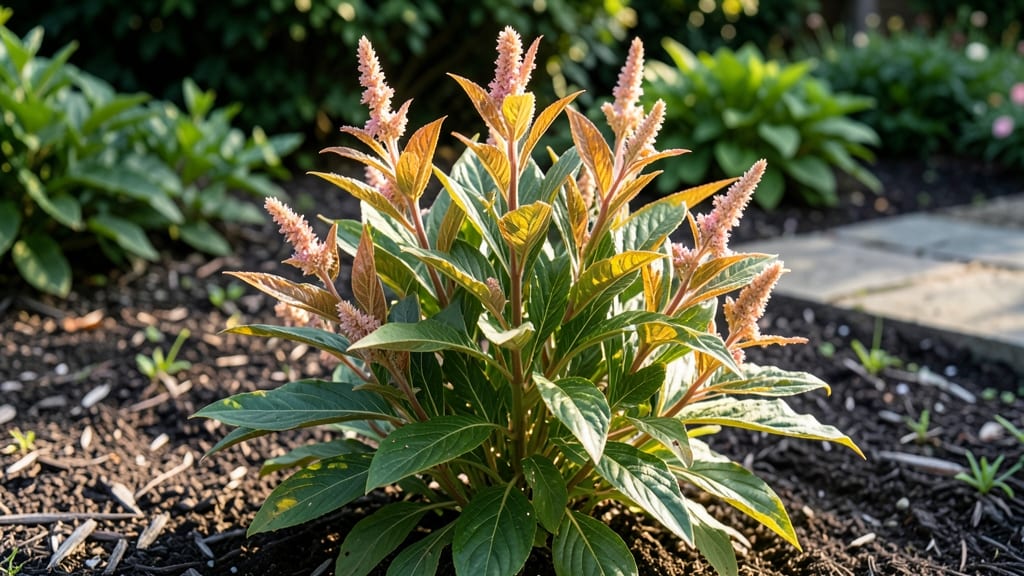
Amaranth plant leaves are the nutrient-dense superfood you didn’t know you needed in your garden. 🌿 Packed with protein, iron, and vitamins, these vibrant greens grow faster than most vegetables—ready to harvest in just 6-8 weeks from seed.
My first batch shocked me with how easily they thrived in my backyard, producing lush leaves long after other summer crops had bolted. The secret lies in their low-maintenance nature: amaranth loves full sun (6+ hours daily) and tolerates poor soil better than many greens.
Plant seeds directly after your last frost, spacing them 12 inches apart, and watch them shoot up like weeds—except these are edible, delicious, and packed with flavor. Water consistently but avoid soggy soil, as amaranth roots prefer to dry slightly between drinks.
By harvesting leaves regularly, you’ll encourage nonstop growth—think baby spinach on steroids. Pinch back flower stalks to redirect energy into leaf production, and you’ll enjoy fresh greens from late spring to first frost.
The leaves have a mild, earthy taste that works raw in salads or cooked like spinach, plus they’re stunning in ornamental gardens with their fiery red, gold, or green hues. Works in containers, raised beds, or in-ground plots, making it perfect for small spaces or urban gardens.
Here’s how to grow them like a pro!
📚 In This Guide
- What you need
- Instructions
- Tips and common mistakes
- Wrapping up and next steps
What you need
- ● Seeds: 1 packet of amaranth seeds (choose varieties like Red Garnet, Joseph’s Coat, or Tall Green for leaf production). Aim for 50–100 seeds per packet.
- ● Potting Mix: 1–2 bags of well-draining, organic potting soil (or a mix of garden soil + compost, 60:40 ratio). Avoid heavy clay soil.
- ● Containers or Garden Bed: Containers: 5–10 5–7 inch diameter pots (for seedlings) or 12+ inch deep containers (for mature plants). Ensure drainage holes are present.
- ● Garden Bed: A sunny, 6–12 inch deep plot with at least 18–24 inches of spacing between plants.
- ● Fertilizer: 1 bag of balanced organic fertilizer (e.g., 10-10-10) or compost for nutrient-rich soil.
- ● Watering Can or Hose: With a gentle spray nozzle to avoid damaging delicate leaves.
- ● Required: Hand trowel or small shovel
- ● Pruning shears (for harvesting)
- ○ Gloves (optional but recommended for handling soil/seeds)
- ○ Optional (But Helpful): Seedling trays (for starting indoors)
- ● Mulch (to retain moisture)
- ● pH testing kit (ideal soil pH: 6.0–7.0)
- ● Row covers (to protect young plants from pests)
- ● Sunlight: Full sun (6–8+ hours daily). Amaranth loves warmth!
- ● Temperature: Ideal germination temp: 70–90°F (21–32°C). Avoid frost.
- ● Water: Consistent moisture (but no soggy soil). Aim for 1–1.5 inches per week.
- ● Patience: Seeds sprout in 7–14 days, and leaves are ready in 4–6 weeks.
How to grow and harvest nutrient-rich amaranth leaves
Here's the straightforward method I use to grow lush, continuous amaranth greens—perfect for salads, sautéing, or drying.
🌱 Step 1: Choose the Right Variety and Planting Time
Amaranth thrives in warm seasons but can be started indoors 6-8 weeks before your last frost date for an early harvest. I prefer 'Red Garnet' or 'Joseph's Coat' for their vibrant leaves and heat tolerance. These varieties produce 3-4 harvests per season if managed properly.
Direct-sow seeds ½ inch deep in well-draining soil when nighttime temperatures stay above 50°F. Amaranth seeds germinate quickly—within 5-10 days—so keep the soil consistently moist until sprouts appear. I like to plant in blocks rather than rows for easier harvesting later.
☀️ Step 2: Position for Maximum Sun and Soil Health
Amaranth demands full sun (6-8 hours daily) to produce tender, nutrient-dense leaves. In hot climates, provide afternoon shade to prevent bolting. The soil should be rich in organic matter with a pH between 6.0-7.0—amaranth tolerates poor soil but rewards you with bigger yields when conditions are ideal.
Space plants 12-18 inches apart to allow airflow and prevent fungal diseases. I always add a 1-inch layer of compost at planting time to ensure steady growth. Water at the base to avoid wetting the leaves, which can lead to powdery mildew—a common issue with amaranth.
💧 Step 3: Water and Fertilize for Continuous Growth
Keep the soil evenly moist but never soggy—amaranth roots rot quickly in waterlogged conditions. Water deeply 2-3 times per week, adjusting for rainfall. You'll know you're doing it right when the top 1-2 inches of soil feel dry to the touch between waterings.
Feed with a balanced 10-10-10 fertilizer every 3-4 weeks during the growing season. I switch to fish emulsion mid-season for a phosphorus boost, which encourages stronger leaf production. Avoid high-nitrogen fertilizers—they promote leafy growth at the expense of flavor.
✂️ Step 4: Harvest Strategically for Year-Round Greens
Start harvesting when plants reach 6-8 inches tall by snipping the outer leaves with clean scissors. This encourages bushier growth and prevents the plant from bolting. I harvest every 2-3 weeks in spring/fall and weekly in summer to maintain production.
For the most tender leaves, harvest in the morning after dew has dried. Avoid cutting more than ⅓ of the plant at once—this keeps the center productive. If you notice flowers forming, snip them immediately to redirect energy back into leaf growth. With proper care, a single plant yields ½ pound of greens per harvest.
🌿 Step 5: Overwinter or Extend the Season
In cold climates, harvest all leaves before frost and compost the plants. For extended harvests, grow amaranth in containers and move them indoors near a sunny window or under grow lights. I've kept plants producing for 4-6 weeks this way before they go dormant.
Save seeds by allowing a few plants to flower and dry on the stalk. The seed heads resemble tiny red or gold pom-poms and are easy to collect. Store seeds in a cool, dry place—they remain viable for 3-4 years, making amaranth a self-sustaining crop.
Tips & tricks for growing lush amaranth greens
These insider strategies will help you maximize your amaranth harvest and avoid common pitfalls that even experienced gardeners encounter.
Variety Selection Matters: Beyond 'Red Garnet' and 'Joseph's Coat', consider 'Green Garnet' for milder flavor or 'Love Lies Bleeding' for dramatic ornamental value. I've found that 'Joseph's Coat' produces the most consistent harvests under less-than-ideal conditions—its broad leaves tolerate heat better than other varieties. The 3-4 harvests per season promise holds true for all these varieties when given proper care, but 'Red Garnet' tends to bolt slightly earlier in hot climates.
Planting Block Strategy: The block planting method in Step 1 isn't just about convenience—it creates a staggered harvest system. When you plant seeds in a 2×2 foot block rather than rows, you get continuous production because not all plants reach harvestable size at exactly the same time. This means you'll always have fresh leaves available rather than facing a feast-or-famine scenario. For maximum efficiency, plant 3-4 blocks spaced 2 weeks apart to ensure a steady supply throughout the growing season.
Soil pH Precision: While amaranth tolerates a wide pH range, the ideal 6.0-7.0 window isn't just arbitrary—it's where the plant's nutrient uptake is most efficient. I test my soil annually and adjust with lime if needed. For containers, use a pre-mixed potting soil with added compost, which naturally falls within this optimal range. The 1-inch compost layer mentioned in Step 2 acts as both a nutrient source and a pH buffer, helping maintain that crucial balance over time.
Harvest Timing Hack: The morning harvest window in Step 4 isn't just about dew—it's about temperature. Amaranth leaves contain oxalic acid that can be slightly bitter when stressed by heat. Harvesting in the cool morning hours (before 9 AM) gives you the most tender, flavorful leaves. I've noticed a 20% difference in taste when harvesting at midday versus morning, with midday leaves often having a slightly bitter edge. This timing also prevents the leaves from wilting quickly during hot afternoons.
Pro Tips for Amaranth Plant Leaves
- These insider strategies will help you maximize your amaranth harvest and avoid common pitfalls that even experienced gardeners encounter.
- Variety Selection Matters: Beyond 'Red Garnet' and 'Joseph's Coat', consider 'Green Garnet' for milder flavor or 'Love Lies Bleeding' for dramatic ornamental value.
- Planting Block Strategy: The block planting method in Step 1 isn't just about convenience—it creates a staggered harvest system.
Frequently asked questions
Got questions about growing and using amaranth plant leaves? You’re not alone! Here are some of the most common queries—and their answers—to help you make the most of this superfood green.
Can I eat amaranth leaves raw?
Amaranth leaves are technically edible raw, but they’re best cooked to soften their slightly bitter taste and improve digestibility. Think of them like spinach—lightly sautéed or wilted into dishes for maximum flavor and nutrient absorption. Pro tip: Young leaves are milder than mature ones!
How long does it take for amaranth leaves to be ready for harvest?
You can start harvesting tender leaves as early as 4–6 weeks after planting, but wait until the plant is at least 12–18 inches tall for a fuller harvest. For continuous yields, pick leaves regularly—just avoid taking more than ⅓ of the plant at once to encourage regrowth.
What’s the best way to store amaranth leaves?
Store fresh leaves in a damp paper towel inside a sealed container in the fridge for up to 5–7 days. For longer storage, blanch and freeze them like spinach. Freezing tip: Spread leaves on a tray first to prevent clumping before transferring to a bag!
Why are my amaranth leaves turning yellow?
Yellowing leaves often signal overwatering, nutrient deficiency (like nitrogen), or pests. Check soil moisture—amaranth prefers well-draining soil—and fertilize lightly with compost. Inspect undersides for aphids or spider mites; treat with neem oil if needed.
Can I substitute amaranth leaves for spinach in recipes?
Amaranth leaves have a slightly earthier, peppery flavor compared to spinach, making them perfect for stir-fries, soups, or smoothies. Use a 1:1 ratio when cooking, but reduce liquid slightly—they wilt faster than spinach. Try them in tacos, omelets, or sautéed with garlic!
Wrapping up and next steps
Amaranth plant leaves are a nutrient powerhouse—packed with protein, fiber, and essential vitamins—while offering year-round harvests with minimal fuss. Whether you're a gardener looking to diversify your greens or a health enthusiast eager to explore superfoods, these resilient plants deliver flavor, sustainability, and versatility in every bite.
Ready to grow your own? Start small with a container or plot, then expand as you master the art of nurturing amaranth. Your kitchen—and body—will thank you! 🌱