
Planting
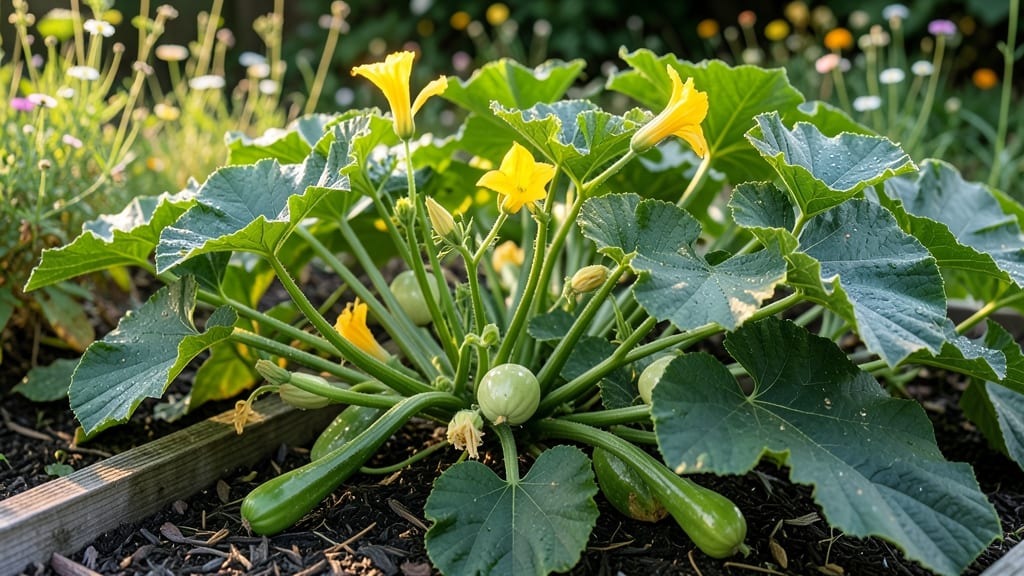
Tracking summer squash plant stages transforms guessing into knowing exactly when to expect those first tender zucchinis. 🌱 From the moment you plant seeds to the day you harvest, each phase has its own care needs—and missing them means smaller yields or bitter fruit.
I’ve watched my squash go from tiny sprouts to sprawling vines heavy with produce, and the secret to success lies in recognizing these stages early.
The journey starts with germination (5-10 days), where seeds sprout into delicate seedlings with two true leaves. Then comes vegetative growth (3-4 weeks), when vines spread rapidly and leaves thicken—this is when consistent watering (1-2 inches per week) and morning sunlight keep them thriving.
Flowering arrives next (4-6 weeks), marked by yellow blooms that signal fruit development is just around the corner.
By fruiting (6-8 weeks), you’ll see squash forming—harvest them when small (6-8 inches) for the best flavor. A healthy plant produces 50+ pounds of squash per season if you prune suckers and keep soil rich with compost.
The key? Watching the plant’s cues: wilting leaves mean thirst, yellowing means overwatering, and powdery spots mean it’s time to spray neem oil.
Each stage builds on the last, so don’t rush—patience here means bigger harvests later. Whether you’re growing bush types or vining varieties, the same principles apply. Let’s break down what to watch for at every turn so you can troubleshoot before problems start.
📚 In This Guide
- What you need
- Instructions
- Tips and common mistakes
- Wrapping up and next steps
What you need
- ● Seeds: Choose high-quality, disease-resistant summer squash seeds (e.g., zucchini, yellow crookneck, or pattypan). Aim for 1-2 seeds per hill (or 1 seed per cell if starting indoors).
- ● Seed Starting Mix: A sterile, well-draining mix (e.g., Black Gold Seedling Mix) for indoor starts. Use a small tray or peat pots (3-4 inches deep).
- ● Outdoor Soil: Amend garden soil with compost or aged manure (1-2 inches mixed in) for fertility. Summer squash thrives in loamy, well-draining soil with a pH of 6.0-7.0.
- ● Fertilizer: At planting: A balanced, slow-release fertilizer (e.g., 10-10-10) or compost tea.
- ● During growth: A high-nitrogen fertilizer (e.g., 5-10-10) every 2-3 weeks for leafy growth.
- ● Watering Supplies: A hose with a gentle spray nozzle or drip irrigation system to keep soil consistently moist (avoid overhead watering to prevent disease).
- ● A watering can for indoor seedlings.
- ○ Support (Optional but Helpful): Sturdy trellis or cages (4-5 feet tall) for vining varieties like yellow squash.
- ● Straw mulch to retain moisture and suppress weeds.
- ● A hand trowel for transplanting seedlings.
- ● A garden fork for loosening soil before planting.
- ● Pruning shears to remove excess foliage or damaged leaves.
- ○ A garden gloves (optional but recommended for comfort).
- ○ A thermometer (optional) to monitor soil temperature (ideal: 60-90°F for germination).
- ● Sunlight: A full-sun location (6-8 hours of direct sunlight daily)—summer squash is a sun-worshipper! 🌞
- ● Warmth: Wait until soil temperatures reach at least 60°F (use a soil thermometer to check).
- ● Space: Plant seeds 1-2 inches deep and 2-3 feet apart (or 3-4 feet for bush varieties). Rows should be 4-6 feet apart.
- ● Patience: Germination takes 5-10 days in warm soil!
Step-by-Step guide to tracking summer squash growth stages
Watch your squash plants transform from tiny sprouts to prolific producers—here's what to expect at each thrilling stage.
🌱 Step 1: Germination and First True Leaves (Days 7-14)
After sowing seeds ½ inch deep in warm soil (70-85°F), germination typically occurs within 5-10 days. You'll notice the first sign when tiny green sprouts push through the soil—these are the seed leaves (cotyledons). Don't be tempted to thin yet; wait until you see the first true leaves (the second set of leaves that look like miniature versions of mature foliage).
This is the most delicate phase—keep soil consistently moist but not soggy. I use my finger to check moisture: if the top ½ inch feels dry, it's time to water gently at the base. Avoid overhead watering to prevent fungal diseases. Real talk: if you see yellowing or wilting at this stage, it's usually from either too much water or too little light.
🌿 Step 2: Vegetative Growth and Vine Development (Weeks 3-6)
Once your squash plants have 4-6 true leaves, they enter rapid growth mode. You'll notice the vines thickening and leaves expanding quickly—this is when they're building energy for flowering. The plants will develop lateral branches from the main stem, which is a good sign for future fruit production.
This is when I start paying close attention to light requirements. Summer squash needs full sun (6-8 hours daily)—if leaves look pale or stems stretch excessively, move your plants to a sunnier spot or supplement with a grow light. You'll also see the first signs of male and female flowers emerging. The female flowers will have a tiny squash forming at their base, while male flowers have long stems.
☀️ Step 3: Flowering and Early Fruit Set (Weeks 6-8)
The flowering stage is exciting but requires careful attention. Female flowers need to be hand-pollinated if you're not seeing bees visiting your garden. I use a small paintbrush to transfer pollen from male to female flowers in the morning when they're freshest. You'll know pollination worked when the tiny squash at the base of the female flower starts swelling within 2-3 days.
Watch for blossom end rot (dark spots on young squash) which indicates calcium deficiency. To prevent this, I side-dress with compost or crushed eggshells around the base of plants. This stage also demands consistent watering—1-1.5 inches per week—to keep the soil evenly moist but not waterlogged. You'll see new flowers and fruit forming continuously as the vines mature.
🍆 Step 4: Fruit Development and Harvest Readiness (Weeks 8-12)
Here's where the magic happens: your squash will go from the size of a marble to harvestable within 7-10 days. Summer squash like zucchini and yellow squash are ready when they reach 6-8 inches long and their skin is smooth and shiny. I always check by gently pressing the fruit—if it yields slightly to pressure, it's perfect for picking.
This is also when you need to harvest regularly to encourage more production. Leaving squash on the vine too long causes the plant to focus energy on one fruit instead of producing more. You'll notice the vines becoming more prolific as you keep harvesting. Watch for powdery mildew on leaves during humid weather—remove affected leaves immediately and consider applying a neem oil spray preventatively.
⏰ Step 5: Peak Production and Maintenance (Weeks 10-14)
At peak production, your squash plants can produce 1-2 pounds of fruit per week under ideal conditions. This is when I implement a mulching routine with straw to keep roots cool and retain moisture. The vines may start looking tired by this stage, but with proper care, they can keep producing for 8-10 weeks total.
Pay attention to nutrient needs—if leaves turn yellow between veins, it's a sign of nitrogen deficiency. I use a balanced liquid fertilizer (10-10-10) every 2-3 weeks during this phase. You'll also want to watch for squash vine borers (look for wilting vines and sawdust-like frass). If you spot them, cut open the stem to remove the larvae immediately and treat with Bacillus thuringiensis (Bt) as a preventive measure.
Tips & tricks for perfect summer squash growth
These simple strategies will help you nurture thriving summer squash plants from seed to harvest.
Soil Temperature Matters: The 70-85°F soil temperature range in Step 1 is crucial for germination. I always check soil warmth with a thermometer before planting—if it's below 70°F, wait a few more days or use black plastic mulch to warm the soil faster. Cold soil delays germination and can lead to weak seedlings. This is especially important in cooler climates or early spring plantings.
Light Requirements: During Step 2's vegetative growth phase, summer squash needs 6-8 hours of direct sunlight daily. If your garden doesn't get enough natural light, supplement with a grow light for 12-14 hours per day. I notice pale leaves or leggy stems when plants aren't getting sufficient light—this is your plant's way of stretching toward more sunlight. Rotate plants occasionally so all sides receive even light exposure.
Hand-Pollination Technique: In Step 3, when hand-pollinating female flowers, work in the morning when flowers are freshest. Use a small paintbrush to gently collect pollen from male flowers (look for the long stems) and transfer it to the center of female flowers (where the tiny squash forms at the base). This mimics what bees do naturally. I've found that pollinating every other day during peak flowering increases fruit set significantly.
Harvesting Timing: The 7-10 day window in Step 4 for fruit development is critical. I harvest when squash reach 6-8 inches and their skin is smooth and shiny. Use a sharp knife or pruners to cut the fruit, leaving a small stem attached. Harvesting at this stage prevents the fruit from becoming fibrous or seedy. Regular harvesting also stimulates more flower production—plants respond by producing more female flowers when you remove ripe squash promptly.
Pro Tips for Summer Squash Plant Stages
- These simple strategies will help you nurture thriving summer squash plants from seed to harvest.
- Soil Temperature Matters: The 70-85°F soil temperature range in Step 1 is crucial for germination.
- Light Requirements: During Step 2's vegetative growth phase, summer squash needs 6-8 hours of direct sunlight daily.
Frequently asked questions
Got questions about growing summer squash? You’re not alone! Here are answers to the most common queries to help you navigate each stage with confidence.
How long does it take for summer squash seeds to germinate?
Summer squash seeds typically germinate in 5–10 days after planting, depending on soil temperature. Keep the soil consistently moist (not soggy) and warm—aim for 60–90°F (15–32°C). If germination takes longer than two weeks, check seed viability or soil conditions. Pro tip: Soak seeds overnight before planting to speed things up!
When is the best time to transplant summer squash seedlings?
Transplant seedlings after the last frost when soil is at least 60°F (15°C) and nighttime temps stay above 50°F (10°C). Seedlings should be 2–3 inches tall with 2–3 true leaves. Harden them off for 5–7 days before moving to the garden. Plant in the late afternoon to reduce transplant shock.
What are the most common pests or diseases in summer squash, and how do I prevent them?
Watch for squash bugs, cucumber beetles, powdery mildew, and downy mildew. Prevent pests with row covers (early season) and neem oil sprays. Improve airflow between plants to deter mildew. Remove yellowing leaves promptly to stop disease spread. Pro tip: Interplant with nasturtiums to repel pests naturally!
How do I know when summer squash is ready to harvest?
Harvest summer squash when it’s 6–8 inches long and skin is shiny, firm, and easy to pierce with a fingernail. Overripe squash turns tough or seedy. Use a sharp knife or pruners to avoid damaging the vine. Pick frequently to encourage more production! Fun fact: Zucchini and yellow squash ripen faster than other varieties.
Can I grow summer squash in containers? What’s the best setup?
Yes! Choose compact varieties like ‘Eight Ball’ or ‘Patio Star’ and use containers at least 12–18 inches deep with drainage holes. A 5-gallon bucket works for one plant. Use lightweight potting mix and fertilize weekly with a balanced feed. Place in full sun (6+ hours/day) and train vines with a trellis if needed.
Wrapping up and next steps
Understanding the summer squash plant stages—from tender seedlings to vibrant, harvest-ready vines—sets you up for a bountiful garden! 🌱 With the right soil, spacing, and care, you’ll enjoy fresh, homegrown squash all season long.
Now that you’re armed with knowledge, it’s time to roll up your sleeves and get planting—your future meals (and bragging rights) are waiting!
🚀 Next Steps:
- Start seeds indoors (if your climate is cool) or direct-sow outdoors when soil is warm.
- Monitor growth closely—especially during the flowering stage—to ensure pollination and fruit set.
- Share your progress with fellow gardeners for tips and encouragement!