
Pests and Diseases
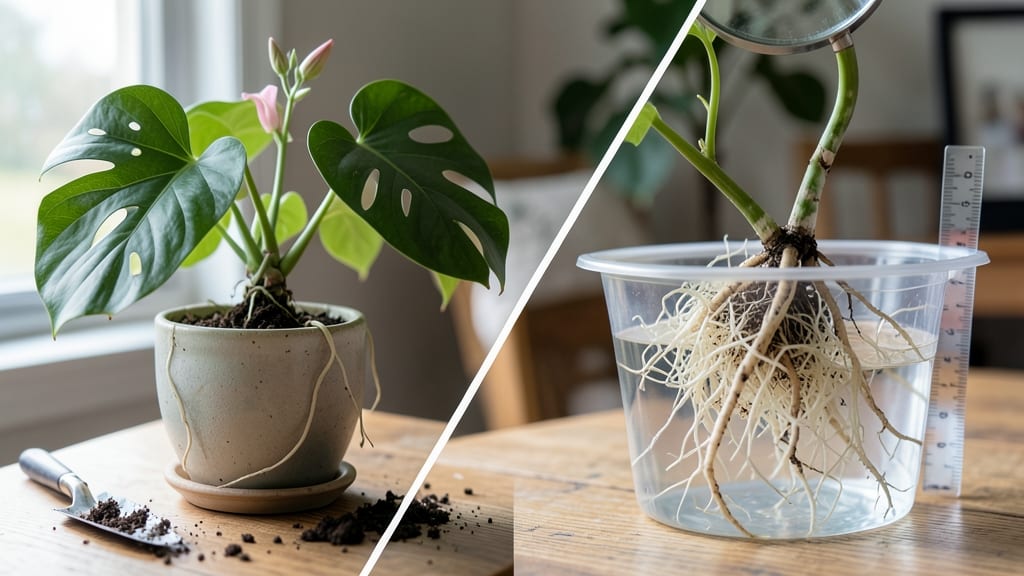
Understanding your plant's shoot and root system is the secret to fast, lush growth—and it's simpler than you think. 🌱 The shoot system (stems, leaves, flowers) works with the roots to pull off photosynthesis magic, but they need the right conditions to thrive together.
My first attempt at propagating basil failed because I ignored how roots and shoots depend on each other for water and nutrients.
Here's the game-changer: healthy roots mean strong shoots, and vice versa. For fibrous-rooted plants like lettuce, keep soil moist but well-drained; taproots like carrots need deep, loose soil. A quick test—press your finger into the soil: if it's dry 1" down, water immediately.
The right balance turns weak seedlings into thriving plants in weeks, not months.
📚 In This Guide
- What you need
- Instructions
- Tips and common mistakes
- Wrapping up and next steps
What you need
- ● Plant cuttings: 3–5 healthy, disease-free cuttings (4–6 inches long) with at least 2–3 nodes each.
- ● Ideal plants: Coleus, mint, pothos, or succulents (adjust based on your target species).
- ● Rooting medium: 1 small tray or container (6–8 inches wide) with drainage holes.
- ● 2–3 cups of perlite, vermiculite, or a 50/50 mix of peat moss and sand.
- ○ Hormonal rooting gel or powder: (Optional but recommended) 1 small bottle (e.g., Clonex or Rootone).
- ● Misting bottle: 1 (8–12 oz) with clean water.
- ● Clear plastic bag or propagator: 1 (to create humidity).
- ● Pruning shears: 1 pair (sterilized with rubbing alcohol).
- ○ pH testing kit: (Optional) To ensure medium pH is 5.8–6.2.
- ● Temperature: Keep cuttings in a warm area (70–75°F / 21–24°C).
- ● Light: Bright, indirect light (avoid direct sun).
- ● Humidity: Maintain 70–80% humidity (use a humidity dome or plastic bag).
- ● Water: Room-temperature, dechlorinated water (let tap water sit 24 hours or use filtered water).
- ● 🌱 Timing: Propagate in spring or early summer for fastest root growth.
- ● 🔄 Sterilize tools to prevent fungal/bacterial infections.
- ● ✨ Monitor moisture: Keep medium consistently damp, not soggy.
Step-by-Step guide to understanding and propagating plant shoot and root systems
Here's how to leverage plant biology for rapid, science-backed propagation that delivers lush growth in record time.
🌱 Step 1: Identify the Optimal Shoot for Propagation
Select a healthy, non-flowering shoot with at least 3-4 leaf nodes—these are the growth points where roots will emerge. I always choose semi-hardwood cuttings (new growth that's started to mature) because they strike roots faster than either softwood (too tender) or hardwood (too woody). Avoid shoots with signs of disease or pest damage, as these will compromise your new plant's health.
Use sharp, sterilized pruning shears to make a clean cut just below a node at a 45-degree angle. This angled cut increases surface area for water uptake and root initiation. Immediately place the cutting in water or moist propagation medium to prevent desiccation—you've got about 30 minutes before the cut end dries out and becomes unusable.
🌿 Step 2: Prepare the Root Environment
Create a propagation medium that mimics natural conditions while preventing rot. I use a 50/50 mix of perlite and peat moss for most plants, as this balance provides both aeration and moisture retention. Fill your propagation container (clear plastic domes work well for humidity control) with the mix, leaving about 1 inch of space at the top for watering.
Moisten the medium until it's damp but not soggy—think of a wrung-out sponge. You'll know it's right when water runs through evenly but doesn't pool at the bottom. For tropical plants, add a rooting hormone powder to the medium to boost success rates, especially in lower humidity environments.
💧 Step 3: Insert and Maintain Proper Moisture
Make a hole in the propagation medium with your finger or a pencil, then insert the cutting so that 2-3 nodes are buried below the surface. Gently firm the medium around the cutting to eliminate air pockets that could cause rot. Place the container in a warm location with bright, indirect light—direct sun will scorch tender new growth.
Cover the container with a clear plastic dome or plastic wrap to maintain 80-90% humidity, which is critical for root development. Check moisture daily by lifting the container—if the medium feels dry to the touch, mist lightly with water. Avoid overwatering; soggy conditions will suffocate roots before they form.
☀️ Step 4: Monitor and Transition to Light
After 2-4 weeks, check for root growth by gently tugging on the cutting. If resistance is felt, roots have formed. At this stage, gradually remove the plastic cover over 3-5 days to acclimate the new plant to normal humidity levels. This hardening-off period prevents transplant shock when you move it to its permanent location.
Once roots are established, increase light exposure gradually. Start with 2-3 hours of morning sun, then extend daily. You'll notice new shoot growth as the plant adjusts—this is your cue that the root system is supporting active photosynthesis. For fast growth, maintain temperatures between 65-75°F and keep the soil consistently moist but never waterlogged.
⏰ Step 5: Establish Long-Term Growth Conditions
After 6-8 weeks, your propagated plant should have a well-developed root system and several new shoots. Transplant to its final container or garden spot, ensuring the root ball is fully covered with soil. Water deeply to help roots establish in their new environment, and apply a balanced fertilizer to support vigorous growth.
Here's the thing—propagated plants often grow faster than seeded varieties because they skip the germination phase entirely. You'll see this in the thicker stems and larger leaves compared to seedlings. Continue monitoring for pests and diseases, as young propagated plants are particularly vulnerable during their first few months of growth.
Tips & tricks for science-backed plant propagation
These pro tips will help you maximize your propagation success rate while avoiding common pitfalls that even experienced gardeners encounter.
Node Selection Matters: In Step 1, focus on selecting shoots with 3-4 leaf nodes that are actively growing but not yet woody. These semi-hardwood cuttings contain the perfect balance of hormones to initiate root growth quickly. I've found that avoiding flowering shoots is critical—they divert energy to blooms instead of root development, which can delay your 2-4 week propagation timeline by weeks.
Sterilization is Non-Negotiable: Before making any cuts in Step 1, sterilize your pruning shears with rubbing alcohol. I learned this the hard way after losing three cuttings to bacterial infections from contaminated tools. The 30-minute window you have to work with the cutting is short enough that you don't want to waste any time dealing with cross-contamination issues.
Medium Consistency is Key: When preparing your 50/50 perlite and peat moss mix in Step 2, aim for a texture that resembles a damp sponge—not too wet, not too dry. I've seen beginners either drown their cuttings or create conditions too dry for root initiation. The moisture should flow through the medium but not pool at the bottom, creating the ideal oxygen balance for root development.
Humidity Control is Critical: The 80-90% humidity range in Step 3 is where the magic happens for root formation. I recommend using a clear plastic dome to maintain this level, but if you don't have one, a simple plastic bag with holes punched for ventilation works just as well. The key is to check daily by lifting the container—if the medium feels dry at the surface, that's your cue to mist lightly rather than soak.
Pro Tips for Shoot And Root System
- These pro tips will help you maximize your propagation success rate while avoiding common pitfalls that even experienced gardeners encounter.
- Node Selection Matters: In Step 1, focus on selecting shoots with 3-4 leaf nodes that are actively growing but not yet woody.
- Sterilization is Non-Negotiable: Before making any cuts in Step 1, sterilize your pruning shears with rubbing alcohol.
Frequently asked questions
Got questions about mastering the shoot and root system for propagation? You’re not alone! Here are answers to the most common queries to help you grow like a pro—no guesswork required.
What’s the best time of year to propagate using the shoot and root system?
The ideal window is early spring to late summer (March–September), when plants are actively growing. Avoid winter—dormant plants struggle to root. For tropical plants, year-round propagation works, but spring still delivers the fastest results. Pro tip: Start indoors if your climate dips below 60°F (15°C) to maintain warmth and humidity.
Can I use this method for all plants, or are some better suited?
While the shoot and root system works for many plants (e.g., coleus, mint, pothos, or herbs like basil), succulents and cacti are trickier—they prefer leaf cuttings instead. Stick to soft-stemmed, herbaceous plants for best success. Quick check: If the stem bends without snapping, it’s a great candidate!
What should I do if my cuttings rot instead of rooting?
Rot is usually a sign of overwatering or poor airflow. Troubleshoot by:
- Drying cuttings for 1–2 hours before planting.
- Using sterile, well-draining soil (add perlite or sand).
- Misting lightly (not soaking) and keeping humidity high but not soggy.
If rot persists, trim the mushy base and replant in fresh medium. Prevent it: Use a rooting hormone for extra insurance!
How often should I water cuttings during propagation?
Less is more! Water only when the top inch of soil feels dry—usually every 5–7 days. Overwatering suffocates roots. For humidity-loving plants (like ferns), place a clear plastic bag over the cutting to trap moisture, but vent it daily to avoid mold. Watch for: Yellowing leaves = too much water; crispy edges = too little.
Is there a faster alternative to the shoot and root system?
Yes! For instant results, try:
- Water propagation: Place stems in jars of water (change weekly) until roots form (2–4 weeks).
- Hydroponic mats: Use pre-moistened propagation pads for 90% faster rooting.
- Heat mats: Speed up growth by 30–50% with a gentle heat source (70–75°F).
But the shoot and root system still wins for hardiness and long-term success!
Wrapping up and next steps
Mastering the shoot and root system is your ticket to thriving, fast-growing plants—whether you're a seasoned gardener or just starting out! 🌱 By understanding how to balance propagation techniques, troubleshoot common issues, and leverage the right tools, you’ve unlocked the secrets to healthier, more resilient greenery. Now’s your chance to put that knowledge into action!
🚀 Your Next Step:
- Experiment with the methods that work best for your space and plants.
- Document your progress—track growth, note challenges, and refine your technique.
- Share your wins! Inspire others in your gardening community with your newfound expertise.
Happy growing—your green thumb is about to get even greener! 🌿