
Planting
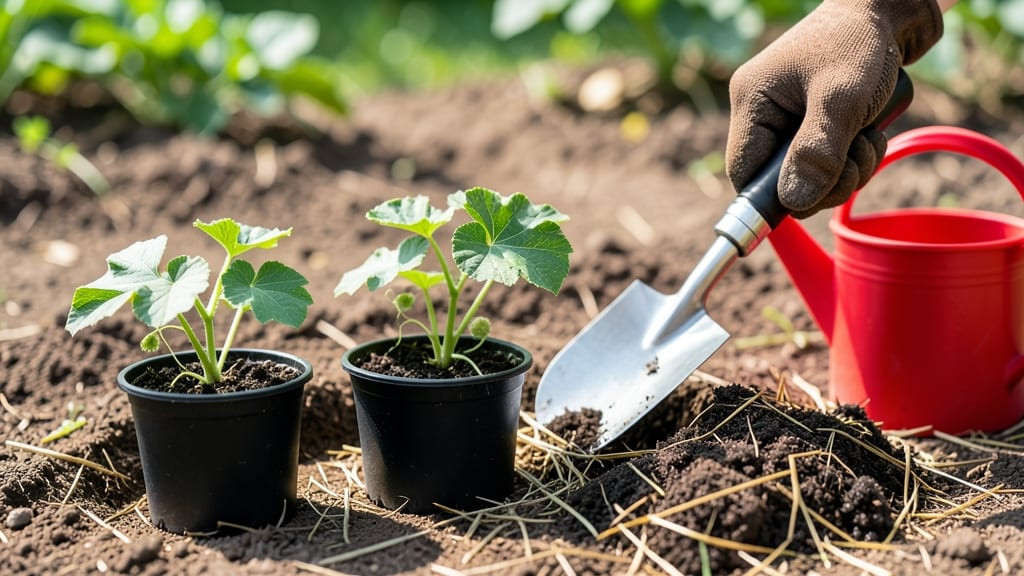
Transplanting watermelon seedlings at the right time means the difference between a 20-foot vine loaded with fruit and a sad, stunted plant.
I’ve moved watermelons from pots to garden beds for five seasons now, and I’ve learned that timing, soil prep, and gentle handling are everything—skip any of those, and you’ll end up with stressed plants that take weeks to recover.
The key is waiting until nighttime temperatures stay above 55°F, when roots can handle the move without shock.
Start by prepping the ground with 3-4 inches of compost mixed into the top 12 inches of soil—watermelons are heavy feeders, and poor soil means small, bitter fruit. If your soil drains poorly, raise beds or add sand to prevent root rot.
Space plants 4-6 feet apart in rows 6 feet apart to give vines room to sprawl (or use trellises for smaller spaces). Dig holes just deep enough to bury the seedling’s roots without bending the stem—this keeps the plant upright and ready to grow.
After transplanting, water deeply to settle the soil and keep it moist for the first 10-14 days—this helps roots establish before the heat sets in. Mulch with straw or black plastic to retain moisture and suppress weeds, and watch for yellowing leaves (a sign of shock).
With proper care, your watermelons will start climbing within days, and by midsummer, you’ll have vines heavy with fruit. The secret? Less fuss, more patience.
Container growers can use 5-gallon pots with drainage holes, but expect smaller harvests—watermelons need deep roots to produce big fruit. In cooler climates, wait until after the last frost and use black plastic mulch to warm the soil faster.
And here’s the pro tip: if your seedlings look leggy before transplanting, bury them deeper—up to the first true leaves—to encourage stronger stems. Now go dig in!
📚 In This Guide
- What you need
- Instructions
- Tips and common mistakes
- Wrapping up and next steps
What you need
- ● Watermelon seedlings: 3–6 healthy, disease-free plants (age: 2–4 weeks old, with 2–3 true leaves).
- ● Transplanting shovel or trowel: A 6–8" garden trowel for precision or a sturdy shovel for larger plots.
- ● Garden gloves: A pair of breathable, durable gloves to protect your hands from thorns and soil.
- ● Watering can or hose with a gentle spray nozzle: For hydrating roots without damaging them.
- ○ Compost or well-aged manure: 2–3 gallons per plant to enrich the soil (optional but recommended for nutrient boost).
- ● Mulch (straw, grass clippings, or shredded leaves): 2–3 inches thick to retain moisture and suppress weeds.
- ○ Plant support (optional but helpful): Trellis or sturdy stakes (5–6 ft tall) for climbing varieties.
- ● Soft plant ties or old T-shirts to secure vines.
- ● Epsom salt (magnesium sulfate): 1 tbsp per hole to prevent blossom-end rot.
- ● Fertilizer (balanced 10-10-10 or organic options like fish emulsion): Light dose to avoid burning young roots.
- ● Row covers or shade cloth: For young plants in hot or windy climates.
- ● Pruning shears: For trimming damaged or overgrown foliage post-transplant.
- ● Soil test kit: To check pH (ideal range: 6.0–7.0 for watermelons).
How to transplant watermelon plants: stress-free relocation for bountiful vines
Transplanting watermelon seedlings correctly means the difference between thriving vines and struggling plants. Here's how I do it—step by step.
Prepare the New Planting Site
Watermelons need full sun and warm soil to thrive, so choose a location that gets at least 8 hours of direct sunlight daily. The soil should be well-draining and rich in organic matter—watermelons are heavy feeders. Before transplanting, loosen the soil to a depth of 12-15 inches with a garden fork or tiller. This helps roots spread easily without resistance.
If your soil is heavy clay or sandy, mix in 2-3 inches of compost to improve fertility and moisture retention. I like to add a handful of 5-10-10 fertilizer per planting hole to give the plants a nutrient boost right away. Avoid fresh manure—it can burn delicate roots and cause more harm than good.
Harden Off Seedlings Before Transplanting
Seedlings grown indoors or in cool conditions need time to adjust to outdoor conditions. Start 7-10 days before transplanting by placing them outside in a shaded, sheltered spot for 1-2 hours the first day. Gradually increase their outdoor time by 1-2 hours daily, moving them to sunnier locations each time. This process, called hardening off, helps prevent transplant shock.
Watch for wilting or yellowing leaves—this is a sign they're not ready yet. If the seedlings look stressed, give them another day or two of gradual exposure. By the time you transplant, they should look healthy and vibrant, with no signs of stress. Hardened-off seedlings recover faster and start growing vigorously within days.
Dig Holes and Transplant Carefully
Dig holes twice as wide as the root ball but no deeper. Watermelon roots are sensitive, so avoid disturbing them during transplanting. Gently remove the seedling from its container, holding it by the base of the stem—never the leaves—to prevent damage. If the roots are circling tightly in the pot, loosen them with your fingers before placing the seedling in the hole.
Position the seedling so the top of the root ball sits level with the soil surface. Press the surrounding soil lightly to eliminate air pockets, then water deeply to settle the roots. Mulch the area with 2-3 inches of straw or shredded leaves to retain moisture and regulate soil temperature. Avoid piling mulch against the stem—keep it 2-3 inches away to prevent rot.
Provide Immediate Aftercare for Recovery
For the first 7-10 days after transplanting, keep the soil consistently moist but not soggy. Watermelons need 1-2 inches of water per week, but newly transplanted plants may need more frequent watering until they establish roots. Water at the base of the plant in the morning to reduce evaporation and fungal risks. Avoid wetting the leaves, as this can lead to disease.
During this critical period, watch for signs of stress like yellowing leaves or wilting. If you see these, increase watering slightly or provide temporary shade with a lightweight row cover until the plant recovers. Once the seedlings show new growth—usually within 5-7 days—they’re on their way to a strong, productive season.
Support and Train Vines for Maximum Yield
Watermelon vines grow aggressively, so provide trellis support or a sturdy frame if space is limited. Train the main vine along the trellis, gently tying it with soft plant ties every 12-18 inches. This keeps the fruit off the ground, reduces disease risk, and makes harvesting easier. If growing on the ground, leave 3-4 feet of space between plants to allow vines to sprawl naturally.
Prune any weak or damaged growth early on to encourage stronger vines. Once the plant establishes, focus on removing suckers (side shoots) to direct energy into fruit production. You’ll know you’re on the right track when the vines start producing flowers within 3-4 weeks—this is your sign the transplant was successful and the plant is thriving.
Tips & tricks for stress-free watermelon transplanting
Moving watermelon seedlings can be nerve-wracking, but these practical tips will help you avoid common pitfalls and set your plants up for success.
Soil Preparation Secret: The 12-15 inch soil loosening in Step 1 isn't just about roots—it's about creating an oxygen-rich environment. Use a garden fork to break up compacted layers without turning the soil into dust. I've found that adding a handful of coarse sand to clay-heavy soil improves drainage dramatically while maintaining moisture. The goal is to mimic the loose, airy texture of a well-tended garden bed, not dense packed dirt.
Harden Off Gradually: The 7-10 day hardening process in Step 2 is non-negotiable for watermelon seedlings. I recommend starting with just 1 hour of morning sun on day one, then increasing by 30 minutes each subsequent day. Watch for the subtle signs of readiness—leaves should be slightly darker but not curled, and the plants should stand upright when touched. Rushing this step often leads to transplant shock, where plants wilt dramatically within hours of being moved.
Root Handling Technique: When transplanting in Step 3, treat those roots like fragile glassware. If you notice circling roots in the container, gently tease them apart with your fingers—never force them. I've learned the hard way that cutting roots with shears can cause permanent damage. Position the seedling so the root ball sits just below soil level, but never bury the stem. This prevents rot while allowing roots to establish quickly.
Post-Transplant Recovery: The 7-10 day recovery period in Step 4 deserves special attention. I've found that using drip irrigation during this time keeps moisture consistent without wetting leaves. If you notice yellowing leaves after transplanting, it's often a sign of overwatering rather than stress. Let the top inch of soil dry between waterings, and always water at the base rather than overhead.
Pro Tips for Transplant Watermelon Plants
- Moving watermelon seedlings can be nerve-wracking, but these practical tips will help you avoid common pitfalls and set your plants up for success.
- Soil Preparation Secret: The 12-15 inch soil loosening in Step 1 isn't just about roots—it's about creating an oxygen-rich environment.
- Harden Off Gradually: The 7-10 day hardening process in Step 2 is non-negotiable for watermelon seedlings.
Frequently asked questions
Got questions about transplanting watermelon plants? You’re not alone! Here are answers to the most common concerns to help you navigate the process like a pro.
What’s the best time of day to transplant watermelon seedlings?
Transplant watermelon plants on a cool, overcast day or in the early morning or late afternoon to avoid stress from direct sunlight. If you must transplant during peak heat, provide shade for a few hours afterward. Watermelons are sensitive to temperature swings, so aim for 60–85°F (15–29°C) soil temps for optimal survival.
How soon after sowing can I transplant watermelon seedlings?
Watermelon seedlings are ready for transplanting when they have 2–4 true leaves and are about 2–3 inches tall. Rushing the process can stunt growth, while waiting too long risks overcrowding. Most gardeners transplant 3–4 weeks after sowing, but always check for hardy stems and vibrant leaves before moving them.
Can I transplant watermelon plants that are already flowering or fruiting?
Transplanting watermelons after they’ve started flowering or bearing fruit is risky—they’re delicate at this stage. If you must move them, do so only in emergencies (like poor soil or pests) and handle with extreme care. Expect a delay in fruit production as the plant recovers. For best results, transplant before flowering.
What should I do if my watermelon seedlings look wilted after transplanting?
Wilting after transplanting is normal due to stress, but it usually recovers in 1–3 days if conditions are right. Keep the soil moist but not soggy, provide afternoon shade, and avoid fertilizing for a week. If wilting persists beyond 3 days, check for root damage or disease—adjust care accordingly.
Are there any alternatives to transplanting watermelon seedlings?
Yes! If transplanting feels too tricky, try direct sowing into the garden after the last frost when soil is at least 70°F (21°C). Watermelons thrive in warm soil, and direct sowing avoids transplant shock. For small spaces, consider container growing—use large pots (15+ gallons) with excellent drainage and full sun.
Wrapping up and next steps
Transplanting watermelon plants might seem tricky, but with the right timing, tools, and care, you’ll give your vines the best shot at thriving! Remember to harden off seedlings, choose a sunny spot with well-draining soil, and handle those roots gently for a smooth transition. 🌱
Now that you’re armed with these tips, it’s time to roll up your sleeves and watch your watermelon patch flourish. Happy planting—and may your harvest be sweet and plentiful! Ready to dig in? Grab your gloves and get growing!