
Planting
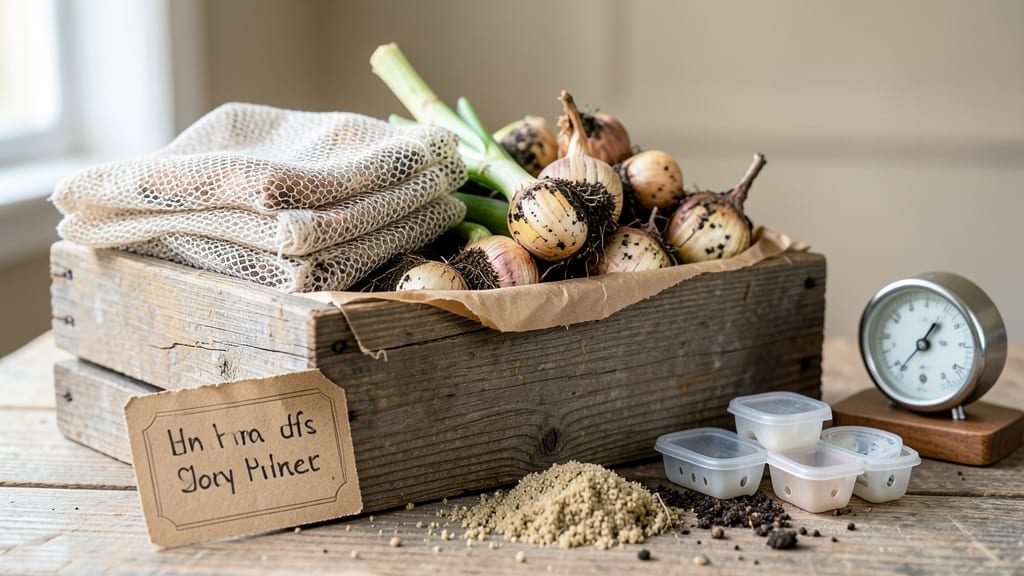
Storing plant bulbs properly means next year’s garden will burst with color instead of fading into memory. ✨ I’ve dug up hundreds of bulbs over the years, and the ones I stored right—cool, dry, and dark—produced the most vibrant blooms.
The difference between a thriving spring garden and a patchy one often comes down to how well you preserve those bulbs over winter.
You’ll need a few simple supplies: breathable mesh bags or cardboard boxes, a dark storage spot (like a basement or garage), and a way to keep humidity low. The key is mimicking their natural dormancy—no light, just enough airflow to prevent rot, and temperatures between 40-50°F.
Summer bulbs like dahlias need slightly warmer storage (60-70°F), while spring bloomers like tulips and daffodils thrive in cooler conditions.
By following these steps, you’ll wake up to lush foliage and bold blooms year after year. The bulbs stay firm, pest-free, and ready to plant—no shriveled or moldy surprises. Even if you’ve struggled before, this method works for beginners and seasoned gardeners alike.
Whether you’re storing a handful of tulips or a bucket of dahlias, the principles stay the same. Just adjust for bulb type and timing—dig up summer bulbs after frost, and leave spring bulbs in the ground until they’ve fully died back. Small tweaks make all the difference!
📚 In This Guide
- What you need
- Instructions
- Tips and common mistakes
- Wrapping up and next steps
What you need
- ● Clean, dry bulbs – Free of soil, pests, or rot (check for soft spots or mold!).
- ● Breathable storage containers – Mesh bags, cardboard boxes, or wooden crates (avoid airtight plastic!).
- ○ Drying agent – Optional but helpful: A handful of peat moss, vermiculite, or silica gel packets (for moisture control).
- ● Labeling supplies – Permanent markers or tags to note bulb types (e.g., tulips, daffodils) and planting dates.
- ● Garden shears or knife – For trimming foliage (leave 1–2 inches of stem).
- ● Soft brush or cloth – Gently remove loose dirt without damaging bulbs.
- ○ Thermometer & hygrometer – Optional: Monitor storage conditions (ideal: 40–50°F and 40–60% humidity).
- ● Plastic wrap or paper towels – For wrapping individual bulbs if storing in humid climates.
- ● Wait until foliage yellows (6–8 weeks after blooming) before digging up bulbs.
- ● Choose a cool, dark, and well-ventilated storage spot (basement, garage, or unheated shed).
- ● Avoid storing near fruits or vegetables (ethylene gas can harm bulbs!).
Step-by-Step guide to storing plant bulbs properly
Here's how I keep my bulbs fresh and ready for vibrant blooms year after year.
🪴 Step 1: Cure and Clean Bulbs After Harvest
Once your bulbs finish blooming and leaves turn brown, dig them up carefully with a fork. Gently brush off excess soil, but don't wash them—moisture can cause rot. Let bulbs air-dry in a shady spot for 2-3 weeks. This curing process thickens the skin and prepares them for storage.
I place them on a mesh rack or hang them in small bunches. Watch for any soft spots or mold—these should be discarded immediately. Healthy bulbs should feel firm and papery-skinned after drying.
🌿 Step 2: Sort and Inspect for Storage Quality
Group bulbs by type, since some varieties (like tulips) need cooler storage than others (like dahlias). Remove any damaged or diseased bulbs—don't store them even if they look mostly fine. I use a small cardboard box with ventilation holes for sorting.
Check for pests like mites or bulb flies. If you spot any, treat with neem oil before storage. Healthy bulbs should have a tight, unbroken skin with no signs of sprouting—this indicates they're ready for dormancy.
☀️ Step 3: Choose the Right Storage Environment
Store bulbs in a cool (40-50°F), dry, and dark location. A basement, garage, or even the back of a closet works well. I use a breathable container like a mesh bag or cardboard box with holes punched in the sides—plastic traps moisture and causes rot.
Keep bulbs away from heating vents or windows that might expose them to light. Check them monthly for moisture or mold. If you notice condensation inside the container, move it to a drier spot immediately.
⏰ Step 4: Monitor and Prepare for Planting
Most bulbs stay dormant for 8-12 weeks before needing replanting. Tulips and daffodils can wait until late fall, while tropical bulbs like cannas may need indoor storage at 50-60°F until spring.
When it's time to plant, inspect bulbs for signs of sprouting. If you see green shoots, it's definitely time to get them in the ground. I like to soak bulbs in a fungicide solution for 10 minutes before planting to prevent disease in the garden.
💧 Step 5: Revive and Replant for Next Season
Plant bulbs at the proper depth—usually 3 times their height—in well-draining soil. Water lightly after planting, but avoid overwatering until you see new growth. I mark their location with small stakes to remember where they are.
Within 4-6 weeks, you should see shoots emerging. This is your signal that storage was successful and the bulbs are ready to bloom again. Keep an eye out for pests or diseases early in the season.
Tips & tricks for perfect plant bulb storage
Real talk: Even experienced gardeners mess up bulb storage—here's what I learned after losing a whole batch of tulips to mold.
Curing is Non-Negotiable: Those 2-3 weeks of air-drying in Step 1 aren't just about removing dirt—they're about hardening the skin. I used to skip this, and my bulbs would develop soft spots during storage. Place them in a spot with airflow but no direct sun, like a covered porch. If you're in a humid climate, extend drying to 4 weeks—just don't rush it.
Storage Container Matters: Never use sealed plastic containers! The 40-50°F temperature range in Step 3 is only half the battle—moisture buildup will ruin everything. I use old mesh produce bags or cardboard boxes with holes punched in the sides. For extra protection, sprinkle a little diatomaceous earth at the bottom to deter pests naturally.
Monthly Check-In Routine: Set a reminder to inspect your stored bulbs every 4 weeks. Look for condensation on the container or any bulbs that feel soft to the touch. This is your early warning system for mold or rot. If you find any affected bulbs, remove them immediately and treat the container with a 10% bleach solution before storing the remaining healthy ones.
Temperature Zones for Different Bulbs: Not all bulbs are created equal! While most need 40-50°F, tropical varieties like cannas actually prefer 50-60°F during storage. I keep mine in separate containers—this simple separation makes all the difference when replanting time comes. Label your containers if you're storing multiple types together.
Pro Tips for Store Plant Bulbs
- Real talk: Even experienced gardeners mess up bulb storage—here's what I learned after losing a whole batch of tulips...
- Curing is Non-Negotiable: Those 2-3 weeks of air-drying in Step 1 aren't just about removing dirt—they're about harde...
- Storage Container Matters: Never use sealed plastic containers! The 40-50°F temperature range in Step 3 is only half ...
Frequently asked questions
Got questions about storing plant bulbs? You’re not alone! Here are some of the most common concerns—and straightforward answers—to keep your bulbs happy until planting season.
Can I store bulbs in the refrigerator?
While a fridge might seem like a cool spot, it’s not ideal for long-term bulb storage. Refrigerators can be too humid or fluctuating in temperature, which risks mold or premature sprouting. Instead, opt for a consistently cool (40–50°F), dry, and dark space like a basement or garage.
How long can I store bulbs before they go bad?
Most bulbs (like tulips, daffodils, and hyacinths) stay viable for 6–12 months if stored properly. Perennials (e.g., lilies, alliums) often last longer—up to 2 years—while tender bulbs (e.g., dahlias, cannas) may only keep for 3–6 months. Check for shriveling, soft spots, or mold as signs it’s time to plant.
What if my bulbs sprout too early?
Early sprouting usually means warmth or light exposure. Move them to a cooler, darker spot immediately. If the shoot is 1–2 inches long, you can gently replant them in a pot with soil, keeping them in a bright but cool window until outdoor temps are safe. Avoid cutting sprouts—it stresses the bulb!
Do I need to remove leaves or stems before storing?
Yes! Trim dead foliage (brown, crispy leaves) to prevent rot, but leave healthy green leaves until they naturally yellow and die back. For bulbs like tulips or hyacinths, remove stems after flowering but keep leaves until they wither—this helps the bulb replenish energy for next year.
What’s the best way to store bulbs in hot climates?
In warm areas, bulbs can overheat or dry out. Double up on protection:
- Use mesh bags or cardboard boxes (better airflow than plastic).
- Store in the coolest part of your home (e.g., under a bed, in a closet with a fan).
- Add a desiccant packet (like silica gel) to absorb excess moisture.
- Check bulbs monthly for dampness or spoilage.
How do I know if a bulb is still good after storage?
Test bulbs before planting by:
- Checking for firmness (squishy = bad; firm = good).
- Looking for shriveled or wrinkled skin (signs of dehydration).
- Smelling for musty or rotten odors (discard these!).
- Gently peeling back the outer layers to spot mold or soft centers.
Wrapping up and next steps
Storing plant bulbs the right way ensures they’ll burst back to life with vibrant blooms next season—cool, dry, and dark are your best friends! Whether you’re prepping daffodils, tulips, or hyacinths, following these steps keeps them healthy and ready to thrive.
Now that you’re armed with the know-how, take action: gather your bulbs, organize your storage space, and give them the care they deserve. Your future garden will thank you! 🌱✨