
Planting
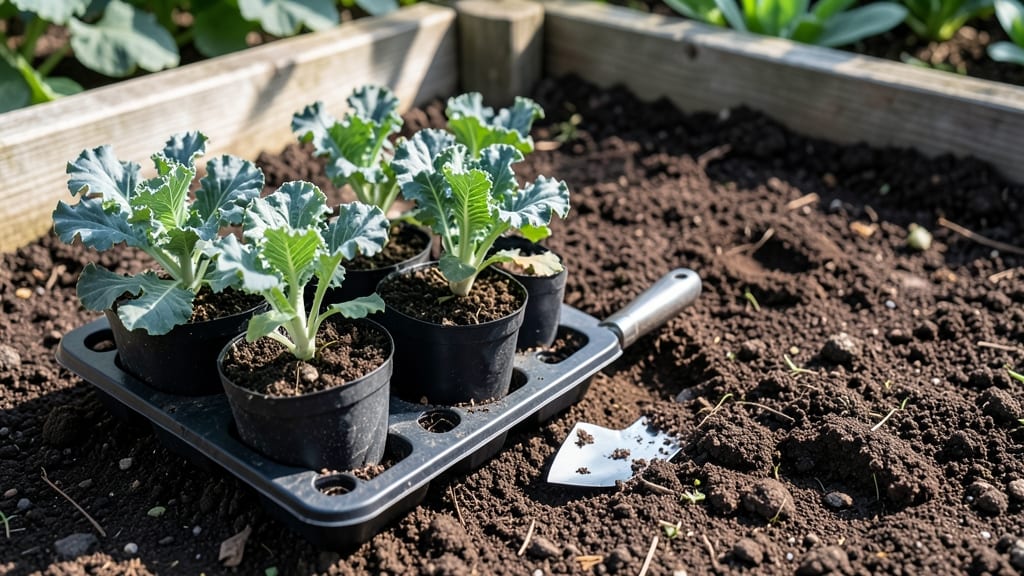
Planting kale seedlings at the right depth is the key to fast, healthy growth 🌱—too shallow and they’ll flop, too deep and they’ll suffocate.
Struggling to get your kale seedlings off to a strong start? Planting them at the wrong depth can stunt growth, weaken stems, or even kill your seedlings before they thrive. The secret to fast, hardy kale lies in understanding the perfect planting depth—and we’re breaking it down step by step.
Most gardeners make the mistake of burying seedlings too deep, thinking it’ll give them stability. But kale roots need room to spread, not be smothered. The ideal depth balances support with airflow, and small adjustments can mean the difference between a thriving plant and a struggling one.
In this guide, you’ll learn the exact depth for each growth stage, how soil type affects planting, and how to fix common mistakes—so you can grow kale that’s fast, robust, and ready for harvest.
Optimal kale seedling depth by growth stage: roots, stems, and survival
When you transplant kale seedlings, the soil depth becomes a critical factor in their survival and growth. Unlike mature plants, seedlings have delicate root systems and stems that can easily be damaged or suffocated if planted incorrectly.
The ideal depth ensures strong stem stability, proper root expansion, and resistance to common diseases like damping-off.
Kale thrives when planted at a depth that balances exposure to sunlight with root development. Too shallow, and the roots won’t anchor properly; too deep, and the stem may rot or the plant will struggle to reach light.
Let’s break down the optimal planting depth for each growth stage, from seedling to mature plant, so you can give your kale the best chance to flourish.
Here’s how to plant kale seedlings at the perfect depth for each stage of growth, including how to adjust for your specific soil conditions and climate.
🌱 Key Rule: Always plant kale seedlings so that the soil line on the stem is just below the lowest set of leaves. This ensures the stem remains sturdy while allowing roots to expand freely.
| Growth Stage | Planting Depth | Root System | Stem Exposure | Notes |
|---|---|---|---|---|
| Seedling (1-2 weeks old) | 1/4 inch deep | Tiny, fragile roots | First true leaves exposed | Use fingers to create small holes; avoid compacting soil. |
| Transplant (3-4 weeks old) | 1/2 inch deep | Developing lateral roots | Lowest leaves at soil line | Firm soil gently around stem to prevent air pockets. |
| Establishment (4-6 weeks) | 3/4 inch deep | Strong taproot forming | Stem buried up to first leaf cluster | Mulch around base to retain moisture. |
| Mature Plant (6+ weeks) | 1-1.5 inches deep | Deep, fibrous roots | Lower leaves at soil level | Avoid burying too deep to prevent rot. |
For young seedlings (1-2 weeks old), planting just 1/4 inch deep is ideal. At this stage, their roots are tiny and delicate, and burying them too deep can suffocate them.
Use your finger to create small holes in the soil and gently place the seedling inside, ensuring the soil line on the stem is just below the lowest set of leaves.
When your seedlings reach the transplant stage (3-4 weeks old), increase the depth to 1/2 inch. This allows the developing lateral roots to spread outward while keeping the stem stable. Be careful not to bury the leaves, as this can lead to rot or disease.
Firm the soil gently around the stem to eliminate air pockets that could hinder root growth.
During the establishment phase (4-6 weeks), your kale plants will need slightly deeper planting at 3/4 inch. This depth supports the formation of a strong taproot, which is essential for anchoring the plant and accessing nutrients deeper in the soil.
Mulching around the base helps retain moisture and protects the stem from temperature fluctuations.
Once your kale reaches maturity (6+ weeks), you can plant it 1-1.5 inches deep. At this stage, the plant’s roots are well-developed, and the stem is sturdy enough to handle deeper burial.
However, avoid planting too deep, as this can cause the lower leaves to rot or attract pests. Keep the lowest leaves at soil level to maximize sunlight exposure for the entire plant.
Understanding how root development and stem exposure change with depth is key to avoiding common issues like damping-off or stem rot. For example, planting too deep can trap moisture around the stem, creating a breeding ground for fungal diseases.
On the other hand, shallow planting may not provide enough stability, especially in windy conditions or when harvesting.
To ensure your kale seedlings thrive, always monitor their growth and adjust care as needed. If you notice yellowing leaves or wilting, it could be a sign of improper planting depth or poor drainage.
Regularly check the soil moisture and adjust your watering schedule to keep the roots healthy and hydrated.
With the right planting
Common planting mistakes that kill kale seedlings (and how to fix them)
If your kale seedlings are struggling to grow, the issue might start with how deep you planted them. Too shallow, and they’ll dry out or topple over.
Too deep, and they’ll suffocate, turning yellow or wilting. I’ve seen gardeners lose entire batches because of this one mistake—and it’s completely avoidable with the right technique.
Most gardeners assume "plant deep" means burying seedlings as far as possible, but kale has delicate stems that need just the right amount of soil coverage. The ideal depth is about 1/4 inch deeper than the seedling’s current soil line.
This ensures stability without smothering the stem. Let’s fix common mistakes before they kill your crop.
⚠️ Wrong Depth = Dead Seedlings
Planting kale seedlings too deep or shallow causes:
- Stem rot from buried stems (anaerobic conditions)
- Toppling from shallow roots (wind or rain damage)
- Yellowing leaves from poor nutrient access
- Stunted growth from stress
Fix it: Dig a hole 1/4 inch deeper than the seedling’s root ball. Gently press soil around the stem—never pack it tightly.
One of the biggest red flags is yellowing leaves on your kale seedlings. This often signals the stem is buried too deep, cutting off oxygen to the lower leaves. If you notice this, carefully dig up the seedling and adjust the depth.
Replant it at the correct level, then water gently to settle the soil without disturbing the roots.
Shallow planting causes another common issue: toppling seedlings. When roots aren’t anchored, even a light breeze can snap fragile stems. To prevent this, press soil firmly around the base of the seedling after planting.
A quick trick? Use your finger to create a slight trench around the stem—this helps water drain away from the base, reducing rot risk while keeping the seedling upright.
If your seedlings are wilting despite regular watering, check the soil depth again. Overwatering shallowly planted seedlings can drown their roots, while underwatering deep-planted ones leaves them thirsty. The fix?
Water deeply but infrequently—aim for 1 inch of water per week, delivered directly to the soil, not the leaves. A soaker hose makes this easy.
For a quick troubleshooting checklist, grab a notebook and jot down these steps:
- 🔍 Check seedling depth—should be 1/4 inch deeper than original soil line
- ✂️ Trim any yellow or damaged leaves (don’t remove more than 1/3 of the plant)
- 💧 Water at the base, not the leaves, to avoid fungal issues
- ☀️ Ensure full sun (6+ hours daily)—kale won’t thrive in shade
With these fixes, your kale seedlings will stand tall and strong, ready to grow into healthy, harvest-ready plants. The key is patience and precision—once you master the perfect planting depth, you’ll never lose seedlings to depth errors again! 🌱