
Planting
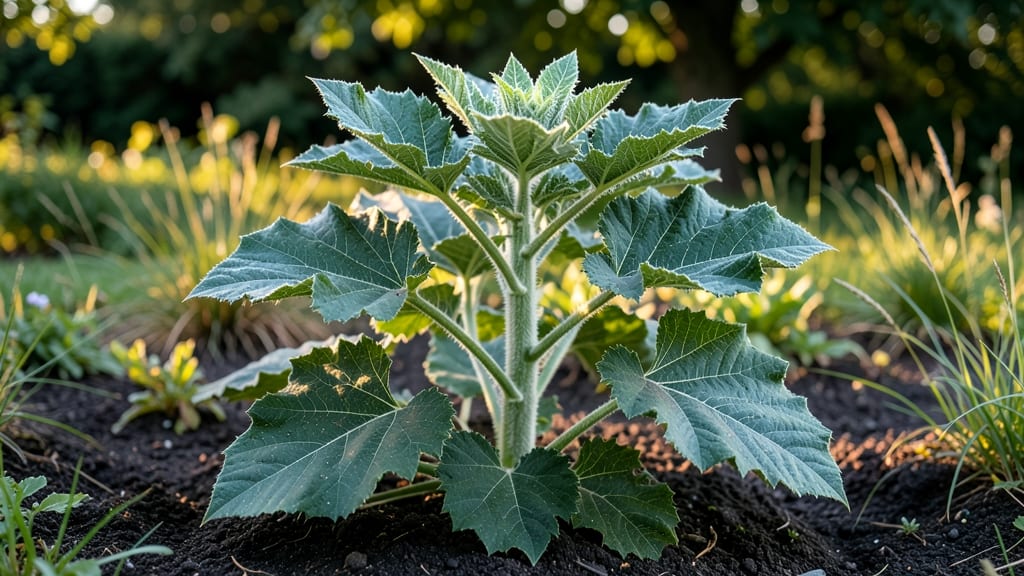
Spotting that first young hogweed plant can save you from a garden takeover. 🌱 I've pulled these invasive plants by the roots for years, and the key is acting fast before they reach their towering, sun-blocking glory.
That delicate young growth is your only chance to stop it before it spreads across your yard like a green carpet. The real danger isn't just the space hogweed occupies—it's the sap that causes painful burns when exposed to sunlight.
I learned that the hard way after a misidentified plant left my arm itching for weeks. Always wear long sleeves, gloves, and safety goggles when dealing with these plants, no matter how small they seem.
You'll need a sturdy trowel, heavy-duty trash bags, and a way to dispose of the plants properly (never compost them). The roots are surprisingly deep for something so young, so dig at least 6 inches deep to get the whole plant.
Even a tiny root fragment can regrow into a new plant. This is where most people go wrong—they pull the top growth but leave roots behind. I've seen hogweed return more aggressively after partial removal. The secret is persistence and proper disposal.
With the right technique, you can reclaim your garden space before these plants become impossible to remove.
📚 In This Guide
- What you need
- Instructions
- Tips and common mistakes
- Wrapping up and next steps
What you need
- ● Gloves (waterproof, long-sleeved) – Protects skin from sap irritation (nitrile or rubber, size medium/large).
- ● Sturdy gardening shears or loppers – For cutting thick stems (blade length: 12–18 inches; sharp for clean cuts).
- ● Heavy-duty trash bags (20–30 gallon) – Seal hogweed debris to prevent seed spread (use double-bagging for large plants).
- ● Spray bottle with soapy water – Helps rinse sap off skin/tools (1 tbsp dish soap per gallon of water).
- ● Garden fork or trowel – For digging deep roots (6–12 inches long, sturdy metal).
- ● Disposable coveralls or old clothes – Covers arms/legs to avoid sap contact.
- ● Goggles – Protects eyes from sap splashes (especially when cutting).
- ● Vinegar (20–30% acetic acid) or herbicide (glyphosate) – For stubborn root systems (apply only to targeted areas).
- ● Plant identification guide/app (e.g., iNaturalist) – Confirms hogweed vs. lookalikes (like cow parsnip).
- ● Wheelbarrow or bucket – Hauls debris to disposal site efficiently.
Step-by-Step guide to identifying and removing young hogweed plants
Here's how I spot and eliminate this invasive plant before it takes over your yard.
🌱 Step 1: Learn the Key Visual Clues of Young Hogweed
Young hogweed plants have deeply lobed leaves that look like smaller versions of carrot plant leaves, but with a hairy texture. The stems are purplish-green and hollow, often with white blotches. Look for 3-5 inch tall plants with leaves growing in a rosette pattern close to the ground.
This is the critical stage—once it reaches 3 feet tall, removal becomes much harder. I always check areas where I've seen it before in early spring, when new growth first appears. The key is catching it before those distinctive white sap-filled stems develop.
✂️ Step 2: Gather Your Removal Tools
You'll need thick gardening gloves (hogweed sap causes severe burns), a sharp shovel or spade, and a heavy-duty trash bag. I also keep a small spray bottle with vinegar on hand for any missed roots that might sprout later.
Never use your hands—even a tiny sap exposure can cause painful blisters that take weeks to heal. The gloves should cover your wrists completely. Work on a dry day when the soil is firm enough to dig cleanly without leaving root fragments behind.
🪴 Step 3: Dig Out the Entire Root System
Use your shovel to cut a 12-inch radius around the plant, going down at least 6 inches deep. Hogweed has a deep taproot that can regrow from even small pieces left in the ground. I always check the soil for any remaining root fragments—white, fibrous roots mean you haven't gotten them all.
Once removed, bag the entire plant immediately. Don't compost it—hogweed seeds can remain viable for years. The trash bag should be sealed tightly and disposed of in your outdoor trash bin, not your regular household trash.
💧 Step 4: Treat the Area to Prevent Regrowth
After removal, spray the area with undiluted vinegar or a 20% salt solution to kill any remaining roots. I use a spray bottle for small patches or a pump sprayer for larger areas. This prevents new shoots from emerging from any missed root pieces.
Monitor the area for 4-6 weeks—if any new growth appears, repeat the removal process. Hogweed is persistent, so patience is key. I mark treated areas with small flags to remember where I've already worked.
☀️ Step 5: Prevent Future Hogweed Spread
Hogweed spreads through both seeds and root fragments, so prevention is crucial. I always inspect new plants before bringing them home, especially if they resemble hogweed's early growth. Remove any weeds that look suspicious immediately.
Keep your lawn and garden areas well-maintained—hogweed thrives in neglected spaces. I also recommend checking nearby properties, as hogweed spreads easily through wind and water. The more you eliminate now, the less chance it has to establish itself permanently.
Tips & tricks for hogweed removal success
These battle-tested strategies will help you tackle hogweed like a pro—without the painful consequences. Real talk: I learned the hard way after dealing with regrowth from missed roots, so here's what actually works.
Visual Confirmation is Key: In Step 1, when you're checking for that 3-5 inch height and deeply lobed leaves, run your gloved fingers along the stem. Hogweed stems feel hollow and slightly spongy—this is your best clue when leaves aren't fully developed yet. I've found plants as small as 2 inches tall that still had that telltale hollow stem.
Root Removal Technique: For Step 3, think of it like digging a well—not just a shallow hole. After cutting that 12-inch radius, wiggle your shovel gently to feel for resistance. If you hit a fibrous, white root, you haven't gotten it all. I keep a small trowel handy to scrape the sides of the hole afterward—you'd be surprised how many tiny rootlets cling to the soil walls.
Safety First: The gloves in Step 2 aren't optional—they're non-negotiable. I've seen people get burned from just brushing against the sap. Pro tip: Keep a damp cloth handy to wipe down any tools that might have touched the plant, then dispose of the cloth with the plant material. That white sap dries clear, so you might not even notice it on your tools until it's too late.
Monitoring Strategy: When you're marking treated areas in Step 4, use something bright like orange flags or even colored surveyor's tape. I've walked right past treated spots because they blended into the landscape. The 4-6 week monitoring period is crucial—hogweed can sprout from root fragments that small you'd miss at first glance.
Pro Tips for Hogweed Young Plant
- These battle-tested strategies will help you tackle hogweed like a pro—without the painful consequences. Real talk: I...
- Visual Confirmation is Key: In Step 1, when you're checking for that 3-5 inch height and deeply lobed leaves, run you...
- Root Removal Technique: For Step 3, think of it like digging a well—not just a shallow hole. After cutting that 12-in...
Frequently asked questions
Got questions about young hogweed plants? You're not alone!
Here are some of the most common concerns—plus quick answers to help you stay ahead of this invasive menace.
How can I tell if a young hogweed plant is sprouting in my yard?
Look for hairy stems (like a fuzzy stalk) and deeply lobed leaves that resemble carrot tops. Young hogweed often grows in clusters near water or disturbed soil. Pro tip: Rub the stem—if it oozes a milky sap, it’s likely hogweed!
When is the best time to remove young hogweed plants?
Act early—before flowering (usually spring to early summer). Pull or dig them up before seeds form to prevent spread. Warning: Wear gloves and protective clothing—hogweed sap can cause severe skin burns when exposed to sunlight!
What’s the best way to dispose of hogweed after removal?
Seal plants in a plastic bag and throw them in the trash—never compost! If possible, double-bag and leave them out for a few days to dry first. This reduces the risk of accidental regrowth or spreading seeds.
Are there natural alternatives to chemical herbicides for hogweed?
Yes! Try vinegar-based herbicides (20-30% acetic acid) or smothering with thick mulch. For stubborn patches, repeat treatments weekly. Bonus: Manual removal works best for small, young plants—just be thorough!
What should I do if I accidentally touch hogweed sap?
Wash the area with soap and water immediately, then apply aloe vera or calamine lotion. Avoid sunlight for 48 hours—exposure can cause painful burns. If irritation persists, seek medical help. Prevention: Wear long sleeves and gloves when pulling hogweed!
Wrapping up and next steps
Identifying and removing young hogweed plants early is your best defense against its invasive spread—don’t wait until it’s too late! 🌱 With the right tools, knowledge, and a little vigilance, you can protect your garden (and local ecosystems) from this towering menace. Next up: Share this guide with neighbors or local gardening groups to create a community effort against hogweed—because teamwork makes the toughest weeds tremble! 💪