
Planting
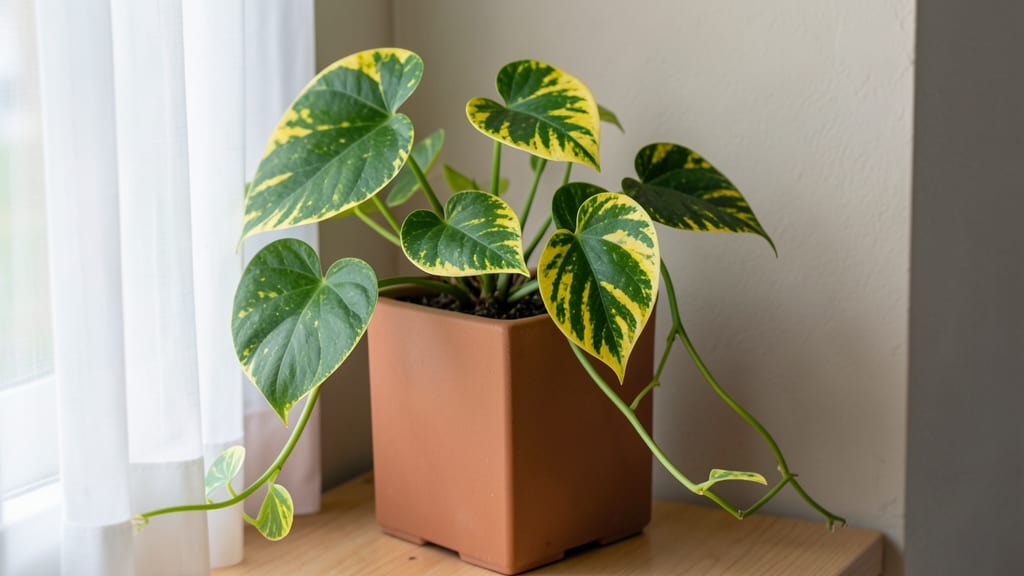
Turn your blank wall into a thriving vertical plant wall indoor—where every inch becomes a lush, green escape. 🌿 I’ve transformed my tiny apartment’s bare corner into a living jungle that purifies air, boosts mood, and looks stunning without taking up floor space.
The secret? Choosing the right plants, structure, and care routine that fits your light and lifestyle.
Start with lightweight, trailing plants like pothos, spider plants, or ferns—they thrive in modular pockets or pallet walls while needing minimal light. For a bold look, mix in succulents or herbs like thyme, but skip heavy vines unless your wall can handle the weight.
A simple DIY kit or pre-made system (like felt pockets or wooden crates) makes setup a breeze, and drip irrigation keeps roots happy without daily watering.
By week 4, you’ll see vibrant growth creeping up the wall, turning a forgotten space into a fragrant, leafy oasis. The air feels fresher, your stress melts away, and guests will ask where you hid the jungle.
Plus, it’s the perfect way to grow herbs or flowers year-round, even in a sun-starved apartment.
Whether you’re a beginner or a plant enthusiast, this project scales to any space—from a single shelf to a full-room feature. The key? Start small, test your setup, and let nature do the rest. Ready to grow up?
📚 In This Guide
- What you need
- Instructions
- Tips and common mistakes
- Wrapping up and next steps
What you need
- ● Plant wall panel or frame: Pre-made modular panels (e.g., hydroponic felt pockets) or a DIY wooden frame (1x2 or 2x4 lumber, 4+ ft tall). Size: Adjust based on wall space (e.g., 4’x8’ for a full statement wall).
- ● Growing medium: Hydroponic option: Coconut coir, rockwool, or hydroponic clay pebbles (5–10 lbs, depending on panel size).
- ● Soil option: Lightweight potting mix (e.g., cactus/succulent blend) with perlite (20–30 lbs).
- ● Plants: Choose low-maintenance, shallow-rooted varieties like: Pothos
- ● Spider plants
- ● Ferns
- ● Sedums
- ● Small ferns or moss (for texture).
- ● Watering system: Drip irrigation kit (with adjustable emitters, e.g., blank">Aquascape).
- ● OR_ a reservoir tray (for capillary action) + wicking material (e.g., landscape fabric).
- ● Fasteners: L-brackets, screws, or adhesive hooks (for mounting panels). Quantity: 4–6 per panel.
- ● Drainage solution: Plastic liner (6-mil thickness) or waterproof underlayment.
- ● LED grow lights: Full-spectrum (12W–24W per panel) for low-light areas. 💡
- ● Decorative elements: Non-toxic paint (for wooden frames), pebbles, or moss for a natural look.
- ● Humidity tray: Shallow tray with water + pebbles (to boost moisture for tropical plants).
- ● Plant labels: Mini tags or chalkboard labels for tracking varieties.
- ● Fertilizer: Hydroponic nutrients or liquid fertilizer (diluted to half-strength).
- ● Wall prep: Ensure your wall is clean, dry, and structurally sound. For heavy panels, use stud finder to locate supports.
- ● Power access: Nearby outlet for grow lights/water pump (if using electric systems).
- ● Time commitment: Initial setup: 2–4 hours; maintenance: 10–15 mins/week.
- ● Budget: $100–$500+ (DIY vs. pre-made kits).
Step-by-step instructions for building your indoor vertical plant wall
Here's how to create a lush, space-saving green wall that thrives indoors.
🪴 Step 1: Choose Your Structure and Gather Materials
Start with a sturdy frame—wooden crates, a pre-made wall panel, or even a hanging grid system all work. I like using a 6-foot-tall wooden frame with 1-inch grid spacing for small plants. Make sure your structure can support 10-15 pounds per square foot once plants are established.
Gather your materials: hydroponic felt or coconut coir for moisture retention, plastic plant trays to catch runoff, and small pots or planters for each plant. If using a DIY approach, zip ties or landscape fabric will help secure plants in place. Measure twice—your plants will thank you for a stable foundation.
☀️ Step 2: Install the Wall and Set Up Irrigation
Mount your structure securely on the wall, ensuring it's level. For a 4-plant wall, I use a drip irrigation system with a 1-gallon reservoir at the top. The tubing should deliver water evenly to each plant pocket. If you don’t have a system, a spray bottle works for smaller setups—just water every 2-3 days until the top inch of felt feels damp.
Line the back of the wall with hydroponic felt, cutting it to fit snugly. This keeps roots hydrated without drowning them. For extra stability, staple the felt to the frame so it doesn’t shift when watered. Test your irrigation by running a small amount of water through—you’ll see it trickle evenly to the bottom.
🌱 Step 3: Plant Your Selections
Choose low-maintenance, shallow-rooted plants like pothos, spider plants, or ferns—they thrive in tight spaces. Remove each plant from its nursery pot and gently tease apart the roots if they’re crowded. Place 1 plant per pocket, pressing the soil lightly into the felt to secure it. Space plants 4-6 inches apart for airflow.
Here’s the thing—don’t overcrowd. Too many plants compete for water and light, leading to weak growth. If you’re using succulents, space them 6-8 inches apart since they need less frequent watering. Watch for yellowing leaves—a sign of overwatering or poor drainage.
💧 Step 4: Adjust Light and Water for Success
Most indoor vertical walls need bright, indirect light—a south- or west-facing window works best. If natural light is weak, add a LED grow light 6-12 inches above the wall for 12-14 hours daily. You’ll know your plants are happy when they grow evenly toward the light without stretching.
Water 2-3 times weekly, checking the felt’s moisture level. If it’s dry to the touch, it’s time to water. For a self-watering system, fill the reservoir once a week—the felt will wick moisture as needed. Avoid letting water pool at the bottom; drainage holes are a must to prevent root rot.
✂️ Step 5: Maintain and Prune for Long-Term Growth
Trim leggy stems or yellowing leaves every 4-6 weeks to encourage bushier growth. Use clean, sharp scissors to snip just above a leaf node. This keeps your wall looking full and healthy. If you notice white mold on the felt, it’s time to replace it—this fungus thrives in damp conditions and can harm roots.
Fertilize once a month with a balanced liquid fertilizer (10-10-10) diluted to half strength. Over-fertilizing burns roots, so less is more. Rotate plants quarter-turn weekly so they grow evenly toward the light. With consistent care, your wall will stay vibrant for years—and who doesn’t love a little green therapy?
Tips & tricks for building your indoor vertical plant wall
Building a thriving vertical garden takes more than just assembling materials—it's about creating the perfect environment for your plants to flourish. Here's what I've learned from years of experimenting with these space-saving green walls.
Structure Stability: Don't underestimate the importance of a sturdy frame. I've seen walls collapse under the weight of established plants, so always mount your structure using heavy-duty anchors or brackets. For a 6-foot-tall wall, use at least two anchors per side to distribute weight evenly. If you're unsure about your wall's load-bearing capacity, consider using a freestanding frame instead—it's the safer choice for renters or walls that can't support extra weight.
Moisture Management: The hydroponic felt or coconut coir is your secret weapon for consistent moisture, but it's easy to overdo it. I learned this the hard way when my first wall developed root rot from too much water. Always check the top inch of felt before watering—it should feel damp, not soggy. For a 4-plant wall, your 1-gallon reservoir should last about a week with proper moisture control. If you notice water pooling at the bottom, immediately add drainage holes or adjust your watering schedule.
Light Optimization: That 12-14 hours of LED grow light isn't just arbitrary—it mimics natural daylight cycles and prevents leggy growth. Position your grow light so it's parallel to the wall, not directly above. This creates even light distribution across all plants. I like to use a timer for my grow lights to maintain consistency. If you notice plants stretching toward one side, rotate the entire wall a quarter turn weekly to encourage even growth. For maximum efficiency, choose a white or cool-toned LED bulb designed specifically for plants.
Plant Selection Strategy: Not all plants are created equal for vertical gardens. Pothos and spider plants are my go-to choices because they're forgiving and adaptable, but don't be afraid to mix in some air plants or mosses for variety. When selecting plants, look for ones with similar watering needs—grouping them together makes maintenance easier. Pro tip: Start with 1 plant per pocket as instructed, but leave some empty spaces. You can always add more plants later as your wall matures and you understand their growth patterns better.
Pro Tips for Vertical Plant Wall Indoor
- Building a thriving vertical garden takes more than just assembling materials—it's about creating the perfect environment for your plants to flourish.
- Structure Stability: Don't underestimate the importance of a sturdy frame.
- Moisture Management: The hydroponic felt or coconut coir is your secret weapon for consistent moisture, but it's easy to overdo it.
Frequently asked questions
Got questions about creating your dream indoor vertical plant wall? You're not alone! Here are some of the most common concerns—and their easy solutions—to help you green up your space with confidence.
How much sunlight do indoor vertical plants really need?
Most indoor vertical gardens thrive with moderate, indirect light (think bright windowsills or grow lights). Leafy plants like pothos or ferns tolerate low light, while succulents or herbs need 4–6 hours of sunlight daily. Rotate plants occasionally for even growth!
What’s the best way to water a vertical plant wall?
Use a self-watering system (like a drip irrigation kit) or a spray bottle for gentle, even moisture. Water from the top down to avoid soggy roots at the bottom. Check soil moisture weekly—overwatering is the #1 killer of vertical gardens!
How long does it take to see noticeable growth?
Patience pays off! With proper care, you’ll see new leaves in 4–6 weeks, but full lushness takes 3–6 months. Fast growers like mint or spider plants show results quicker, while slower varieties (e.g., orchids) take longer. Adjust lighting/nutrients if growth stalls.
What should I do if pests show up?
Isolate the affected plant and wipe leaves with neem oil or soapy water. Common culprits: spider mites (tiny webs) or aphids (sticky residue). Boost humidity (pests hate it!) and inspect new plants before adding them to your wall.
Are there budget-friendly alternatives to pre-made vertical planters?
Try:
- DIY pallet gardens (cheap wood + fabric pockets)
- Hanging shoe organizers (fill pockets with soil)
- Upcycled crates or ladders (drill drainage holes!)
Wrapping up and next steps
Transforming your indoor space with a vertical plant wall isn’t just about aesthetics—it’s a breath of fresh air (literally!) that boosts your mood, purifies the air, and adds life to small or large spaces alike.
Whether you’re a seasoned gardener or a beginner, this project is your chance to grow creativity and connection with nature—one leaf at a time. 🌱
Ready to dive in? Start small—pick your favorite plants, gather your materials, and let your green thumb shine! Your perfect vertical oasis is just a wall (and a little patience) away.