
Planting
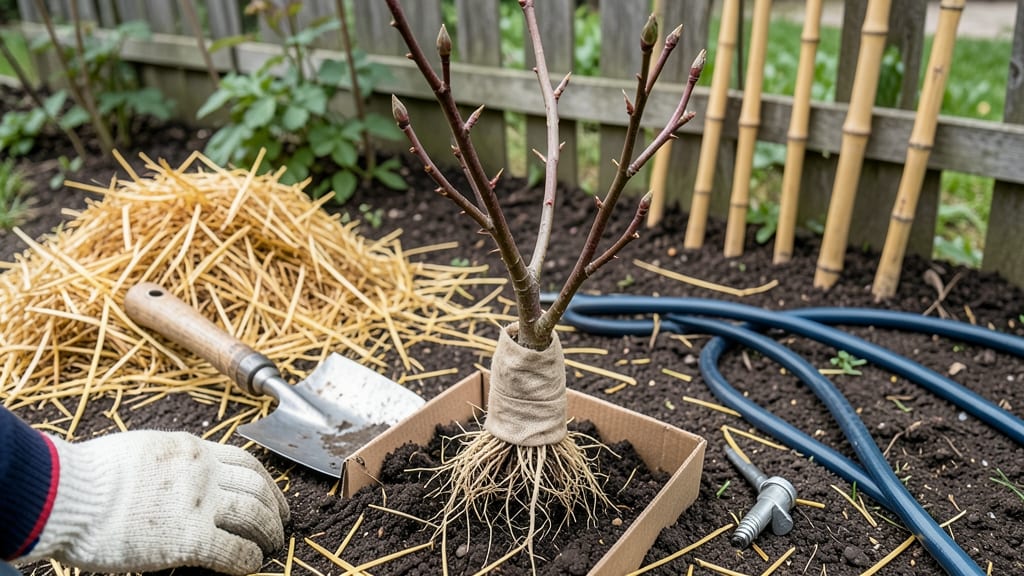
Winter isn’t the usual time to transplant roses—but when done right, it’s a foolproof way to move plants with minimal stress. ✂️ I’ve transplanted dozens of roses in late winter, and the key is working with dormancy, not against it.
Cold-hardy varieties like ‘Knock Out’ or ‘Dr. Huey’ handle winter moves best, while tender roses need extra protection. The secret lies in timing and root care. Transplant on a 40°F day when soil isn’t frozen, and wrap roots in burlap or straw for insulation.
Water deeply before and after moving to help roots establish before spring growth begins. Most roses wake up stronger in spring if you follow these steps. You’ll end up with roses that look like they’ve been in their new spot for years—no wilting, no shock, just steady growth.
The trick is patience: winter moves reward careful prep, not rushed action. Perfect for gardeners who want to rearrange beds without summer stress. Works in zones 3-8, but adjust for your local frost dates. Let’s get those roses settled for good!
📚 In This Guide
- What you need
- Instructions
- Tips and common mistakes
- Wrapping up and next steps
What you need
- ● Transplanting shovel or spade: A sharp, sturdy 18-inch garden spade (or digging fork for rocky soil).
- ● Garden gloves: Heavy-duty, waterproof gloves (e.g., Mechanix Wear or FrogToggs) to protect hands from thorns and cold.
- ● Pruning shears: Bypass pruners (e.g., Felco F-2) for clean cuts on stems and roots.
- ● Burlap or landscape fabric: 3–4 feet wide, enough to wrap roots (1 roll typically covers 20–30 plants).
- ● Organic mulch: 4–6 inches of straw, shredded leaves, or wood chips (avoid fresh wood chips—they can mat down).
- ○ Root stimulator (optional but helpful): A mycorrhizal inoculant or seaweed extract (e.g., Fish Emissions) to boost root recovery.
- ● Watering can or hose with nozzle: For gentle hydration post-transplant (avoid heavy water pressure).
- ● Insulation materials: Pine needles or evergreen boughs (for natural windbreaks).
- ● Cardboard boxes or burlap sacks (to wrap individual plants if temps drop below 10°F).
- ○ Thermometer (optional): A soil thermometer to monitor root zone temps (ideal range: 35–50°F).
- ● Stakes or plant ties: 3–4 ft bamboo stakes + soft ties to support roses during recovery.
- ● ✅ Choose the right timing: Transplant on a cool (40–50°F), cloudy day or early morning to reduce stress.
- ● ✅ Prep the new location: Amend soil with compost (2–3 inches mixed into top 12 inches) and ensure good drainage.
- ● ✅ Hardiness check: Verify your rose variety’s USDA zone (e.g., Knock Out® roses tolerate Zone 4 with protection).
Step-by-Step instructions for transplanting roses in winter
Here's how to move roses without shocking them—even in cold weather.
🪴 Step 1: Choose the Right Time and Prepare the New Location
Transplant roses in late fall or early winter (after the first hard frost but before the ground freezes solid). This gives roots time to establish before spring growth. Pick a spot with full sun (6+ hours daily) and well-draining soil—roses hate soggy roots. I always test drainage by digging a hole, filling it with water, and waiting to see if it drains within an hour.
Amend the soil with 2-3 inches of compost mixed into the top 12 inches of the hole. Roses love rich, slightly acidic soil (pH 6.0–6.5). If your soil is heavy clay, add a handful of perlite or sand to improve drainage. Mark the new planting spot with stakes so you don’t lose track during the move.
✂️ Step 2: Prune and Dig Up the Roses Carefully
Use clean, sharp pruners to trim back the canes by one-third before digging. This reduces stress and encourages new growth in spring. Cut at a 45-degree angle just above an outward-facing bud. Avoid pruning too late—you want the plant to enter dormancy with energy reserves intact.
Dig a wide trench around the rose bush, going 12–18 inches deep and 12 inches out from the base. Use a spade to loosen roots gently—don’t tear them. Lift the bush carefully, keeping as much root ball intact as possible. If roots break, trim them with pruners and dust the cuts with rooting hormone to encourage healing.
💧 Step 3: Move and Replant with Root Protection
Carry the rose to its new home immediately—exposed roots dry out fast. Place it in the prepared hole so the graft union (a swollen bump near the base) sits 2–3 inches above soil level. This protects it from cold and prevents soil-borne diseases from reaching the graft. Backfill with the amended soil, tamping lightly to remove air pockets.
Water deeply to settle the soil and eliminate air gaps. Then, mound 4–6 inches of mulch (like straw or shredded bark) around the base, keeping it 6 inches away from the stem. This insulates roots from freezing temperatures. In extreme cold zones, add a breathable burlap wrap around the canes for extra protection.
☀️ Step 4: Winter Care for Cold-Hardy Survival
Check the mulch monthly—add more if it decomposes or washes away. Avoid heavy mulch that smothers the plant. In Zone 5 or colder, add a lightweight frost blanket over the bush in late fall, securing it with stakes. Remove it in early spring before new growth starts.
Skip fertilizing until spring—dormant roses don’t need nutrients. If you see brown, mushy stems in spring, it’s a sign of winter damage. Prune out dead canes in late winter (just before buds swell) to encourage fresh growth. Patience pays off—roses transplanted in winter often bloom earlier and more vigorously the next season.
Tips & tricks for perfect winter rose transplanting
Winter rose transplanting can be tricky, but these insider tips will help your roses thrive in their new home.
Timing Secret: That late fall/early winter window is critical—aim for when daytime temps are above freezing but nights dip below. I’ve found that moving roses after the first hard frost (when soil temps hit around 35°F) gives roots time to settle before spring growth begins. If you miss this window, wait until early spring, but expect slower recovery.
Root Protection Strategy: When lifting roses in Step 2, water the soil thoroughly the day before digging. This helps preserve the root ball and reduces shock. After replanting, I like to add a layer of 4-6 inches of straw mulch right after watering—this keeps roots insulated and moist. For extra cold protection in Zone 5+, wrap canes loosely with burlap (not plastic!) to prevent windburn.
Soil Prep Insight: Don’t skip the drainage test in Step 1—poor drainage is the #1 reason roses fail. If your soil is heavy clay, mix in perlite or coarse sand to create air pockets. I’ve seen roses in amended soil establish roots twice as fast compared to unamended spots. For acidic lovers, a sprinkle of sulfur (½ cup per hole) can help adjust pH if needed.
Winter Care Watch: Those monthly mulch checks in Step 4 are non-negotiable. In my experience, mulch breaks down faster than expected in wet winters—top it up every 4-6 weeks. And here’s a pro move: in late winter, gently brush away old mulch before new growth appears to prevent rot at the base.
Pro Tips for Transplant Roses In Winter
- Winter rose transplanting can be tricky, but these insider tips will help your roses thrive in their new home.
- Timing Secret: That late fall/early winter window is critical—aim for when daytime temps are above freezing but nights dip below.
- Root Protection Strategy: When lifting roses in Step 2, water the soil thoroughly the day before digging.
Frequently asked questions
Got questions about transplanting roses in winter? You’re not alone! Here are some common concerns and expert answers to help you succeed.
Can I transplant roses in winter if the ground is frozen?
Transplanting when the ground is frozen is not ideal—roots need moist, workable soil to establish. Wait until the soil is cool but thawed (around 40–50°F) for best results. If you must act in freezing temps, focus on bare-root roses or use a heated mat to thaw the area first.
What’s the best time of winter to transplant roses?
The dormant season (late fall to early spring) is perfect—aim for November through March (before buds swell). In colder zones (USDA 3–6), late winter (February) is ideal. Avoid extreme cold snaps; aim for 40–50°F days with above-freezing nights.
Do I need to prune roses before transplanting in winter?
Yes! Prune 1/3 of the canes to reduce stress and encourage new growth. Cut just above an outward-facing bud at a 45° angle. Avoid heavy pruning—save the rest for early spring. Pro tip: Sterilize shears with rubbing alcohol to prevent disease.
How do I protect newly transplanted roses from winter damage?
Mound 6–12 inches of mulch (straw, leaves, or wood chips) around the base (but not touching stems). Wrap canes with burlap or rose cones and secure with twine. For extreme cold (-20°F+), add a cloche or frost blanket.
What if my transplanted roses look wilted or stressed in spring?
Wilting can mean root shock or overwatering. Reduce watering slightly and fertilize lightly with balanced 10-10-10 in early spring. If leaves yellow, check for nutrient deficiency (add compost) or fungus (treat with neem oil).
Are there winter-hardy rose varieties better for transplanting?
Yes! Choose David Austin English roses, Knock Out roses, or Dr. Huey (hybrid tea). These handle cold better. Avoid tropical varieties (e.g., Noisette)—they’re frost-sensitive. Check your USDA zone for local recommendations!
Wrapping up and next steps
Transplanting roses in winter can be a rewarding way to refresh your garden while giving your plants a fighting chance against harsh conditions. With the right preparation—like choosing cold-hardy varieties, protecting roots, and timing your move correctly—you’ll set your roses up for a vibrant spring comeback. 🌹❄️
Now that you’re armed with tips and tricks, roll up your sleeves and give it a try! Start by assessing your roses’ health, gather your supplies, and follow the steps with confidence. Your future blooms will thank you—and who knows? You might just discover a new winter gardening passion.
Next step: Mark your calendar for early winter (before the ground freezes) and get ready to transform your garden into a winter wonderland of resilience!