
Planting
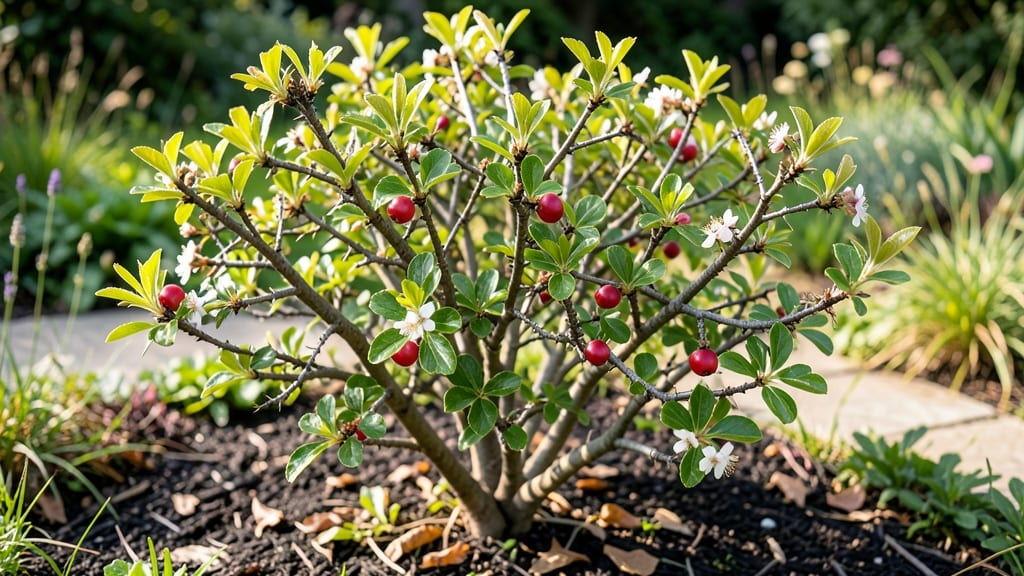
My first thorny bush hedge turned my backyard from an open invitation to a privacy fortress—and it only took one season to transform. 🌿 The right thorny plant (like barberry or hawthorn) creates a living barrier that deters intruders, supports wildlife, and stays lush year after year with minimal effort.
You’ll need full sun, well-draining soil, and a little patience—these plants grow fast once established. I started with 18-inch transplants spaced 2-3 feet apart, and within a year, they formed an impenetrable (but beautiful) green wall. The key? Pruning in late winter to encourage dense growth and keep thorns manageable.
By summer, you’ll have a thriving hedge that blooms, berries, and even attracts birds—while keeping nosy neighbors at bay. The best part? Once rooted, they require almost no maintenance beyond an annual trim. Perfect for property lines, garden edges, or anywhere you want nature’s built-in security.
Here’s how to pick, plant, and care for yours—safely and effectively.
📚 In This Guide
- What you need
- Instructions
- Tips and common mistakes
- Wrapping up and next steps
What you need
- ● Thorny bush plant: Choose from options like Pyracantha, Berberis, or Gleditsia (1-3 mature plants, depending on desired coverage).
- ● Well-draining soil: 50 lbs of a mix of garden soil, compost (20%), and perlite/sand (10%) for aeration.
- ● Fertilizer: Slow-release granular fertilizer (10-10-10 ratio, 1 lb per plant).
- ● Mulch: 2-3 inches of organic mulch (e.g., wood chips or straw) to retain moisture.
- ● Watering can/hose: With a gentle spray nozzle for hydration.
- ● Gloves & long sleeves: Thorn-proof gardening gloves and protective clothing (thorns are no joke! 😉).
- ● Pruning shears: Sharp, bypass-pruners (sterilized with rubbing alcohol).
- ● Trowel & shovel: For digging holes (12-18 inches deep, 2x wider than root ball).
- ● Stakes & twine: 4-6 ft wooden stakes and twine to support young plants.
- ● Soil pH tester: Ideal pH range: 6.0–7.0 (most thorny bushes thrive here).
- ○ Drip irrigation system: Optional but helpful for consistent moisture (especially in dry climates).
- ● Post-hole digger: If installing a trellis or fence for climbing varieties.
- ● Plant food (liquid): For a mid-season growth boost (e.g., seaweed-based fertilizer).
Step-by-Step instructions for planting thorny bushes as privacy barriers
Here's how to create a natural, impenetrable hedge that thrives with minimal fuss.
🌱 Step 1: Choose the Right Location and Soil
Pick a spot with full sun exposure (6+ hours daily)—thorny bushes grow fastest and develop denser foliage when they get plenty of light. I always test the soil first by digging a 6-inch hole and checking the drainage. If water pools after 10 minutes, amend the soil with 2-3 inches of compost to improve drainage and aeration.
Thorny bushes hate soggy roots, so avoid low-lying areas where water collects. The ideal spot has slightly acidic to neutral soil (pH 6.0-7.0). You can test your soil with a simple kit from the garden center—just follow the instructions to get an accurate reading. If your soil is too alkaline, mix in 1 cup of peat moss per planting hole to lower the pH slightly.
🪴 Step 2: Plant Bushes at Proper Spacing and Depth
Dig holes twice as wide as the root ball but only as deep as the container's root base. This prevents burying the stem too deep, which can cause rot. Gently remove each plant from its container and loosen the roots if they're circling tightly—just tease them apart with your fingers. Place the plant in the hole so the top of the root ball sits 1 inch below the soil line.
For a dense barrier, space bushes 3-4 feet apart in rows 4 feet apart. This gives them room to grow without crowding, which leads to weak, leggy stems. Backfill the hole with native soil, pressing lightly to remove air pockets. Water deeply right after planting to settle the soil around the roots—you'll know it's right when the surface looks slightly damp but not glistening.
☀️ Step 3: Water Consistently and Mulch for Retention
Water newly planted bushes 1-2 times per week for the first 4 weeks, giving them 1-2 gallons per plant each time. The goal is to keep the soil evenly moist but not waterlogged—stick your finger 2 inches deep to check. If it feels dry, it's time to water again. After the initial period, reduce to once a week, adjusting for rainfall.
Spread a 2-3 inch layer of mulch around each plant, keeping it 3 inches away from the stem to prevent rot. I use shredded bark or wood chips because they break down slowly and improve soil structure over time. Mulch helps retain moisture, suppresses weeds, and keeps roots cool during hot spells. Replenish the mulch layer annually to maintain its effectiveness.
✂️ Step 4: Prune for Shape and Density
Prune your thorny bushes in early spring before new growth begins. Use clean, sharp pruners to cut back any dead or crossing branches, making cuts at a 45-degree angle just above a leaf node. This encourages bushier growth and prevents disease from entering through jagged cuts. I also trim back any leggy stems to about half their length—this forces the plant to produce more lateral branches, creating a denser barrier.
Skip pruning in the fall, as new growth won't harden off before winter. If you notice any diseased branches during the growing season, remove them immediately and dispose of them in the trash—not the compost—so the pathogen doesn't spread. After pruning, give the plants a light feeding with a balanced fertilizer (10-10-10) to support their recovery and new growth.
🌿 Step 5: Maintain and Monitor for Pests/Diseases
Thorny bushes are generally low-maintenance, but keep an eye out for common pests like aphids or spider mites. If you spot tiny green insects clustering on new growth, spray the plants with a strong stream of water to knock them off. For stubborn infestations, use an insecticidal soap—just mix it according to the package instructions and apply in the early morning to avoid harming beneficial insects.
Watch for signs of disease like yellowing leaves or black spots, which can indicate fungal issues. Improve air circulation by thinning out overcrowded branches, and avoid overhead watering to keep foliage dry. If a plant shows signs of stress, give it a deep watering and check the roots for rot. Healthy thorny bushes should have deep green leaves, vigorous new growth, and plentiful thorns—that's your sign they're thriving and doing their job as a natural barrier.
Tips & tricks for perfect thorny bush planting
These simple tricks will help your thorny bushes grow into the dense, impenetrable barrier you're dreaming of.
Location and Soil Prep: When testing drainage in Step 1, I recommend digging two test holes instead of one—place them at opposite ends of your planned planting area. This helps identify any drainage variations across your yard. If you notice water pooling in one spot but not another, that's a sign you'll need to create raised beds or install drainage pipes for consistent results. The 10-minute wait time for water to drain is crucial—if it drains faster, your soil may be too sandy and need compost added for moisture retention.
Planting Depth and Spacing: In Step 2, don't be afraid to adjust the 3-4 feet spacing slightly if you're planting along a curved boundary. You can reduce spacing to 2.5 feet in tight corners while maintaining the 4 feet between rows. This creates a more natural, flowing barrier while still allowing proper air circulation. For the planting depth, I've found using a small marker on your shovel helps ensure the root ball sits exactly 1 inch below soil level every time—this prevents the common mistake of burying stems too deep.
Watering Wisdom: The 1-2 gallons per plant in Step 3 might seem like a lot, but it's essential for establishing strong root systems. I like to use a watering wand with a flow restrictor to deliver this amount precisely without over-saturating. For the first 4 weeks, I set a reminder on my phone for watering days—this prevents forgetting and keeps your bushes consistently moist. After the initial period, you'll notice the bushes need less frequent watering as their roots establish deeper in the soil.
Pruning Pro Tip: When pruning in Step 4, I've found that using a small notebook to track which branches you cut back helps maintain consistent shape. Mark your cuts with a pencil on a diagram of your plant before making them—this prevents over-pruning and helps you visualize the final shape. For leggy stems, I recommend cutting back to about 1/3 of their length rather than half, which gives you more flexibility for future shaping while still encouraging bushier growth.
Pro Tips for Thorny Bush Plant
- These simple tricks will help your thorny bushes grow into the dense, impenetrable barrier you're dreaming of.
- Location and Soil Prep: When testing drainage in Step 1, I recommend digging two test holes instead of one—place them at opposite ends of your planned planting area.
- Planting Depth and Spacing: In Step 2, don't be afraid to adjust the 3-4 feet spacing slightly if you're planting along a curved boundary.
Frequently asked questions
Got questions about growing thorny bush plants for your privacy barrier?
You’re not alone! Here are some of the most common queries—plus quick, practical answers to help you thrive.
What’s the best thorny bush plant for fast-growing privacy?
If you want quick results, go for Pyracantha (firethorn) or Hawthorn. Both grow 12–24 inches per year and develop dense, thorny branches within 2–3 years. For even faster coverage, try Russian olive—it can grow up to 3 feet annually but needs more space.
How long does it take for thorny bushes to become an effective barrier?
Most thorny bushes take 2–5 years to fully fill out, depending on the species. Barberry and Blackthorn are slower (3–5 years), while Osage orange can reach privacy height in just 1–2 years. Patience pays off—thorns develop as the plant matures!
Are thorny bushes safe for pets or kids?
Most thorny plants are not pet-friendly—their spines can cause injuries, and some (like Pyracantha) have toxic berries. Opt for non-toxic alternatives like Arborvitae or Bamboo if you have curious pets or little ones. Always research before planting!
Can I grow thorny bushes in containers?
Yes! Smaller varieties like Dwarf Pyracantha or Thorny Olive thrive in large containers (at least 18 inches deep). Use well-draining soil, prune regularly, and move pots to sunnier spots in winter. Just know they’ll need annual repotting as they grow.
How do I control aggressive thorny bush growth?
Prune in late winter/early spring to shape and contain growth. For invasive species like Russian olive, dig up suckers and apply vinegar-based herbicide to roots. Always wear gloves—those thorns don’t joke! Pro tip: Wear long sleeves and eye protection when pruning.
What’s a good alternative if thorns aren’t my thing?
If thorns seem too harsh, try privet hedges, Bamboo, or Boxwood for dense, low-maintenance screens. For a wild look, Elderberry or Serviceberry offer natural beauty without spines. Just ensure they fit your climate and space!
Wrapping up and next steps
Growing a thorny bush plant is a rewarding way to add natural beauty and security to your outdoor space! Whether you're drawn to the Pyracantha, Hawthorn, or Barberry, these hardy plants thrive with the right care—pruning, sunlight, and soil prep.
Remember, their prickly charm is their superpower, keeping pests and unwanted visitors at bay while boosting curb appeal. 🌿
Ready to transform your yard? Start by selecting the perfect variety for your climate, then gather your tools and dive in! With patience and a little elbow grease, you’ll soon enjoy a lush, thorny barrier that’s as functional as it is stunning. Happy planting! 🌱