
Planting
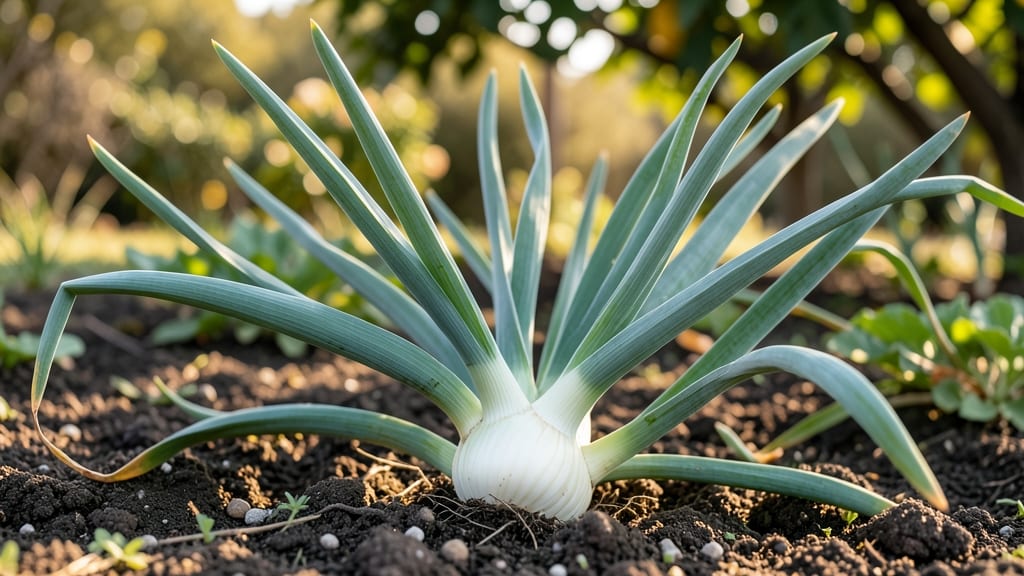
Growing Sweet Texas onions in your garden delivers the kind of bold, sweet flavor that turns every dish into a standout—especially when you master the year-round harvesting trick. 🌱 These onions thrive in Texas heat but also adapt to cooler seasons with the right timing, making them one of the most versatile varieties for home gardeners.
Unlike storage onions that toughen up, Sweet Texas stay tender and mild-sweet even when harvested small, perfect for fresh eating or cooking.
Start with well-draining soil amended with compost—these onions hate soggy roots—and plant sets or seeds in fall (October-November) for spring harvests or early spring (February-March) for summer crops. Space bulbs 4-6 inches apart in rows 12 inches apart to prevent crowding, which leads to small, pungent onions.
Water consistently but avoid overhead sprinklers to prevent fungal diseases like onion smut, a common Texas problem that can ruin a crop.
Harvest begins when tops yellow and fall over—usually 100-120 days after planting—but you can snip individual scallions anytime for fresh use. For storage, leave bulbs in the ground until tops fully brown, then cure them in a dry, shaded spot for 2-3 weeks.
The result? Onions that stay sweet and crisp for months, far outlasting store-bought varieties. Even in Texas summers, proper mulching keeps soil moisture steady and bulbs from bolting early.
Sweet Texas onions handle heat better than most varieties but still need shade during peak summer afternoons if grown in full sun. Rotate crops yearly to prevent soil-borne diseases, and interplant with carrots or lettuce to deter onion flies.
With these adjustments, you’ll enjoy homegrown onions year-round, from crisp spring scallions to full-sized bulbs in fall—no grocery store in sight.
📚 In This Guide
- What you need
- Instructions
- Tips and common mistakes
- Wrapping up and next steps
What you need
- ● Sweet Texas Onion Seeds: 1–2 packets (choose a variety like 'Texas Early White' or 'Yellow Granex').
- ● Well-draining soil: Mix of garden soil + compost (60% soil, 40% compost).
- ● Fertilizer: Balanced 10-10-10 or organic compost (e.g., fish emulsion or alfalfa meal).
- ● Watering can or hose: With a gentle spray nozzle for seedlings.
- ● Garden trowel or small shovel for planting.
- ○ Raised beds or containers (optional): 6–12" deep for better drainage.
- ○ Row cover or shade cloth (optional): For seedlings to prevent bolting.
- ● Pruners or scissors for harvesting.
- ● Sunny spot (6–8 hours of sunlight daily).
- ● Patience! Onions take 90–120 days to mature.
- ● Consistent moisture (keep soil damp but not soggy).
How to grow sweet Texas onions from seed to harvest
Here's how I grow sweet, bold Texas onions year-round with minimal fuss—no green onions, just full-sized bulbs.
🌱 Step 1: Start Seeds Indoors for Early Bulbs
Texas onions thrive when started indoors 8-10 weeks before your last frost date. Use biodegradable peat pots (3 inches deep) filled with sterile seed-starting mix—never garden soil, as it compacts and stunts root growth. Plant 2-3 seeds per pot at a depth of ¼ inch, then cover lightly with additional mix. Press gently to ensure good seed-to-soil contact.
Place pots in a seedling heat mat set to 75-80°F for consistent germination. Keep the soil evenly moist (not soggy) by misting daily with a spray bottle. You'll see first true leaves in 10-14 days. Once seedlings emerge, remove the weakest one to leave the strongest plant per pot—this prevents overcrowding and ensures robust bulbs.
☀️ Step 2: Harden Off and Transplant After Frost
Two weeks before transplanting, begin hardening off seedlings by placing them outside in a shaded, sheltered spot for 1-2 hours the first day. Gradually increase exposure by 1 hour daily, moving them to direct sunlight by day 7. This slow acclimation prevents transplant shock, which can stall bulb development.
Choose a sunny garden bed with well-draining soil (Texas onions hate soggy roots). Space seedlings 4-6 inches apart in rows 12 inches apart. Transplant on a cool, overcast afternoon to reduce stress. Water deeply at the base—avoid wetting leaves, as fungal diseases like onion smut thrive in damp foliage.
💧 Step 3: Manage Water and Fertilizer for Sweet Bulbs
Keep soil consistently moist but never waterlogged—1 inch per week is ideal. Texas onions need regular watering to develop sweet, plump bulbs, but overwatering causes rot. Use drip irrigation or water at the base early in the day to let foliage dry before evening. You'll know moisture is right when the top inch of soil feels damp but not saturated.
Fertilize once at planting with a balanced 10-10-10 formula, then side-dress with compost when shoots reach 6 inches tall. Avoid high-nitrogen fertilizers—they promote leafy growth at the expense of bulb size. Instead, focus on potassium-rich amendments (like wood ash) to enhance sweetness.
✂️ Step 4: Monitor Growth and Harvest at Peak Sweetness
When onion tops yellow and fall over (usually 90-120 days after transplanting), they're ready for harvest. Gently loosen soil with a fork and lift bulbs—don’t pull, or you'll risk damaging the neck. Cure onions in a dry, shaded area (like a garage) for 1-2 weeks to toughen skins and preserve sweetness.
For year-round harvesting, succession plant every 2-3 weeks after the first transplanting. Store cured onions in a cool, dark place (50-60°F) with good airflow—they'll keep for 6-8 months. If bulbs start sprouting, replant them—they'll regrow and produce green onions in as little as 3 weeks.
🌿 Step 5: Prevent Pests and Diseases for Healthy Bulbs
Onion flies and thrips are the biggest threats. Row covers (applied at transplanting) block flies without stunting growth. For thrips, spray neem oil every 7-10 days—it disrupts their life cycle without harming beneficial insects. Remove yellowed or diseased leaves immediately to prevent spread; never compost infected plant material.
Rotate crops annually—never plant onions in the same spot two years in a row. This breaks pest and disease cycles. If you notice purple streaks in leaves, it's onion thrips; white mold on bulbs means too much moisture. Both issues are preventable with proper spacing and drainage.
Tips & tricks for perfect sweet Texas onions
Growing these bold, sweet onions isn't just about following steps—it's about understanding the subtle details that make all the difference. Here's what I've learned after years of perfecting my Texas onion harvests.
Seedling Heat Mat Precision: That 75-80°F heat mat temperature is non-negotiable for germination. I use a digital thermometer to monitor it constantly—fluctuations below 70°F can delay sprouting by days. If you don't have a heat mat, place pots on top of your fridge (not inside) for consistent warmth. The goal is to mimic spring soil temperatures in Texas, which is why these onions develop such distinctive sweetness.
Harden Off Gradually: The 1-2 hour to direct sunlight progression in Step 2 is crucial for preventing transplant shock. I've seen seedlings wilt dramatically when moved too quickly—this is your plant's first major stress test. Start with just 30 minutes on the first day if your climate is particularly harsh. Watch for leaves that perk up after watering; that's your sign they're adjusting well.
Watering Technique: The 1 inch per week guideline is perfect, but timing matters just as much. I water my onions early morning using a soaker hose to deliver water directly to the soil. This prevents fungal spores from splashing onto leaves during evening watering, which is when onion smut thrives. A quick soil check with your finger—damp but not wet—is the best way to monitor moisture without overwatering.
Harvesting Cues: Those yellow and fallen-over tops are your clear signal to harvest, but don't wait too long. I pull onions when about 20% of the tops have yellowed—this ensures maximum sweetness while preventing the bulbs from splitting. The 1-2 week curing period is where the real flavor development happens; I hang my onions in a mesh bag for airflow to toughen the skins naturally.
Pro Tips for Sweet Texas Onions
- Growing these bold, sweet onions isn't just about following steps—it's about understanding the subtle details that ma...
- Seedling Heat Mat Precision: That 75-80°F heat mat temperature is non-negotiable for germination. I use a digital the...
- Harden Off Gradually: The 1-2 hour to direct sunlight progression in Step 2 is crucial for preventing transplant shoc...
Frequently asked questions
Got questions about growing and enjoying Sweet Texas onions? You’re not alone! Here are some of the most common queries—plus quick, practical answers to keep your garden (and your taste buds) happy.
How long does it take for Sweet Texas onions to mature?
Sweet Texas onions typically take 90–120 days to reach full maturity from seed, depending on your climate and growing conditions. If you’re planting sets (small bulbs), you’ll see harvest-ready onions in about 60–80 days. For year-round harvests, succession planting every 2–3 weeks works like a charm!
Can I grow Sweet Texas onions in containers?
These onions thrive in containers as long as the pot is at least 6–8 inches deep and has good drainage. Use a well-draining potting mix, and space bulbs 4–6 inches apart. Containers are perfect for small spaces or urban gardens—just keep them in full sun (6+ hours daily) for the best flavor and sweetness.
What’s the best way to store harvested Sweet Texas onions?
Store them in a cool, dry, and well-ventilated spot (like a mesh bag or open crate) away from humidity or moisture. Avoid refrigerating whole onions—they’ll sprout faster! For long-term storage, braid or hang them upside down in a dark place. If you notice sprouting, use them in recipes fast (they’re still delicious!)
Do Sweet Texas onions survive winter?
Not typically! These onions are tender-day varieties and thrive in mild climates (USDA Zones 3–10). In colder regions, grow them as annuals or harvest before the first frost. For winter harvests, try overwintering in containers and moving them to a sheltered spot. If you’re in a frost-prone area, opt for shorter-season varieties like Texas Early White.
What’s the best way to use Sweet Texas onions in cooking?
These onions are sweeter and milder than storage onions, making them perfect for raw dishes like salads, sandwiches, or Bloody Marys. For cooking, caramelize them slowly for 30–45 minutes to intensify their natural sweetness. Try them in grilling, stir-fries, or even onion rings—their flavor holds up beautifully!
Wrapping up and next steps
Sweet Texas onions are a gardener’s dream—packed with bold, sweet flavor and easy to grow year-round with the right care! Whether you’re a seasoned green thumb or a beginner, these onions reward patience with delicious, homegrown harvests.
Now that you’ve got the materials and answers to common questions, it’s time to roll up your sleeves and plant your own batch.
🌱 Ready to grow? Start with a single bulb, experiment with varieties, and soon you’ll be sharing your homegrown sweetness with friends and family. Happy planting—and enjoy that first taste of Texas-sized flavor! 🌿