
Planting
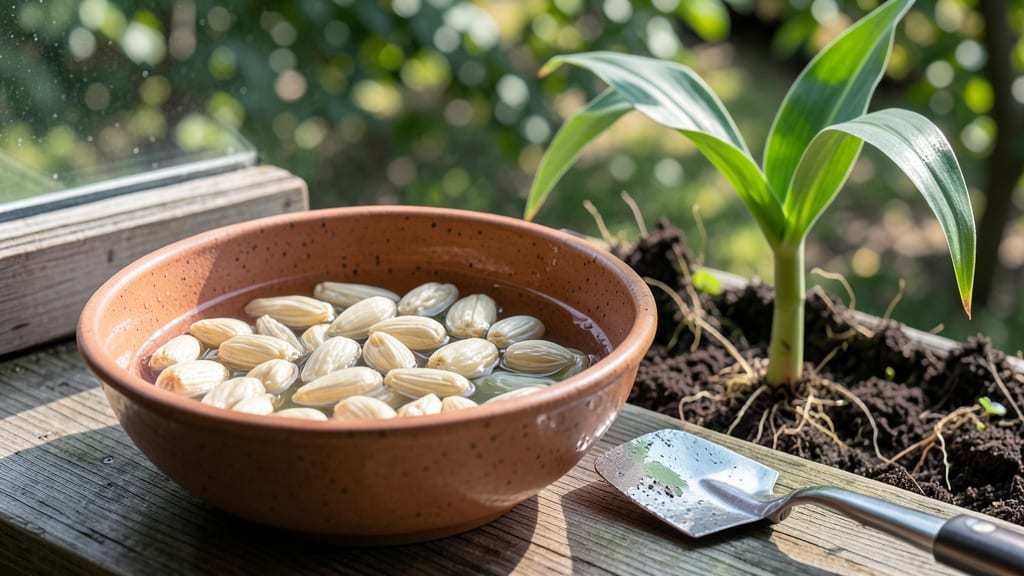
Soaking corn seeds before planting cuts germination time in half—sometimes from 10-14 days to just 4-7 days. 🌱 I learned this trick after struggling with slow starts in my raised beds, and now my corn sprouts like clockwork.
The warm water jumpstarts the seeds, softens tough seed coats, and even helps deter some pests before they hit the soil.
All you need is a bowl, warm (not hot) water, and a clean towel or paper towels. Soak seeds for 12-24 hours, checking occasionally to keep them submerged.
For best results, use rainwater or filtered water—chlorine can slow germination. Once plump and swollen, drain them well and plant immediately while they're still damp.
This method works for most sweet corn, field corn, and popcorn varieties, though heirloom or treated seeds may need slightly longer soaking. After planting, keep the soil consistently moist but not soggy—new sprouts are delicate. You'll notice faster emergence and stronger seedlings that outpace untreated corn by a week.
Fair warning: don't over-soak (beyond 24 hours) or the seeds may rot. And if you're planting in cold soil, combine this trick with a mini greenhouse (plastic wrap or row cover) to keep warmth in those critical first days.
Your corn will thank you with earlier harvests and fewer gaps in the rows.
📚 In This Guide
- What you need
- Instructions
- Tips and common mistakes
- Wrapping up and next steps
What you need
- ● Corn seeds: Choose high-quality, untreated seeds (e.g., heirloom or organic varieties). Aim for 100–200 seeds depending on your planting scale.
- ● Large container: A clean, non-reactive bucket (5+ gallons) or bowl—plastic or glass works best. Avoid metal if soaking long-term.
- ● Warm water: 100–110°F (38–43°C) (lukewarm to slightly hotter than body temperature). Use 1–2 gallons per 100 seeds.
- ○ Thermometer: Optional but helpful to monitor water temperature accurately.
- ● Cheesecloth or mesh bag: A fine-mesh bag (or old nylon stocking) to contain seeds while soaking.
- ● Paper towels or damp cloth: For draining excess water after soaking (2–3 towels per batch).
- ● Planting tray or pots: Seed-starting trays, peat pots, or biodegradable containers with drainage holes.
- ● Potting mix: Lightweight, well-draining soil mix (e.g., 50% peat moss + 50% perlite) or coco coir.
- ● Spray bottle: For gentle misting to keep seeds moist post-soaking.
- ● Hydrogen peroxide (3% solution): 1–2 tbsp per gallon of water to disinfect seeds and boost germination.
- ● Seedling heat mat: Keeps soil warm (70–80°F) for faster sprouting.
- ● Grow lights: If starting indoors, use LED or fluorescent lights 12–16 hours/day.
- ● Planting calendar: Track soaking dates and ideal transplanting windows for your climate zone.
Step-by-Step guide to soaking corn seeds for faster germination
Here's how to jumpstart your corn crop with a simple pre-planting trick that works every time.
💧 Step 1: Prepare the Soaking Water
Fill a clean container with warm water—around 80-85°F—enough to fully submerge your corn seeds. I like to use a glass jar because it lets me monitor the seeds easily. The warmth mimics the soil's natural temperature at planting depth and helps kickstart metabolic activity inside the seed.
Add a pinch of non-chlorinated water conditioner if your tap water is hard. Chlorine can inhibit germination, and hard water may leave mineral deposits on the seeds. Stir gently to dissolve any additives completely before proceeding. This step ensures your seeds get a clean, nutrient-friendly start.
🌱 Step 2: Soak the Seeds for Optimal Duration
Place your corn seeds in the warm water and let them soak for 8-12 hours. You'll see them plump up noticeably—this is the seed absorbing moisture and preparing to break dormancy. I set a timer so I don't forget, because over-soaking can cause the seed coats to split prematurely.
Check the seeds after 6 hours if you're impatient. They should feel slightly firmer when pressed between your fingers. If they're still soft, give them another hour or two. The goal is hydration without damage—think of it like waking up a sleeper who's ready to stretch but not quite there yet.
☀️ Step 3: Prepare the Planting Environment
While the seeds soak, prepare your planting area by loosening the soil to a depth of 6 inches. Corn roots need good contact with loose soil to establish quickly. Work in a small amount of compost or balanced fertilizer (like 10-10-10) into the top 4 inches of soil to give those germinating seeds an immediate nutrient boost.
If planting in cooler soil (below 60°F), consider warming the soil with black plastic mulch laid down a day before planting. Corn seeds germinate best when soil temperatures are between 60-90°F. The soaking trick helps compensate for cooler conditions, but warm soil still gives you the fastest results.
🪴 Step 4: Plant the Soaked Seeds
After soaking, drain the seeds thoroughly by spreading them on a clean towel for 10-15 minutes. Plant them 1-1.5 inches deep in rows spaced 30-36 inches apart, depending on your corn variety. The soaking makes them easier to handle—they won't crumble when you press them into the soil.
Water the planting area gently but deeply right after planting to settle the soil around the seeds. Avoid compacting the soil with your foot—just a light patting with your hand is enough. The goal is to create good seed-to-soil contact while keeping the area moist but not waterlogged. This is where your pre-soaking pays off—those hydrated seeds will sprout faster and more uniformly.
⏰ Step 5: Monitor for Germination
Germination should appear in 5-10 days under ideal conditions, compared to the 10-14 days you'd typically wait with dry seeds. Watch for the first signs: tiny white root hairs emerging from the seed, followed by the shoot pushing upward through the soil. Keep the planting area consistently moist during this time—your finger should feel slight dampness 1 inch below the surface.
If you notice any seeds failing to sprout after 14 days, consider planting additional seeds in their place. While soaking improves germination rates, it doesn't guarantee 100% success. The trick works best with fresh seeds—save older seed batches for other projects or compost them if they've been stored more than a year.
Tips & tricks for soaking corn seeds before planting
Here's what nobody tells you about maximizing your corn seeds' germination potential.
Temperature Precision: For the 80-85°F water in Step 1, I use a kitchen thermometer to verify the temperature. If your tap water runs cooler than 80°F, warm it gently on the stove (never boiling) or add a small amount of hot water to reach the ideal range. Too hot water can damage the delicate seed embryos, while cooler water slows down the metabolic activation we're trying to stimulate. Think of it like giving your seeds a warm bath—not a sauna.
Visual Seed Readiness: In Step 2, when checking your seeds after 6 hours, look for two key visual cues: first, the seeds should visibly plump up and feel slightly heavier in your hand. Second, the seed coats should appear slightly translucent rather than opaque. If they still look shriveled or feel soft like overcooked pasta, give them another hour. This visual check helps you avoid over-soaking, which can cause the seed coats to split and compromise germination.
Soil Temperature Compensation: When preparing your planting environment in Step 3, if your soil temperature is below 60°F, the soaking trick helps compensate—but don't rely on it completely. For cooler conditions, I recommend combining the soaking with black plastic mulch. Lay the mulch down 24 hours before planting to warm the soil surface. This two-pronged approach gives your seeds the best chance in less-than-ideal conditions, mimicking the warm soil depths where corn naturally thrives.
Post-Soak Handling: The 10-15 minute drying period in Step 4 is crucial for preventing waterlogging around the seeds. After draining, spread them on a clean towel in a single layer and gently pat them dry with another towel. This step ensures the seeds don't become waterlogged when planted, which can lead to rot or uneven germination. I like to work quickly but carefully—think of it like drying off a wet dog without roughing up the fur.
Pro Tips for Soak Corn Before Planting
- Here's what nobody tells you about maximizing your corn seeds' germination potential.
- Temperature Precision: For the 80-85°F water in Step 1, I use a kitchen thermometer to verify the temperature. If you...
- Visual Seed Readiness: In Step 2, when checking your seeds after 6 hours, look for two key visual cues: first, the se...
Frequently asked questions
Got questions about soaking corn seeds before planting? You’re not alone! Here are some of the most common concerns—and their answers—to help you get started with confidence.
Why should I soak corn seeds before planting?
Soaking corn seeds in warm water (around 80–90°F) for 12–24 hours speeds up germination by softening the seed coat and kickstarting hydration. This method is especially helpful in cooler climates or when planting early in the season. Think of it as giving your seeds a head start—like a warm bath for baby plants!
How long should I soak corn seeds?
For most corn varieties, 12–24 hours is ideal. Soak them in a container with enough warm water (not boiling) to cover the seeds. Avoid over-soaking—beyond 24 hours, seeds can absorb too much water, risking rot or mold. If you forget, check them after 12 hours; they’re ready when they look plump and slightly swollen.
Can I reuse the soaking water?
No, it’s best to discard the soaking water after the first use. The water absorbs nutrients and may contain bacteria from the seeds. After soaking, rinse the seeds gently with fresh water before planting to remove any residue. This keeps your seeds healthy and ready for the soil!
What if my climate is too hot or cold for soaking?
If your area is too cold (below 50°F), soaking helps compensate by pre-warming the seeds. In hot climates (above 90°F), reduce soaking time to 8–12 hours to prevent drying out. For extreme conditions, consider using a seedling heat mat or planting in a greenhouse to maintain ideal moisture and temperature.
What do I do if my seeds start to sprout before planting?
If seeds sprout during soaking, plant them immediately—gently press them into moist soil, pointy side up, and cover lightly. Sprouted seeds are delicate; handle them carefully to avoid damaging the fragile roots. If you can’t plant right away, store them in a damp paper towel in a cool, dark place (like a fridge) for up to 24 hours.
Are there alternatives to soaking corn seeds?
Yes! If soaking isn’t an option, try these methods:
- Scarification: Lightly nick the seed coat with sandpaper to help water penetrate.
- Stratification: Store seeds in a damp paper towel in the fridge for 1–2 weeks to simulate winter conditions.
- Direct planting in warm soil: If your soil is consistently above 60°F, seeds may germinate faster without pre-soaking.
Wrapping up and next steps
Soaking corn seeds before planting is a simple yet powerful trick to give your garden a head start! By boosting germination speed and root strength with warm water, you’ll enjoy healthier, faster-growing plants—and that’s a win for any gardener. 🌱✨ Ready to try it?
Grab your seeds, follow the steps, and watch your corn thrive in no time!
Next up: Plant those prepped seeds with confidence—and don’t forget to monitor soil moisture for the best results. Happy growing!