
Planting
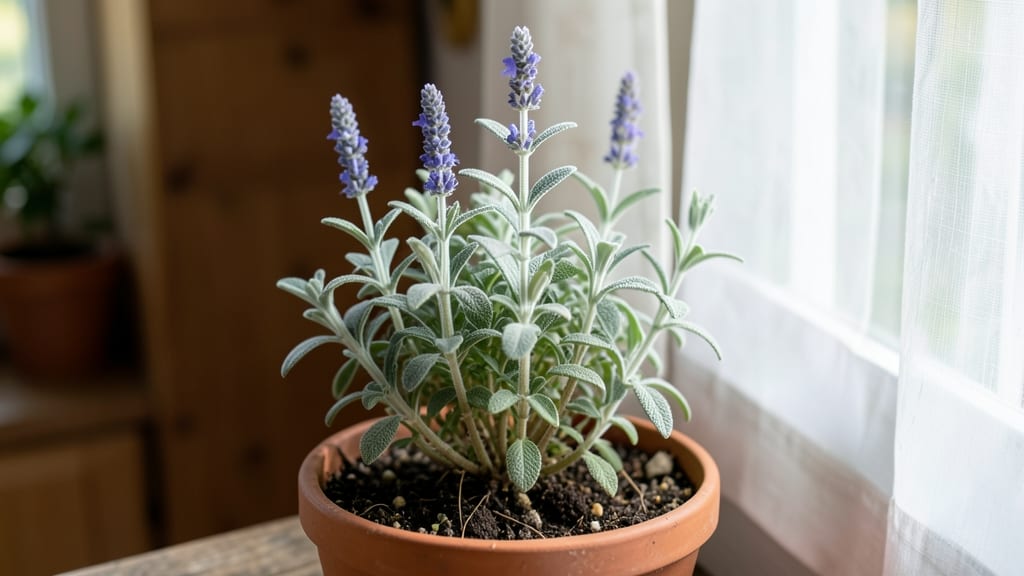
Growing sage herb plants with flowers in pots transforms any kitchen or patio into a fragrant, functional garden. 🌿 The key lies in mimicking its natural Mediterranean habitat—bright light, well-draining soil, and minimal fuss.
I’ve grown sage in containers for years, and the secret isn’t complicated: it thrives on neglect almost as much as it does on attention, as long as you get the basics right.
The right conditions mean 6+ hours of sun daily and a pot with drainage holes to prevent soggy roots. Start with cuttings from an existing plant—sage rarely grows true from seed—and plant in a mix of potting soil and perlite for that perfect airy texture.
Water only when the top inch feels dry; overwatering is the fastest way to kill this hardy herb. Within weeks, you’ll see sturdy stems and those signature silvery-green leaves, with occasional purple-blue flowers adding a delicate touch.
Pruning keeps sage bushy and productive, but don’t trim more than one-third at a time. Harvest leaves regularly—especially in late spring and summer—for the strongest flavor, and use the trimmings in homemade seasoning blends or infused oils.
The flowers, though not edible, attract pollinators and add a lovely contrast to the foliage. By fall, your potted sage will be a self-sustaining, fragrant centerpiece that works as hard as you do.
This method works for both culinary and ornamental use, whether you’re drying bundles for winter cooking or gifting potted plants to fellow herb enthusiasts. The beauty of sage is its versatility—it adapts to small spaces, urban balconies, or even indoor windowsills with enough light.
Once established, it’s nearly indestructible, making it the perfect plant for gardeners of all skill levels.
📚 In This Guide
- What you need
- Instructions
- Tips and common mistakes
- Wrapping up and next steps
What you need
- ● Sage seeds or seedlings: 3–5 (choose Salvia officinalis for culinary sage or Salvia nemorosa for ornamental flowers).
- ● Containers: 2–3 pots (10–12 inches in diameter) with drainage holes. Terracotta or fabric pots work best!
- ● Potting mix: 3–4 gallons of well-draining, herb-specific soil (or mix equal parts potting soil + perlite/sand).
- ○ Organic fertilizer: 1–2 tbsp of balanced 10-10-10 or fish emulsion (optional but recommended).
- ● Mulch: 1–2 inches of gravel or pine bark to retain moisture.
- ● Garden trowel or small shovel for planting.
- ● Watering can or spray bottle (avoid overwatering!).
- ● Pruning shears (for trimming flowers/stems later).
- ● Sunlight access: 6+ hours of full sun daily (south-facing spot ideal).
- ○ Optional: Eggshells or crushed limestone (for calcium-rich soil).
- ● Decorative stones or moss (for aesthetic potted gardens).
- ● Garden gloves (to protect hands from prickly stems).
Step-by-step instructions for growing sage in pots
Here's how to cultivate fragrant, flowering sage that thrives in containers while keeping pests at bay.
🪴 Step 1: Select and Prepare Containers
Choose pots at least 12 inches deep with multiple drainage holes—sage roots need room to spread and hate soggy soil. I prefer terracotta containers because they breathe, preventing root rot. If using plastic, drill extra holes along the bottom to improve airflow. Place a 2-inch layer of gravel at the bottom before adding soil to ensure excess water drains completely.
Sage prefers well-draining soil, so mix 2 parts potting mix with 1 part perlite or coarse sand. This creates the loose, gritty texture sage roots crave. Avoid garden soil—it compacts in containers and suffocates roots. Fill the pot to 1 inch below the rim, leaving space for watering.
🌱 Step 2: Plant Sage Starts or Seeds
For best results, start with 3-4 inch nursery plants—sage seeds germinate slowly and can take 3-4 weeks to sprout. If using seeds, sow them ¼ inch deep and keep the soil consistently moist at 70-75°F until germination. Plant one sage per pot if using 12-inch containers—crowding leads to competition and weak growth.
Dig a hole twice as wide as the root ball and place the plant so the top of the root ball sits just below the soil line. Gently firm the soil around the roots to eliminate air pockets. Water deeply right after planting to help settle the soil and encourage root contact. Avoid wetting the leaves to prevent fungal diseases.
☀️ Step 3: Position for Sun and Water Properly
Sage thrives in full sun, so place your pots in a location with at least 6-8 hours of direct sunlight daily. A south or west-facing spot works best. If you notice leaves yellowing or stems stretching toward the light, your sage needs more sun—move it closer to the window or supplement with a grow light for 14-16 hours per day.
Water only when the top 1-2 inches of soil feel dry—sage is drought-tolerant and overwatering is the fastest way to kill it. Stick your finger in the soil; if it’s damp, wait another day. When watering, soak the soil until water runs out the drainage holes, then empty the saucer to prevent root rot. Mulch with 1 inch of gravel or pine bark to retain moisture and regulate soil temperature.
✂️ Step 4: Prune and Encourage Flowering
Pinch back the tips of new growth when the plant reaches 6-8 inches tall to encourage bushier growth. Use clean, sharp pruners to snip just above a set of leaves. This also redirects energy toward flower production. Sage typically blooms in late spring to early summer, producing delicate lavender or blue flowers that attract pollinators.
After flowering, trim back the spent blooms to ¼ inch above the leaf node to promote a second round of flowers. Avoid cutting into old wood—sage flowers on new growth, so pruning too late in the season removes next year’s buds. Feed your sage with a balanced liquid fertilizer every 4-6 weeks during the growing season to support vigorous growth and flowering.
⏰ Step 5: Overwinter and Maintain Year-Round
Sage is hardy to USDA Zone 5, but potted plants need protection in colder climates. Move pots to a sheltered location or wrap them in burlap if temperatures drop below 20°F. Reduce watering in winter—sage enters dormancy and needs less moisture. Check soil moisture weekly; water only when the top 1 inch feels dry.
In early spring, prune back any dead or damaged growth and fertilize lightly to encourage new growth. Sage is a perennial in warm climates but often treated as an annual in pots. With proper care, your potted sage can thrive for 3-5 years, producing fragrant leaves and beautiful flowers season after season.
Tips & tricks for perfect potted sage with flowers
A few insider tricks will help your potted sage grow lush, fragrant, and full of those stunning lavender blooms.
Container Selection: The 12-inch depth requirement isn't just about root space—it also prevents the plant from becoming root-bound too quickly. I've found that wider pots (14-16 inches) actually work better for flowering sage because they allow for more robust root development. Just make sure the extra width still maintains that essential depth for proper drainage. Terracotta is ideal, but if you use plastic, add those extra drainage holes along the sides too—they make a surprising difference in airflow.
Soil Mix Secrets: When mixing your 2 parts potting mix to 1 part perlite/sand, don't skimp on the gritty components. I like to add a handful of coarse vermiculite too—it helps retain moisture while still preventing compaction. The goal is that loose, almost sandy texture that mimics sage's natural Mediterranean habitat. Pro tip: Sterilize your potting mix by baking it in the oven at 200°F for 30 minutes before use to kill any potential pests or diseases lurking in the soil.
Lighting Strategy: Those 6-8 hours of sunlight are non-negotiable, but here's what I've learned about the 14-16 hour grow light supplement: Use full-spectrum LED bulbs rated for plants, not standard household lighting. Position the light 6-12 inches above the plant and adjust the height as your sage grows. The key is to mimic natural daylight conditions—this encourages that vigorous growth and abundant flowering you're after. I've seen sage plants nearly double their growth rate when given proper supplemental lighting during shorter winter days.
Flowering Trigger: The pinch-back technique at 6-8 inches is your secret weapon for flowers. But here's what nobody tells you—timing matters. Do this pinch when you see those first flower buds forming at the leaf nodes. This redirection of energy is what produces those beautiful lavender blooms. And when you're trimming back spent flowers to ¼ inch above the node, use clean pruners and make the cut at a 45-degree angle. This prevents water from pooling on the cut surface and helps new growth emerge more vigorously.
Pro Tips for Sage Herb Plant Flowers
- A few insider tricks will help your potted sage grow lush, fragrant, and full of those stunning lavender blooms.
- Container Selection: The 12-inch depth requirement isn't just about root space—it also prevents the plant from becoming root-bound too quickly.
- Soil Mix Secrets: When mixing your 2 parts potting mix to 1 part perlite/sand, don't skimp on the gritty components.
Frequently asked questions
How often should I water my sage plant to encourage flowering?
Sage thrives on moderate watering—about once a week (or when the top inch of soil feels dry). Overwatering can drown roots and delay blooms, while underwatering stresses the plant. Morning watering is best to prevent fungal issues. Mulch around the base to retain moisture without soggy soil!
Will sage flowers attract bees or other pollinators?
Sage’s tiny, purple-blue flowers are a magnet for bees, butterflies, and hummingbirds. Planting sage near other herbs (like thyme or rosemary) creates a pollinator-friendly "hotspot." Just avoid pesticides—these critters help your garden (and your flowers!) thrive.
Can I prune sage after it flowers to keep it bushy?
Yes! Prune 1/3 of the plant right after flowering (late summer) to encourage new growth and prevent legginess. Use clean shears to trim just above a leaf node. Skip heavy pruning in fall—sage needs time to harden off for winter. Pro tip: Harvest leaves anytime for cooking!
What’s the best way to dry sage flowers for culinary use?
Harvest flowers when fully open, then tie small bunches with twine and hang upside-down in a dark, dry, well-ventilated spot (like a pantry). It takes 2–3 weeks to dry. Once crisp, strip flowers from stems and store in an airtight jar. Use them like dried sage leaves—perfect for stuffing, soups, or tea!
My sage isn’t flowering—what’s wrong?
Sage may skip flowering if it’s too young (under 2 years), over-fertilized, or lacks sunlight. Move it to a sunny spot (6+ hours/day), reduce fertilizer (or use none), and ensure well-draining soil. Stress can trigger blooms—try a slight water restriction for a few weeks if needed!
Wrapping up and next steps
Growing sage herb plant flowers in pots isn’t just rewarding—it’s a fragrant, flavorful journey that brings the garden to your kitchen! Whether you’re a seasoned gardener or a beginner, these hardy plants thrive with minimal effort, offering both beauty and culinary magic. 🌿✨
Now that you’re armed with the right tips, why not take the next step? Start small with a single pot, experiment with recipes, or even share your harvest with friends. Your fragrant garden awaits—go plant, grow, and savor the flavors of homegrown sage!