
Planting
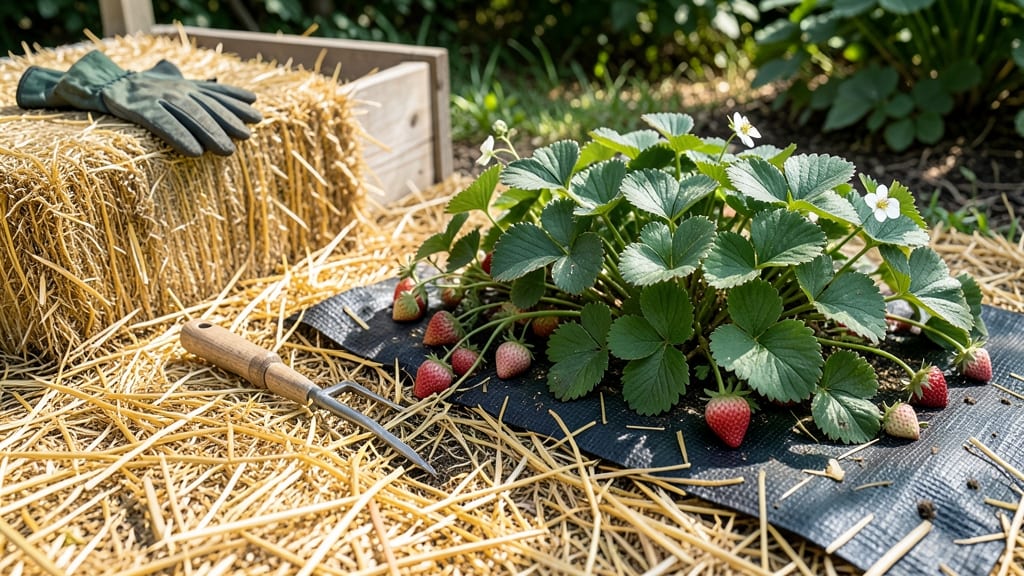
Mulching strawberries for winter isn't just about survival—it's about setting them up for a bigger, sweeter harvest next spring. 🌱 I've seen strawberry plants wilted by January frost become thriving bushes by June, all because of a simple layer of protection.
The right mulch acts like a cozy blanket, shielding roots from freezing temperatures while locking in moisture for early growth.
You'll need straw or shredded leaves (never fresh clippings—they rot), a rake, and about 4-6 inches of material spread evenly around each plant. Timing matters too: apply mulch after the ground freezes but before heavy snowfall.
This balance keeps roots insulated without trapping too much moisture, which can lead to rot. My plants have survived -10°F winters with this method.
What you'll get is strawberries that emerge weeks earlier than unmulched beds, with fewer dead crowns and stronger plants. The berries themselves tend to be larger and more flavorful because the plants aren't struggling to recover from frost damage.
Plus, fewer weeds mean less competition for nutrients—your plants will thank you at harvest time.
For coldest climates, add a thin layer of burlap over the mulch before snowfall to block windburn. And avoid over-mulching—too much can suffocate the plants. Start with 3-4 inches, then add more in extreme cold snaps.
This approach works in zones 3-8, with adjustments for snow depth and winter severity.
📚 In This Guide
- What you need
- Instructions
- Tips and common mistakes
- Wrapping up and next steps
What you need
- ● Straw mulch: 4–6 inches (10–15 cm) per plant area. Opt for clean, weed-free straw—avoid treated or dyed varieties.
- ● Garden gloves: A pair to protect your hands while handling mulch.
- ● Garden rake or hoe: For spreading mulch evenly and clearing debris.
- ○ Watering can or hose: To lightly moisten the mulch before applying (optional but helpful).
- ○ Pruners (optional but useful): Trim dead or diseased foliage before mulching to reduce pests.
- ● Landscape fabric: Lay a thin layer (1–2 inches) under mulch to block weeds and retain moisture.
- ● Burlap or frost cloth: Lightweight coverings for extra insulation during extreme cold snaps.
- ● Compost or fertilizer: A light top-dressing in early spring to boost next season’s growth.
- ● Strawberry plants in pots: If container-grown, use extra mulch (up to 8 inches) around the base.
Step-by-Step guide to mulching strawberries for winter protection
Here’s how I protect my strawberry beds through freezing temperatures—keeping plants healthy and ready for spring harvests.
🌱 Step 1: Clear and Prepare the Planting Area
Remove any dead leaves, weeds, or debris from around your strawberry plants. I use a small rake to gently clear away old mulch and organic matter—this prevents pests and diseases from overwintering. Focus on the 6-inch radius around each plant, where roots and crowns are most vulnerable to cold.
If your plants look weak or leggy, trim back any overly long runners or leaves to reduce stress. The goal is to keep the plant’s energy focused on surviving the cold rather than maintaining unnecessary foliage. Water the plants deeply 2-3 days before mulching—this ensures the soil is moist enough to retain heat while preventing waterlogging.
🌿 Step 2: Apply a Layer of Organic Mulch
Spread a 3-inch layer of straw or shredded leaves over the soil around the plants. I prefer straw because it breaks down slowly and insulates better than leaves, which can mat and trap moisture. Avoid using grass clippings—they can compact and create a barrier that prevents water from penetrating.
Leave a small gap (1-2 inches) around the crown of each plant to prevent rot. The mulch should cover the soil but not smother the plant itself. If your strawberry bed is on a slope, mound the mulch slightly higher on the north side to provide extra wind protection.
💧 Step 3: Add a Protective Layer for Extreme Cold
When temperatures drop below 20°F, add a second layer of mulch—this time, use 4-6 inches of straw or pine needles. The extra thickness traps heat radiating from the soil and shields the plants from harsh winds. I like to fluff the mulch occasionally to prevent it from compacting, which could reduce its insulating properties.
For additional protection, drape a frost cloth or burlap sack over the plants if a hard freeze (15°F or lower) is forecasted. Secure the edges with bricks or stakes to keep it from blowing away. Remove the cloth during the day if temperatures rise above freezing to prevent overheating.
⏰ Step 4: Monitor and Adjust Through Winter
Check your mulched strawberries every 2-3 weeks to ensure the layers haven’t shifted or compacted. If the mulch looks flattened, fluff it up to restore insulation. Watch for signs of mold or excessive moisture—if the mulch feels damp, add a thin layer of dry straw on top to absorb excess water.
In late winter, as temperatures begin to rise, gradually remove the top layer of mulch to allow the soil to warm. This prevents a sudden shock when spring arrives. By mid-March, you can reduce the mulch to just a 1-inch layer**, letting the plants start photosynthesizing early for a head start on growth.
☀️ Step 5: Remove Mulch and Prepare for Spring
Once the threat of frost has passed and daytime temperatures consistently stay above 40°F, remove all remaining mulch. I use a rake to gently pull it away, being careful not to disturb the crowns of the plants. The decomposing mulch will have enriched the soil, so you may notice a boost in fertility when new growth appears.
Add a fresh layer of compost or balanced fertilizer around the plants to replenish nutrients lost over winter. Water lightly to help the soil settle, and watch for new leaves—this is your signal that the plants are waking up and ready for the growing season.
Tips & tricks for cold-proof strawberry mulching
Here's what I've learned after years of testing different winter protection methods for my strawberry beds—these details make all the difference between healthy spring plants and frost-damaged losses.
Layering Strategy: The key to effective mulching lies in the layering sequence. Start with that 3-inch base layer of straw from Step 2—this creates the foundational insulation. When temperatures drop below 20°F, add the 4-6 inch second layer only after confirming the first layer has settled. I've seen gardeners rush this step and end up with compacted mulch that traps moisture rather than insulating.
Wind Protection: Don't overlook wind exposure when positioning your mulch. In Step 2, when you mound the mulch higher on the north side of sloped beds, you're creating a natural windbreak. For exposed garden areas, consider adding a windbreak barrier like a temporary fence or even large cardboard boxes filled with straw on the windward side before applying mulch.
Moisture Management: The 2-3 day deep watering before mulching in Step 1 is critical—it ensures the soil moisture is optimal for heat retention. During winter checks every 2-3 weeks, if you notice damp mulch, add a thin layer of dry straw on top to absorb excess moisture. Wet mulch loses its insulating properties and can lead to mold growth that harms plant crowns.
Spring Transition: When you're ready to reduce mulch to just 1 inch by mid-March, do it gradually over several days rather than all at once. This slow transition prevents temperature shock to the plants' roots. I've seen gardeners rush this step and end up with stressed plants that struggle to recover in early spring.
Pro Tips for Mulching Strawberries For Winter
- Here's what I've learned after years of testing different winter protection methods for my strawberry beds—these details make all the difference between healthy spring plants and frost-damaged losses.
- Layering Strategy: The key to effective mulching lies in the layering sequence.
- Wind Protection: Don't overlook wind exposure when positioning your mulch.
Frequently asked questions
Got questions about mulching strawberries for winter?
Here are some of the most common concerns—and their straightforward answers—to help you protect your berries like a pro.
When is the best time to mulch strawberries for winter?
Mulch strawberries after the first hard frost (when soil temps drop to 25–30°F) but before heavy snowfall. This timing lets the plants harden off naturally while insulating them from sudden cold snaps. Wait too long, and frost damage may already set in!
How thick should the mulch layer be for strawberries?
Aim for 4–6 inches of mulch (like straw or shredded leaves) over the crowns and roots. Too thin (<3 inches), and it won’t trap enough heat; too thick (>8 inches), and it may suffocate plants or attract pests. Fluff it occasionally to prevent compaction.
Can I reuse last year’s mulch on strawberries?
Yes, but with caution! Reuse clean, weed-free straw or leaves—avoid mulch from diseased plants or areas with pests. If it’s broken down, supplement with fresh material (2–3 inches) to maintain insulation. Just shake off debris and check for mold before applying.
Will mulching strawberries attract rodents or slugs?
Mulch can attract pests, but proper prep prevents problems:
- Rodents: Avoid thick mulch near burrows; use wire mesh (1/4-inch holes) under mulch if squirrels/voles are an issue.
- Slugs: Opt for straw over leaves (slugs hate its texture). Add a diatomaceous earth barrier around beds if needed.
What if my strawberries still get frost damage despite mulching?
Don’t panic! Light frost damage (brown leaves, mushy berries) often heals. For severe damage:
- Remove dead foliage in early spring to prevent rot.
- Check for crown rot—if soggy, improve drainage next year.
- Fertilize lightly in spring (10-10-10) to encourage regrowth.
Wrapping up and next steps
Mulching strawberries for winter is a simple yet powerful way to protect your berries from frost damage and ensure a bountiful harvest next season.
By using organic materials like straw or leaves, you’re not just shielding your plants—you’re also improving soil health and saving time on spring cleanup. Now that you’re armed with the right techniques and tips, it’s time to roll up your sleeves!
Start by gathering your supplies, then follow the steps with confidence. Your strawberries will thank you—and so will your taste buds come summer! 🍓❄️ Ready to give it a try? Pick a calm day, and let’s get mulching!