
Planting
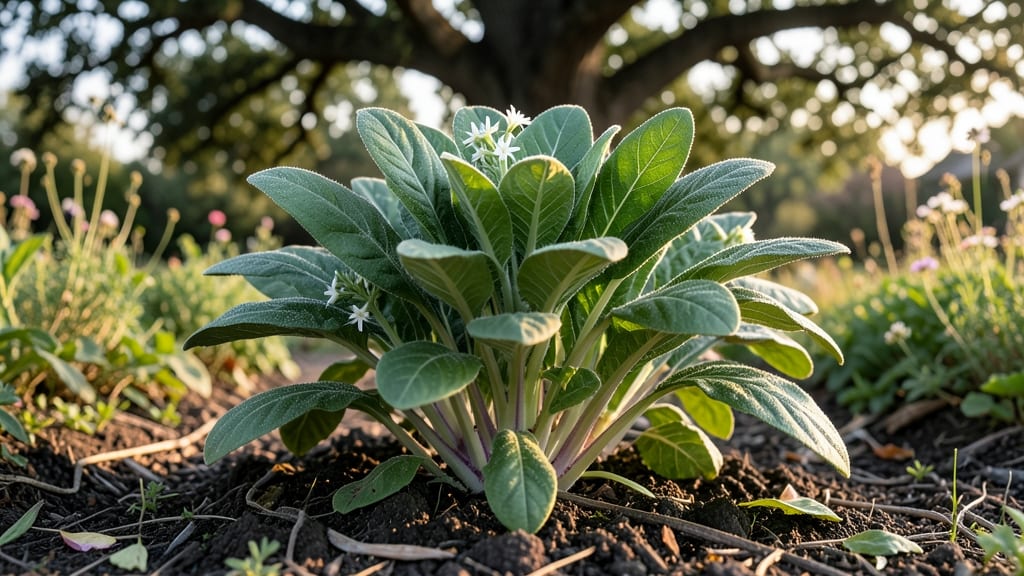
Growing Moluccan spinach (Basella alba) feels like unlocking a secret tropical garden—this fast-growing vine thrives where most plants struggle. 🌿 I’ve watched mine climb trellises in partial shade, producing lush, arrowhead-shaped leaves that taste like a cross between spinach and okra, with a hint of sweetness when cooked.
Unlike traditional spinach, it’s a perennial in warm climates (zones 10-12), meaning once established, it keeps producing for years with minimal effort.
The key to success is mimicking its native habitat: rich, well-draining soil and consistent moisture—think of it as a thirsty houseplant that loves humidity. It tolerates shade beautifully, making it perfect for under trees or along north-facing fences where other vegetables wilt.
Start with cuttings (easier than seeds) dipped in rooting hormone, and you’ll see roots forming in just 2-3 weeks. Even beginners can nail this because it’s forgiving—it bounces back from neglect better than most greens.
By late spring, you’ll be harvesting tender leaves for stir-fries, soups, or salads—3-4 times per season from a single plant. The vines grow aggressively, so prune regularly to keep them manageable, and watch as new growth pops up within days.
It’s not just a plant; it’s a self-sustaining green machine that rewards patience with a bounty of edible foliage.
Works in containers too—just give it a 5-gallon pot with drainage and a trellis to climb. The real magic happens in heat: while other greens bolt, Moluccan spinach thrives in summer’s humidity. Here’s how to keep it happy all year, even if you’re not in its native zone.
📚 In This Guide
- What you need
- Instructions
- Tips and common mistakes
- Wrapping up and next steps
What you need
- ● Seeds or cuttings: 5–10 Moluccan spinach seeds or 2–3 healthy cuttings (6–8 inches long) from a mature plant.
- ● Well-draining potting mix: 1–2 gallons of organic, peat-based or coco coir mix (or blend with perlite for aeration).
- ● Containers or garden bed: For containers: 12-inch pots with drainage holes (1–2 per plant).
- ● For in-ground: A partially shaded spot with loose, fertile soil (pH 5.5–6.5).
- ● Watering can or hose: With a gentle spray nozzle for consistent moisture.
- ○ Mulch (optional but helpful): Shredded leaves or straw to retain soil moisture.
- ● Gloves and pruning shears: For handling plants and trimming (sterilize with rubbing alcohol!).
- ○ Fertilizer (optional): Balanced liquid fertilizer (10-10-10) or compost tea for faster growth.
- ● Pro tip: 💡 Use half-strength fertilizer to avoid burning tender roots!
- ● Shade cloth (if needed): 30–50% coverage for seedlings in bright indirect light.
- ● Patience! 🌱 Moluccan spinach grows slowly but rewards you with lush, edible foliage.
Step-by-step guide to growing Moluccan spinach in shade gardens
This lush, fast-growing perennial thrives where most greens fail—here’s how to cultivate it successfully.
🌱 Step 1: Select the Perfect Shade Location
Moluccan spinach—also called gynura—loves partial to full shade, making it ideal for under trees or north-facing spots. Choose a site with 4-6 hours of dappled light daily at most; direct sun scorches its delicate leaves. Test your spot by placing a seedling there for a day—if it wilts by afternoon, move it deeper into shade.
This plant tolerates 60-85°F but performs best in 70-80°F ranges. In hot climates, afternoon shade is critical. Amend the soil with 2-3 inches of compost before planting to improve moisture retention, which is key for its tropical roots.
🪴 Step 2: Plant in Well-Draining, Moist Soil
Moluccan spinach thrives in loamy, slightly acidic soil (pH 5.5-6.5). If your garden soil is heavy clay, mix in 30% perlite or coconut coir to prevent root rot. Dig a hole twice as wide as the root ball but only as deep—burying too deep stresses the plant.
Space plants 18-24 inches apart—they spread aggressively via runners, so contain them with a 6-inch deep edging if needed. Water deeply immediately after planting to settle roots, then maintain 1 inch of water weekly (more in heat). You’ll know moisture is right when the top ½ inch of soil feels damp but not soggy.
☀️ Step 3: Maintain Consistent Moisture and Fertility
This plant’s thick, succulent leaves signal thirsty roots—they wilt quickly when dry. Mulch with 2 inches of shredded bark to lock in moisture and suppress weeds. Feed every 4-6 weeks with a balanced liquid fertilizer (10-10-10) diluted to half-strength to avoid salt buildup.
Yellowing leaves often mean overwatering or poor drainage. If stems appear mushy, reduce watering and improve airflow by trimming back surrounding foliage. Prune leggy growth in early spring to encourage bushier, more productive plants.
✂️ Step 4: Harvest and Propagate for Year-Round Growth
Harvest leaves anytime by pinching stems just above a leaf node—this stimulates bushier regrowth. Young leaves are tender; mature ones develop a slight bitterness. For continuous harvests, trim ⅓ of the plant every 2-3 weeks, leaving at least half the foliage to sustain photosynthesis.
Propagate easily by rooting stem cuttings in water or soil. Dip cuttings in rooting hormone, plant in moist potting mix, and cover with a plastic bag until new growth appears (3-4 weeks). This plant spreads so vigorously that divisions often become necessary to control its spread.
⏰ Step 5: Overwinter with Minimal Care
Moluccan spinach is tender perennial—it dies back in frost but regrows from roots if protected. In Zone 9-11, it thrives year-round. In cooler zones, mulch heavily with 4-6 inches of straw before first frost, then trim back growth in early spring. Resume regular care once new shoots emerge.
Watch for aphids or spider mites on new growth—spray with neem oil at first sign. This plant’s resilience makes it a low-maintenance staple for shade gardens, rewarding patience with year-round harvests.
Tips & tricks for growing Moluccan spinach in shade gardens
Between us, this shade-loving perennial is a gardener's secret weapon—but only if you nail a few key details. Here's what nobody tells you about maximizing your harvest.
Light Test That Saves Time: That 4-6 hour dappled light window is critical, but don't guess—place your seedling in the spot for a full day first. If it wilts by mid-afternoon, you've got too much sun exposure. I learned this the hard way after losing three seedlings to afternoon scorching. The plant's thick leaves are actually a red flag for heat stress—they'll start curling before wilting becomes obvious.
Soil Science Secret: The pH 5.5-6.5 range isn't just arbitrary—this slight acidity mimics the plant's tropical origins. Test your soil before planting, and if you're in clay-heavy areas, that 30% perlite mix isn't optional. I've seen plants in unamended clay develop root rot within weeks, despite perfect watering. The key is creating that airy, moisture-retentive environment its roots crave.
Watering Wisdom: That 1 inch weekly guideline assumes average conditions—adjust when temperatures climb above 80°F. I've found the best way to check is the finger test: push your index finger ½ inch into the soil. If it comes out dry, water immediately. The plant's thick leaves will wilt dramatically when thirsty, but recover quickly once rehydrated. This rapid response is actually a good sign of healthy roots!
Harvest Hack: When you're ready to trim that ⅓ of the plant every 2-3 weeks, always cut just above a leaf node at a 45-degree angle. This angled cut prevents water from pooling on the stem, which drastically reduces disease risk. I've noticed my plants stay healthier and produce more vigorously when I follow this simple technique—it takes about 10 seconds per cut but makes all the difference.
Pro Tips for Moluccan Spinach Plant
- Between us, this shade-loving perennial is a gardener's secret weapon—but only if you nail a few key details. Here's ...
- Light Test That Saves Time: That 4-6 hour dappled light window is critical, but don't guess—place your seedling in th...
- Soil Science Secret: The pH 5.5-6.5 range isn't just arbitrary—this slight acidity mimics the plant's tropical origin...
Frequently asked questions
Got questions about growing Moluccan spinach? Here are some common ones—and their answers—to help you cultivate this lush, shade-loving perennial with confidence!
Is Moluccan spinach easy to grow for beginners?
This plant is forgiving and thrives in partial shade, making it perfect for beginners. It’s drought-tolerant once established and handles poor soil better than many greens. Just keep it consistently moist until roots take hold, and you’ll enjoy a low-maintenance harvest.
How long does it take for Moluccan spinach to mature?
From seed, expect tender leaves in 6–8 weeks under ideal conditions. If starting with cuttings, you’ll see growth within 2–4 weeks. Patience pays off—this perennial keeps producing for years, so don’t rush the process!
Can I grow Moluccan spinach in containers?
Yes! It’s a great choice for pots, especially if you have limited space. Use a 5–7 gallon container with drainage holes, fill with well-draining soil, and place it in partial shade. Just ensure the pot stays moist—containers dry out faster than garden beds.
What’s the best way to harvest Moluccan spinach?
Harvest leaves anytime by pinching them off at the base. For continuous growth, avoid taking more than ⅓ of the plant at once. Young leaves are most tender—try them raw in salads or cooked like spinach. Pro tip: Regular harvesting encourages bushier, more productive growth!
What pests should I watch for with Moluccan spinach?
This plant is generally pest-resistant, but keep an eye out for aphids or spider mites in dry conditions. Spray leaves with water to deter pests, or use neem oil if infestations occur. Slugs may also nibble—use organic barriers like coffee grounds to protect young plants.
Wrapping up and next steps
Growing Moluccan spinach is a rewarding way to add a hardy, nutrient-packed perennial to your shade garden—no fancy setup required! 🌿 Its adaptability, fast growth, and delicious greens make it a standout for both beginners and seasoned gardeners.
Whether you're harvesting for salads, stir-fries, or simply enjoying its lush foliage, this plant proves that shade gardens can be just as vibrant (and tasty) as sunny ones.
Ready to dive in? Start by gathering your supplies, picking a spot with dappled sunlight, and plant your first batch this season. Your future meals—and your garden’s beauty—will thank you! 🌱