
Planting
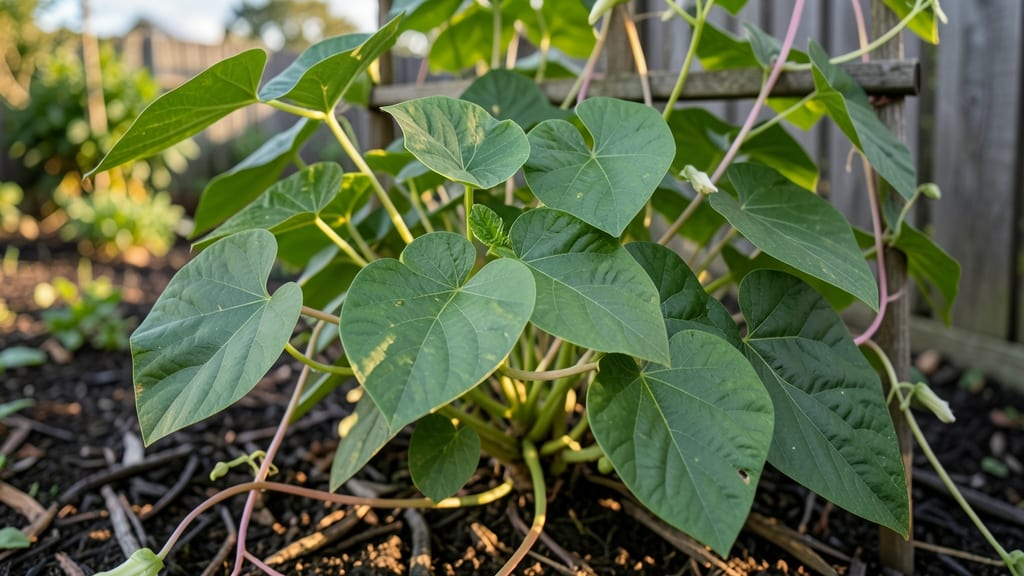
Growing the Indian spinach plant (Basella alba) delivers fast-growing greens that thrive in heat when most leafy crops struggle. 🌿 I’ve grown this vine in my subtropical garden for years, and its ability to produce harvestable leaves in just 4-6 weeks after planting makes it a game-changer for continuous harvests.
This tropical climber loves warmth and humidity but handles partial shade better than most greens. Start with cuttings or seeds in well-draining soil mixed with compost—it’s not fussy about nutrients but will reward you with vibrant, arrowhead-shaped leaves when happy. Prune regularly to encourage bushier growth and prevent legginess.
You’ll harvest tender young leaves for salads or mature leaves for stir-fries within 6-8 weeks of planting. The vines spread aggressively, so contain them in raised beds or trellises if space is limited. With proper care, one plant can feed a family for months.
Perfect for gardeners in USDA Zones 9-11 (or as an annual in cooler climates), this plant thrives where others fail. The key? Consistent moisture and occasional fertilizer—no fancy equipment needed. Ready to grow yours?
📚 In This Guide
- What you need
- Instructions
- Tips and common mistakes
- Wrapping up and next steps
What you need
- ● Seeds: High-quality Indian spinach (Basella alba) seeds (0.5 oz or ~15g should suffice for a small garden).
- ● Potting Mix: Well-draining, organic potting soil (5-gallon bag). Avoid heavy clay soil.
- ● Containers or Garden Bed: Containers: 4–6-inch deep pots (3–5 units) with drainage holes.
- ● Garden Bed: A sunny spot with loose, fertile soil (4’ x 4’ area for a small harvest).
- ● Watering Can or Hose: With a gentle spray nozzle for even moisture.
- ● Fertilizer: Organic: Compost or balanced organic fertilizer (10-10-10 ratio).
- ● Slow-Release: Granular fertilizer (1 tbsp per plant).
- ● Mulch: Straw or shredded leaves (1–2 inches) to retain moisture.
- ● Grow Lights: LED lights (for indoor setups or low-light areas).
- ● Trellis or Support: If growing the climbing variety (e.g., Basella rubra), a small trellis or string for vines.
- ● pH Test Kit: To ensure soil pH is between 6.0–7.0 (ideal for spinach).
- ● Insect Spray: Neem oil or insecticidal soap (for pest control).
- ● Seedling Trays: If starting indoors (biodegradable trays work great!).
Step-by-step instructions for growing Indian spinach (Basella alba)
Here's how to cultivate this heat-loving vine for continuous harvests—no fancy equipment needed.
🌱 Step 1: Select the Right Spot and Prep Soil
Indian spinach thrives in warmth (70-90°F) and partial shade, making it perfect for containers or garden beds with afternoon shade. Choose a location with well-draining soil—this plant hates soggy roots. If your soil is heavy clay, mix in 2-3 inches of compost to improve aeration before planting.
Test soil moisture by squeezing a handful—it should hold together but not be sticky. If your soil drains too quickly (like sandy loam), blend in 1 part coconut coir to the top 6 inches of soil to retain moisture without suffocating roots. Avoid fresh manure; it burns tender vines.
🌿 Step 2: Plant Seeds or Cuttings at the Right Time
Start seeds indoors 6-8 weeks before last frost in biodegradable pots (they dislike root disturbance). Press seeds ½ inch deep in moist seed-starting mix, spacing them 1-2 inches apart. Keep soil consistently damp (not wet) at 75-80°F—germination takes 10-14 days.
For faster growth, propagate from 4-inch cuttings with 2-3 leaves. Dip cut ends in rooting hormone, then plant in moist soil. Water lightly and cover with a plastic bag until new growth appears (7-10 days). Once seedlings have 3-4 true leaves, transplant outdoors after hardening off for 1 week.
☀️ Step 3: Train Vines and Maintain Moisture
Indian spinach grows aggressively—train vines along trellises or fences to save space and improve airflow. Use soft twine to gently tie stems as they grow; never pull tight enough to restrict growth. Prune leggy stems back by ⅓ to encourage bushier, more productive plants.
Water deeply 2-3 times weekly, aiming for 1 inch of water per week. Let the top 1-2 inches of soil dry between waterings—wilting leaves signal thirst, but yellowing indicates overwatering. Mulch with 2 inches of straw to lock in moisture and suppress weeds, which compete for nutrients.
✂️ Step 4: Harvest Strategically for Continuous Growth
Harvest young leaves (3-4 inches long) for tender greens, or let vines mature for thicker stems. Use clean scissors to snip just above a leaf node—this encourages branching. For maximum yield, harvest every 2-3 weeks, never taking more than ⅓ of the plant at once.
After heavy harvests, fertilize lightly with balanced liquid fertilizer (10-10-10) diluted to ½ strength. This plant is forgiving—even if you skip a feeding, it rebounds quickly. In cold climates, grow as an annual; in warm zones, it’s a perennial that self-seeds prolifically.
Tips & tricks for growing Indian spinach
A few simple tricks will help you cultivate this fast-growing vine like a pro—no green thumb required.
Soil Temperature Matters: Maintain soil warmth between 70-90°F for optimal growth. I use a simple soil thermometer to monitor temperatures, especially in cooler climates. If your soil dips below 70°F, consider using black plastic mulch to absorb heat and keep roots warm. This is particularly important during germination when seeds need that consistent warmth to sprout reliably.
Seed Starting Hack: For faster germination, soak seeds in warm water for 6-8 hours before planting. This mimics natural rainfall and can cut your 10-14 day germination window by 2-3 days. Just be sure to plant them immediately after soaking—don't let them dry out. I've found this especially helpful when starting seeds in cooler indoor environments where warmth is limited.
Pruning Strategy: When pruning leggy stems by ⅓, focus on removing the longest, most vertical growth first. This encourages bushier growth at the base where new leaves form. I like to do this pruning in the morning so any new growth has plenty of sunlight to recover by evening. This technique helps maintain that compact, productive shape that yields so well.
Harvesting Timing: For maximum tenderness, harvest leaves in the morning when they're fully hydrated. The 3-4 inch size guideline is perfect for baby greens—any larger and they start to develop that slightly tougher texture. I always carry a small pair of clean scissors when I water in the morning to make harvesting part of my routine without disrupting the plant's growth cycle.
Pro Tips for Indian Spinach Plant
- A few simple tricks will help you cultivate this fast-growing vine like a pro—no green thumb required.
- Soil Temperature Matters: Maintain soil warmth between 70-90°F for optimal growth.
- Seed Starting Hack: For faster germination, soak seeds in warm water for 6-8 hours before planting.
Frequently asked questions
Got questions about growing and using Indian spinach (Basella alba)? You’re not alone! Here are some of the most common queries—plus quick, practical answers to help you succeed.
How fast does Indian spinach grow, and when can I harvest?
Indian spinach is a fast grower! With the right conditions (warmth, partial shade, and consistent moisture), you can expect seedlings to sprout in 7–14 days and harvest in just 4–6 weeks. For continuous harvests, trim leaves as needed—young, tender shoots are best for salads, while mature leaves work great for stir-fries. Pro tip: Pinch back flowering stems to keep the plant producing lush greens!
Can Indian spinach survive cold weather, or is it strictly a tropical plant?
While Indian spinach thrives in tropical to subtropical climates (USDA zones 9–11), it’s not frost-tolerant. In cooler regions, grow it as an annual in containers and bring pots indoors before temperatures drop below 50°F (10°C). For year-round harvests, pair it with winter greens like kale or Swiss chard in a greenhouse or under grow lights.
What’s the best way to cook Indian spinach—raw, stir-fried, or something else?
Indian spinach is versatile! Try it:
- Raw: Thinly slice young leaves for salads (they’re slightly tangy and crisp).
- Stir-fried: Sauté with garlic, ginger, and coconut milk for a Thai-inspired dish.
- Curried: Simmer with tomatoes, spices, and lentils for a hearty palak variation.
- Pickled: Ferment with vinegar and spices for a tangy snack.
Why are my Indian spinach leaves turning yellow or developing holes?
Yellowing or holes in leaves usually signal pests or nutrient issues. Check for:
- Pests: Aphids, spider mites, or whiteflies (spray with neem oil or insecticidal soap).
- Overwatering: Yellowing at the base? Ensure pots have drainage holes.
- Nutrient deficiency: Feed with a balanced liquid fertilizer (like 10-10-10) every 4–6 weeks.
- Sunburn: If leaves scorch, move the plant to partial shade.
Are there any easy alternatives to Indian spinach for beginners?
If Indian spinach seems tricky, try these low-maintenance greens:
- Malabar spinach (Basella rubra): Hardier than Indian spinach, with similar taste.
- Swiss chard: Cold-tolerant and fast-growing (harvest in 40 days).
- Kale: Nutrient-packed and forgiving of cooler temps.
- Spinach (Lollo Rosso): Ready in 30 days; great for salads.
Wrapping up and next steps
Growing Indian spinach (palak) is a rewarding journey that brings fresh, nutrient-rich greens straight to your kitchen—no matter the season! 🌱 With its fast growth and low-maintenance needs, this versatile plant is perfect for beginners and seasoned gardeners alike.
Whether you’re aiming for a thriving home garden or a sustainable food source, the key lies in patience, proper care, and a little creativity in the kitchen.
Ready to dive in? Start by planting your first batch this weekend—your taste buds (and health!) will thank you. Need inspiration? Try swapping store-bought greens for your homegrown palak in your favorite curries or smoothies. Happy growing! 🌟