
Planting
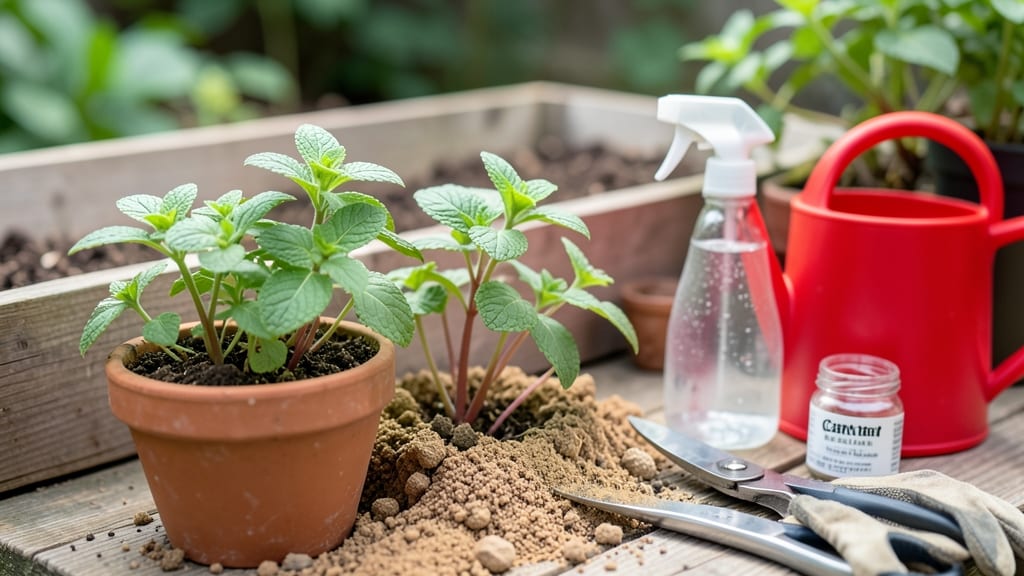
Transplanting mint cuttings in water first cuts rooting time in half—no more waiting weeks for stubborn stems to take hold. 🌱 I’ve rooted dozens of cuttings this way, and the difference is night and day: lush, established plants ready for the garden within 2-3 weeks instead of the usual 6.
The secret? Mimicking how mint grows naturally—fast and aggressive—by giving it a head start in water before soil.
You’ll need just three simple supplies: sharp scissors (to avoid crushing stems), a clean glass jar or vase with water, and a sunny windowsill. Timing matters too—spring or early summer gives mint the perfect growing window, but you can root cuttings anytime indoors.
The key is patience: change the water every 2-3 days to prevent bacteria, and watch for roots sprouting in about 10 days. Once they’re 2-3 inches long, they’re ready for soil.
When transplanting, choose a well-draining potting mix (mint hates soggy roots) and plant at the same depth as the water jar. Space cuttings 6-8 inches apart to give them room to spread—mint’s invasive growth is its superpower, but it needs space to thrive.
After planting, water lightly and place in bright, indirect light (direct sun can scorch tender new leaves). Within a week, you’ll see fresh growth signaling success.
Common mistakes? Overwatering after transplant (stick your finger in the soil—water only when the top inch is dry) and crowding plants too soon. Mint’s fast growth means it’ll fill its space quickly, but give it 4-6 weeks before dividing if you want multiple plants.
The payoff? A year-round supply of fresh mint for cooking, teas, or even pest control—all from a few cuttings rooted in a jar.
📚 In This Guide
- What you need
- Instructions
- Tips and common mistakes
- Wrapping up and next steps
What you need
- ● Mint cuttings: 4–6-inch healthy stems (preferably with 2–3 leaf nodes each). Pro tip: Choose stems from the top half of the plant for best results!
- ● Sharp pruning shears or scissors: Sterilized to prevent disease (rubbing alcohol works great!).
- ○ Clean glass or jar: 8–12 oz size (like a mason jar or clean soda bottle). Optional: Use a small vase or even a plastic cup if needed.
- ● Room-temperature water: Filtered or tap water left out for 24 hours (to remove chlorine).
- ○ Rooting hormone (optional but helpful): Powder or gel formula to speed up root growth.
- ● Small pots or garden bed: 6–8 inches in diameter with drainage holes. Soil rec: Well-draining potting mix or garden soil amended with compost.
- ● Spray bottle: For gentle watering after transplanting.
- ● Sunlight: A bright spot with indirect light (e.g., a windowsill or shaded patio). Mint roots best in warmth but avoids direct sun.
- ● Patience: Roots typically appear in 2–4 weeks, but some varieties may take longer.
- ● Consistency: Change water every 3–5 days to keep it fresh and oxygenated.
Step-by-Step instructions for transplanting mint cuttings
Here’s how to turn those mint stems into thriving plants—fast—using water propagation for stronger roots.
🌱 Step 1: Select and Prepare Healthy Cuttings
Choose stems with 4-6 inches of growth and at least 2-3 sets of leaves—these give the best balance of energy and rooting potential. Use clean, sharp scissors or pruners to cut just below a leaf node (the bump where leaves attach). This is where roots will emerge.
Strip the lower leaves off the stem, leaving only the top 2-3 sets intact. This reduces moisture loss and directs energy to root development. I like to rinse the cut end under cool water to remove any sap or debris—it helps the stem absorb water more efficiently.
💧 Step 2: Root in Water for Faster Establishment
Fill a small glass or jar with room-temperature water—mint roots best in 65-75°F conditions. Submerge the stripped stem about 1-2 inches deep, ensuring the leaves stay above water. Place the container in bright, indirect light (a kitchen windowsill works perfectly).
Change the water every 3-4 days to prevent bacterial growth and stagnation. You’ll see tiny white roots sprouting in 1-2 weeks—sometimes faster if your kitchen stays warm. Once roots reach 1-2 inches long, the cutting is ready for soil. This water phase speeds up growth and reduces transplant shock.
🪴 Step 3: Transplant to Soil for Permanent Growth
Fill a 6-inch pot with well-draining potting mix—mint hates soggy roots, so avoid garden soil. Make a small hole in the center and gently place the rooted cutting in, burying the stem up to the first set of leaves. This encourages stronger stem development below soil level.
Press the soil lightly around the stem to remove air pockets, then water deeply until moisture runs out the drainage hole. Keep the pot in partial shade for the first week to reduce stress. Mint grows aggressively, so you’ll see new leaves in 10-14 days—a sign the roots are happily established.
☀️ Step 4: Maintain Light and Water for Rapid Growth
Once established, mint thrives in full sun to partial shade—6+ hours of light daily. If leaves yellow or stems stretch, your plant needs more brightness. I rotate my pots weekly to prevent lopsided growth, and you’ll notice the stems thicken and leaves darken within weeks.
Water when the top inch of soil feels dry—mint’s shallow roots need consistent moisture but hate sitting in water. Overwatering causes root rot, so always check before watering. Fertilize lightly with a balanced liquid fertilizer every 4-6 weeks to keep growth vigorous.
✂️ Step 5: Prune and Propagate for Continuous Harvests
Pinch back the tips of new growth when stems reach 6 inches to encourage bushier plants. Regular pruning also prevents flowering, which makes mint taste stronger and more aromatic. I harvest leaves as needed, but never take more than ⅓ of the plant at once—this keeps it productive.
Use your pruned cuttings to repeat the process! Mint roots so easily that you’ll soon have more plants than you know what to do with. Just repeat the water propagation method, and you’ll have a self-sustaining mint patch in no time.
Tips & tricks for transplanting mint cuttings
Here’s how to skip the guesswork and maximize your mint’s growth potential every time.
Cutting Selection: Look for stems with vibrant green leaves and no signs of yellowing or damage. The 4-6 inch length mentioned in Step 1 is ideal, but if you’re working with shorter cuttings, don’t worry—just ensure they have at least 2-3 sets of leaves to support photosynthesis during the rooting phase. I’ve successfully rooted cuttings as short as 3 inches by keeping them in bright light and changing the water more frequently.
Water Quality: Use filtered or distilled water if possible, as tap water can contain chlorine or minerals that may inhibit root growth. If you must use tap water, let it sit out uncovered for 24 hours before using to allow chlorine to evaporate. The 65-75°F temperature range mentioned is critical—if your kitchen is cooler, place the container on a seedling mat or near a warm spot to maintain optimal conditions.
Light Management: While bright, indirect light is perfect, mint cuttings can adapt to fluorescent grow lights if natural light is limited. Position lights about 6 inches above the container and keep them on for 12-14 hours daily to simulate sunlight. Watch for leaves touching the water—this can cause rot, so adjust the depth or use a small weight to keep stems submerged at 1-2 inches as specified.
Transplant Timing: Don’t rush the water phase! Wait until roots reach 1-2 inches before transplanting—this ensures the cutting has enough energy to establish itself in soil. I’ve seen cuttings with ½-inch roots struggle to survive in soil, while those with 1.5-inch roots thrive immediately. Once transplanted, the 10-14 days for new leaves to appear is a great benchmark, but some vigorous cuttings may show growth in as few as 7 days.
Pro Tips for Transplant Mint Cuttings
- Here’s how to skip the guesswork and maximize your mint’s growth potential every time.
- Cutting Selection: Look for stems with vibrant green leaves and no signs of yellowing or damage.
- Water Quality: Use filtered or distilled water if possible, as tap water can contain chlorine or minerals that may inhibit root growth.
Frequently asked questions
about transplanting mint cuttings—because even pros need a little guidance!How long does it take for mint cuttings to root in water?
Most mint cuttings will develop roots in 2–4 weeks when placed in water. Keep the water clean and change it every 2–3 days to prevent bacterial growth. Once roots are 2–3 inches long, they’re ready for soil!
Can I transplant mint cuttings directly into soil instead of water?
Yes, but rooting in water first boosts success rates—especially for picky mint varieties. If you skip water, dip cuttings in rooting hormone and plant in moist, well-draining soil. Keep soil consistently damp (not soggy) and place in bright, indirect light.
Why are my mint cuttings turning yellow or mushy after transplanting?
Yellowing or mushy stems often signal overwatering or root shock. Let soil dry slightly between waterings, and avoid transplanting on hot days. If roots were damaged during transfer, trim any brown/mushy sections before replanting.
How often should I prune mint after transplanting?
Prune mint regularly (every 4–6 weeks) to encourage bushy growth. Pinch back tips by 1/3 to promote branching. Avoid heavy pruning right after transplanting—wait until new growth appears (usually 2–3 weeks).
Can I grow mint from cuttings indoors?
Mint thrives indoors near a sunny window (6+ hours of light) or under grow lights. Use a pot with drainage holes, and keep soil moist. Just watch for aggressive spread—mint can overtake containers!
Wrapping up and next steps
Transplanting mint cuttings is a rewarding way to expand your herb garden—and you’ve got this! 🌱 By rooting them in water first, you’ll speed up growth and boost success rates, ensuring lush, fragrant plants in no time.
Whether you’re a seasoned gardener or just starting out, these simple steps make propagation effortless.
Now that you’re armed with the know-how, grab those cuttings and get growing! 🌿 Try experimenting with different containers or even share your new mint plants with friends—who wouldn’t want a fresh supply of this versatile herb? Happy planting!