
Planting
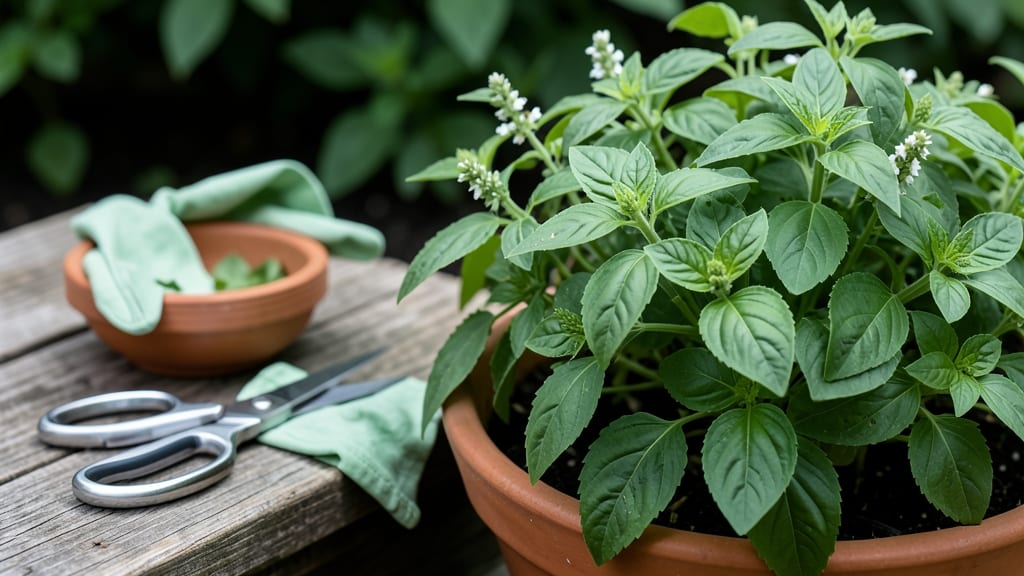
Removing basil leaves the right way keeps your plant thriving while giving you a steady supply of fresh herbs. ✂️ I used to yank leaves off my basil like weeds—until I learned how to pinch and cut for maximum regrowth.
The difference is night and day: my plants now produce twice as much without stress. Start with clean, sharp scissors or your fingers for pinching. Always cut just above a leaf node (where new leaves grow) to encourage bushier growth.
Never take more than 1/3 of the plant at once, or you’ll shock it into flowering. I harvest my basil every 2-3 weeks this way, and it stays lush all summer.
After harvesting, water lightly if the soil feels dry, and give the plant a few hours of morning sun to recover. The leaves you remove will stay fresh in the fridge for 5-7 days if wrapped in a damp paper towel.
My basil rarely bolts now because I harvest before it gets stressed. This method works for both potted basil and garden plants. The key is consistency—harvest young leaves often, and your plant will reward you with bold, flavorful growth all season.
📚 In This Guide
- What you need
- Instructions
- Tips and common mistakes
- Wrapping up and next steps
What you need
- ● Clean, sharp pruning shears – A bypass pruner (4-6 inches long) works best to avoid crushing stems. (1 pair)
- ○ Gloves (optional but recommended) – Lightweight gardening gloves to protect your hands from sap or thorns. (1 pair)
- ● Small bowl or container – A shallow dish or bowl to collect freshly cut leaves. (1)
- ● Water spray bottle – A 16-ounce bottle with water to mist leaves if they’re dusty or wilted. (1)
- ● Paper towels or damp cloth – For wiping down tools or cleaning leaves before use. (A few sheets or 1 cloth)
- ● Kitchen scissors – If you don’t have pruning shears, a clean pair of scissors (5-7 inches) can work in a pinch.
- ● Disinfectant spray (70% isopropyl alcohol) – To sterilize tools between cuts and prevent disease. (Small spray bottle)
- ● Labeling tags or marker – If you’re harvesting for different recipes (e.g., pesto vs. garnishes).
- ● Plastic bag with holes – For storing leaves if you’re not using them immediately. (1)
Step-by-Step instructions for harvesting basil leaves
Here's how to pick basil leaves the right way—keeping your plant happy and productive.
🌿 Step 1: Choose the Right Leaves to Harvest
Focus on the larger, mature leaves near the bottom of the plant first. These are fully grown and won't stunt your basil's growth. Avoid picking the smallest leaves or the topmost growth, as these are still developing and contribute to future harvests.
Look for leaves that are at least 2-3 inches long and have a deep green color. If you see any yellowing leaves, remove those first—they're past their prime and can drain nutrients from healthy growth. I always start with the outer leaves and work my way inward to avoid damaging the center stem.
✂️ Step 2: Use the Proper Snipping Technique
Never yank leaves off the stem—this tears the plant and leaves jagged edges that heal poorly. Instead, use a pair of clean, sharp scissors or pruning shears to make a clean cut just above a leaf node (the small bump where a leaf meets the stem). This encourages new growth from that node.
Hold the stem firmly with one hand and snip about ¼ inch above the node. Making the cut too close to the node can damage the emerging growth point. If you don't have scissors, your fingers work in a pinch—just pinch the stem just above the node and pull gently downward while twisting slightly to snap it cleanly.
🌱 Step 3: Harvest Strategically for Bushier Growth
To keep your basil bushy and productive, never remove more than ⅓ of the plant at once. This rule prevents shock and ensures your basil recovers quickly. I like to harvest every 2-3 weeks during the growing season, focusing on the outer leaves to maintain the plant's shape.
Watch for new growth emerging from the nodes after each harvest—that's your signal the plant is thriving. If you notice the center stem getting woody or the leaves getting sparse, it's time to give your basil a harder prune by cutting back the top ⅓ of the plant to encourage branching. This works especially well in late summer when growth slows.
💧 Step 4: Care for Your Basil After Harvesting
After harvesting, give your basil a light watering if the top inch of soil feels dry. The stress of leaf removal makes the plant more sensitive to moisture loss, so keep the soil consistently damp but never soggy. I like to water in the morning so any excess moisture evaporates during the day.
Place your basil in a spot with 6+ hours of sunlight daily after harvesting—this helps it recover faster. If you notice the leaves wilting or turning yellow within a day or two, it might be thirsty or stressed. A quick check of the soil moisture and a light trim of any damaged leaves usually gets it back on track.
⏰ Step 5: Store Your Harvested Leaves Properly
For fresh use within a few days, store basil leaves in a sealed container lined with a damp paper towel. Place the container in the fridge and use within 5-7 days. The damp towel helps maintain moisture and keeps the leaves crisp longer.
If you're not using all the leaves immediately, wash them gently and pat dry before storing. Avoid submerging them in water—this causes soggy, slimy leaves that spoil faster. For longer storage, freeze leaves in an ice cube tray with a little water or olive oil, then transfer to a freezer bag for up to 3 months.
Tips & tricks for perfect basil harvesting
These little techniques will keep your basil thriving and your kitchen stocked with fresh leaves.
Leaf Selection Matters: When harvesting, focus on the largest leaves near the bottom of the plant—these are fully mature and won't affect future growth. I always skip the smallest leaves (under 2 inches) and the topmost growth, as these are still developing. The outer leaves are your best bet—they're ready to use and won't stunt your plant's productivity.
The Right Cut Makes All the Difference: That ¼-inch clearance above the leaf node in Step 2 is crucial. Cutting too close damages the emerging growth point, while cutting too far away creates a larger wound. For a clean break without scissors, pinch the stem just above the node and twist gently downward—it should snap cleanly. This technique prevents tearing and encourages bushier growth.
Harvesting Frequency is Key: The ⅓ rule in Step 3 isn't just arbitrary—it prevents plant shock while maintaining productivity. I harvest every 2-3 weeks during growing season, always focusing on outer leaves. When you see new growth emerging from nodes after harvesting, that's your plant's way of saying "thank you!" For woody stems or sparse leaves, a harder prune (cutting back the top ⅓) works wonders in late summer.
Post-Harvest Care Keeps Your Plant Happy: After harvesting, check soil moisture—your basil will need a light watering if the top inch feels dry. The stress of leaf removal makes plants more sensitive to moisture loss, so keep soil consistently damp (not soggy). Morning watering helps excess moisture evaporate during the day. Place your basil in bright light (6+ hours daily) to speed recovery—wilting or yellowing leaves after a few days usually mean it's thirsty or stressed.
Pro Tips for Remove Basil Leaves From Plant
- These little techniques will keep your basil thriving and your kitchen stocked with fresh leaves.
- Leaf Selection Matters: When harvesting, focus on the largest leaves near the bottom of the plant—these are fully mature and won't affect future growth.
- The Right Cut Makes All the Difference: That ¼-inch clearance above the leaf node in Step 2 is crucial.
Frequently asked questions
Got questions about harvesting basil? You’re not alone!
Here are answers to the most common concerns—whether you're a beginner or a seasoned green thumb.
How do I know when basil leaves are ready to pick?
Harvest basil leaves when they’re fully grown but still tender—typically after 6–8 weeks of growth. Look for leaves that are 3–4 inches long and vibrant green. Avoid picking flowers or buds, as this can stunt the plant’s growth. Pro tip: Pick in the morning for the freshest flavor!
Should I cut basil leaves from the top or bottom?
Always cut from the top third of the plant to encourage bushier growth. Snip just above a leaf node (where leaves meet the stem) to promote new branching. Avoid cutting too low—this can stress the plant and reduce future harvests.
What if my basil plant has only a few leaves?
If your basil is young or sparse, don’t overharvest! Focus on 2–3 leaves per stem at first. Prune lightly to encourage more foliage. If the plant is still small, wait until it’s at least 6 inches tall before heavy harvesting.
Can I remove basil leaves without cutting? Should I tear them?
While you can tear leaves by hand, it’s best to use clean scissors or pruning shears. Tearing can damage stems and leave jagged edges, making the plant more susceptible to disease. For large leaves, snipping is gentler and cleaner!
What should I do if my basil turns yellow after picking?
Yellowing leaves after harvesting can signal over-pruning or stress. If this happens, reduce how much you pick and ensure the plant gets 6+ hours of sunlight and well-draining soil. Yellow leaves at the bottom are normal—remove them to focus energy on new growth.
How often can I harvest basil leaves?
For continuous harvests, pick basil every 2–3 weeks during the growing season. Regular pruning keeps the plant productive! In hot climates, you may harvest more frequently (every 1–2 weeks), but avoid stripping the plant bare.
Wrapping up and next steps
Removing basil leaves doesn’t have to be intimidating—just follow the right steps to keep your plant thriving while enjoying fresh, flavorful harvests! Whether you’re pinching young leaves or snipping mature ones, gentle care and consistency are key.
Now that you’re equipped with the know-how, take that confidence into your kitchen or garden and savor the rewards of your homegrown basil.
Ready to level up? Try experimenting with different basil varieties or explore creative ways to use your harvest—like pesto, teas, or infused oils. Happy harvesting! 🌿✨