
Planting
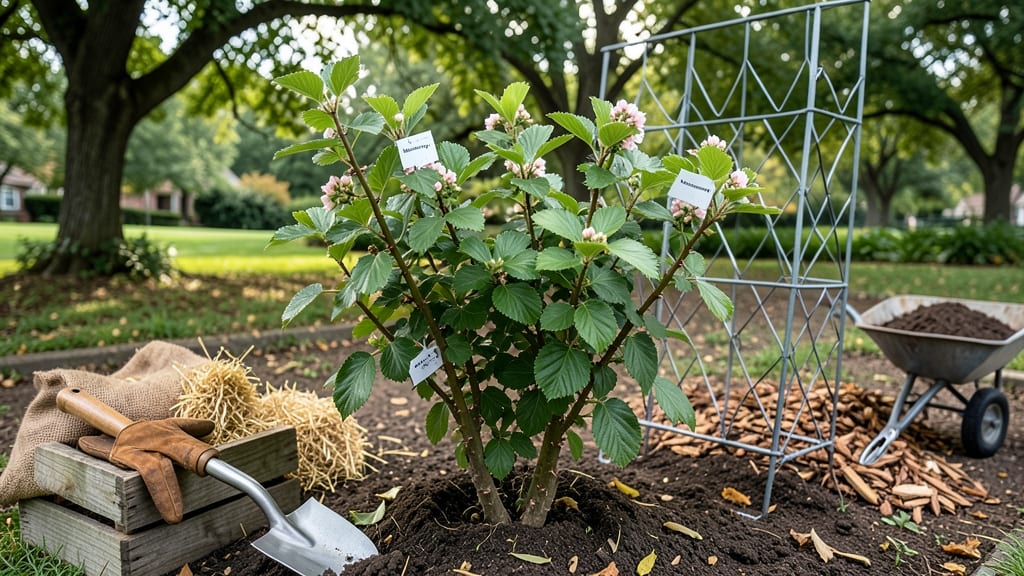
Planting Marionberries means juicy, cold-hardy berries that outperform store-bought every time. 🌱 These thornless bushes thrive in cooler climates, but getting them in the ground right is everything—skip the prep work, and you’ll fight weak growth for years.
I’ve planted mine twice now, and the second time (with proper soil and spacing) gave me double the harvest by year three.
The best time to plant is in early spring, when the soil warms to 50°F but before buds swell. Bare-root canes are cheaper and establish faster than potted plants, but if you grab potted ones, dig a hole twice as wide as the root ball.
Amend the soil with compost—Marionberries hate soggy roots but love rich, well-draining dirt. Three feet apart in rows spaced 6 feet apart keeps plants airy and productive.
After planting, water deeply to settle the soil, then mulch with 2-3 inches of straw to lock in moisture. Prune back any dead wood now, but hold off on heavy pruning until late winter—this gives the plant energy to root before summer’s heat.
The first year is all about roots, so skip heavy harvesting; let the bushes focus on establishing themselves for those sweet, plump berries next season.
Here’s the secret: these bushes reward patience. Plant them right, and by year three, you’ll be picking pint-sized buckets of berries that taste like summer even in cooler zones. The key? Good drainage, consistent water, and winter protection (a thick mulch layer keeps roots from heaving in freeze-thaw cycles).
Ready to grow your own? Let’s get those canes in the ground.
📚 In This Guide
- What you need
- Instructions
- Tips and common mistakes
- Wrapping up and next steps
What you need
- ● Marionberry plants: 3–5 cold-hardy bare-root or potted plants (check for disease-resistant varieties).
- ● Well-draining soil: A mix of loamy soil with a pH of 5.5–6.5 (test your soil if unsure).
- ● Compost or organic matter: 2–3 gallons per plant to enrich the soil.
- ● Mulch: 2–3 inches of wood chips or straw to retain moisture and suppress weeds.
- ● Fertilizer: A balanced 10-10-10 or organic fertilizer (follow package rates).
- ● Garden trowel or spade
- ● Pruning shears (for trimming roots or canes if needed)
- ● Garden hose or watering can
- ● Measuring tape or ruler (for spacing)
- ● Garden gloves (to keep your hands happy!)
- ● Trellis or sturdy stakes (to support canes as they grow)
- ● Drip irrigation system (for consistent watering)
- ● Soil pH test kit (to ensure optimal growing conditions)
- ● Bird netting (to protect ripe berries from hungry critters!)
Step-by-step guide to planting Marionberries for maximum yield
Here’s how I’ve learned to plant these cold-hardy bushes for berries so juicy they’ll make your neighbors jealous.
🌱 Step 1: Choose the Perfect Location and Prepare the Soil
Marionberries thrive in full sun—at least 6-8 hours daily—so pick a spot with no afternoon shade. I always test the soil first because these bushes demand fertile, well-draining soil with a pH between 5.5 and 6.5. If your soil is heavy clay, mix in 3-4 inches of compost to improve drainage and aeration.
Dig a hole twice as wide as the root ball but only as deep—planting too deep suffocates the roots. Loosen the sides of the hole with a shovel to encourage root spread. Marionberries love moisture but hate soggy feet, so if your area gets heavy rain, consider a slight mound to prevent waterlogging.
🪴 Step 2: Plant Bare-Root or Container-Grown Bushes at the Right Time
For best results, plant bare-root bushes in early spring (just as buds begin to swell) or container-grown plants in early fall. I’ve found that spring planting gives roots 6-8 weeks to establish before summer heat stress. If planting in fall, do it 4-6 weeks before your first frost—enough time for roots to settle but not enough for new growth to freeze.
Place the bush in the hole so the graft union (the swollen bump near the base) sits 1-2 inches above soil level. This prevents root rot and ensures the plant stays upright as it matures. Backfill with native soil mixed with 1-2 cups of bone meal for phosphorus—critical for root and fruit development. Water deeply to settle the soil around the roots.
☀️ Step 3: Mulch and Water for Strong Establishment
Spread 3-4 inches of organic mulch (straw or wood chips) around the base, keeping it 6 inches away from the stem to prevent rot. Mulch conserves moisture and suppresses weeds, but it also regulates soil temperature—essential for cold-hardy varieties like Marionberries. I always use disease-free mulch to avoid introducing pathogens to fresh plantings.
Water deeply once a week for the first month, ensuring the soil 6 inches down stays moist. You’ll know you’re doing it right when water drains freely through the soil—no puddles, no dry patches. After that, reduce to every 10-14 days unless you’re in a drought or extreme heat. Overwatering is the fastest way to invite root rot in these thirsty but not soggy-loving bushes.
✂️ Step 4: Prune for Shape and Productivity in Early Spring
Marionberries are self-pollinating but benefit from cross-pollination, so plant at least two bushes for a reliable harvest. In early spring, before buds break, prune out dead, diseased, or crossing branches. Cut back last year’s canes to 1/3 of their height—this encourages new growth and improves air circulation, reducing fungal diseases like powdery mildew.
Here’s the thing—I always leave 3-5 strong canes per bush. These will produce the most fruit, and thinning them out prevents overcrowding. Use clean, sharp pruners and make cuts at a 45-degree angle just above an outward-facing bud. This ensures the new growth angles away from the center, creating an open, sunlit canopy for juicier berries.
🌿 Step 5: Fertilize and Monitor for Pests/Diseases
Feed your bushes once in early spring with a balanced 10-10-10 fertilizer (follow package rates) and again after harvest with a low-nitrogen, high-phosphorus fertilizer (like 5-10-10) to boost next year’s fruit production. I’ve found that Marionberries respond well to compost tea applied as a foliar spray every 4-6 weeks during the growing season—it adds micronutrients without burning the leaves.
Watch for spotted wing drosophila (those tiny fruit flies) and Japanese beetles—both love Marionberries. I use row covers early in the season and handpick beetles when I see them. If you notice yellowing leaves, it’s often a sign of iron deficiency—apply chelated iron to the soil and keep the pH in check. The goal is vibrant green leaves and plump, juicy berries—not struggling plants.
Tips & tricks for planting Marionberries like a pro
These insider tricks will help you grow bushes that produce berries so flavorful, you'll wonder why you didn't start sooner.
Soil Test First: Before amending your soil, test its pH using a simple kit from your garden center. Marionberries are particular about their pH range of 5.5-6.5. If your soil tests higher than 6.5, mix in sulfur (about 1 pound per 100 square feet) and retest in 2-3 months. For lower pH, add lime (about 5 pounds per 100 square feet) and wait 3-6 months before planting. The right pH prevents nutrient deficiencies that lead to poor fruit development.
Root Ball Handling: When planting bare-root bushes, soak the roots in water for 1-2 hours before planting to prevent transplant shock. For container-grown plants, water thoroughly the day before planting. Gently loosen the root ball if it appears compacted—this encourages roots to spread into the surrounding soil. Never force the roots down into the hole; let them naturally find their level as you backfill.
Watering Wisdom: The first month is critical for root establishment, so monitor your soil moisture closely. Stick your finger 6 inches down—if it feels dry, water deeply. A good rule of thumb is to water until you see moisture emerge from the bottom of the hole. After the initial month, reduce frequency to every 10-14 days, but always check the soil first. Drip irrigation systems work wonders for consistent moisture without overwatering.
Pruning Precision: When you're pruning last year's canes to 1/3 of their height in Step 4, look for canes that are pencil-thick or larger—these are the fruit producers. Remove any canes that are thinner than a pencil, as they won't bear significant fruit. Also, cut out any canes that are growing inward, as they'll create a dense center that blocks sunlight and air circulation, inviting disease.
Pro Tips for Plant Marionberries
- These insider tricks will help you grow bushes that produce berries so flavorful, you'll wonder why you didn't start sooner.
- Soil Test First: Before amending your soil, test its pH using a simple kit from your garden center.
- Root Ball Handling: When planting bare-root bushes, soak the roots in water for 1-2 hours before planting to prevent transplant shock.
Frequently asked questions
Got questions about growing Marionberries?
Here are some of the most common ones—plus quick answers to help you grow like a pro!
What’s the best time of year to plant Marionberries?
Plant your Marionberries in early spring (as soon as the soil is workable) or fall (4–6 weeks before the first frost). This gives roots time to establish before extreme temperatures. Avoid planting in summer heat or winter freezes—roots need stability to thrive!
Do Marionberries need cross-pollination?
Yes! Marionberries are self-pollinating but produce more fruit with a second variety nearby (like Boysenberries or other blackberries). Plant at least two bushes within 10–15 feet of each other for the best harvest. Bees will do the rest!
Why aren’t my Marionberry bushes fruiting?
Common reasons include:
- Young age: Marionberries take 2–3 years to bear fruit after planting.
- Poor pollination: Check for bees or plant a second variety.
- Over-pruning: Prune in late winter to encourage new canes.
- Nutrient deficiency: Test soil pH (ideal: 5.5–6.5) and amend with compost.
Can I grow Marionberries in containers?
Yes, but they need large pots (at least 15–20 gallons) with drainage holes. Use a well-draining mix (like 60% soil, 30% compost, 10% perlite). Containers dry out faster—water deeply 2–3 times per week in hot weather. Expect slightly smaller yields than in-ground plants.
What pests should I watch for with Marionberries?
Keep an eye out for:
- Japanese beetles (chew leaves—handpick or use neem oil).
- Spider mites (tiny webs on undersides of leaves; spray with water).
- Birds (cover berries with netting when ripe!).
- Root-knot nematodes (rotating crops helps prevent them).
Wrapping up and next steps
Planting Marionberries is a rewarding journey that leads to juicy, flavorful harvests—even in cooler climates! 🌱 With the right location, soil prep, and care, these cold-hardy bushes will thrive and delight you for years.
Whether you're a beginner or a seasoned gardener, your effort will pay off with homegrown berries that taste like summer.
Now that you’re ready to plant, take the next step: mark your calendar for pruning and harvesting season! Stay patient, observe your bushes, and enjoy the sweet rewards of your hard work. Happy planting! 🍇✨