
Planting
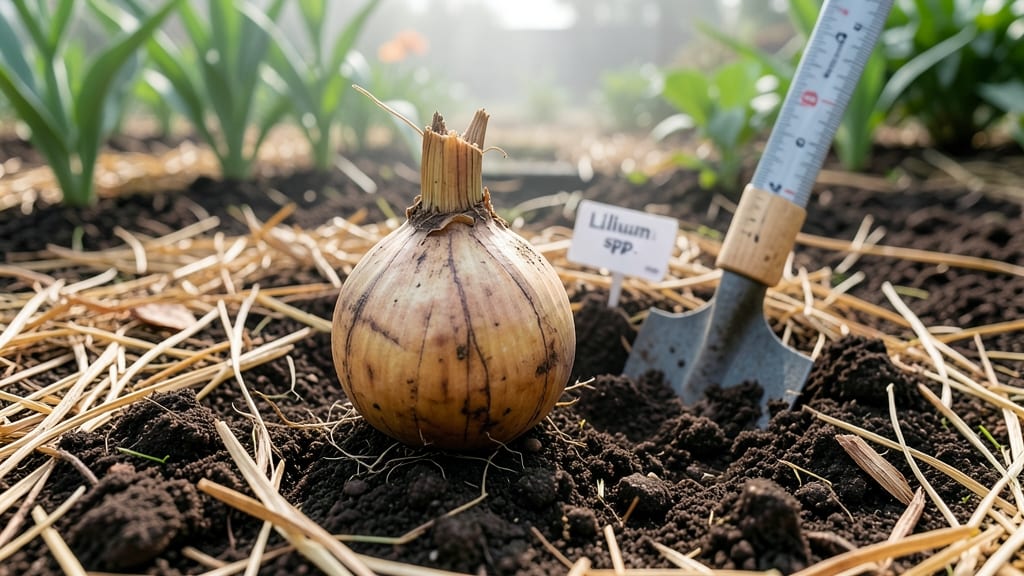
Planting lily bulbs in the ground is your ticket to stunning summer blooms that last for years—if you time it right. 🌸 I’ve watched my own lilies go from floppy stems to towering, fragrant displays just by following a few key rules about when and how to plant them.
The secret starts in late fall or early spring, when soil temperatures hover around 50°F. Most beginners rush planting too early, but waiting until after the last frost (or before the ground freezes) gives bulbs time to establish roots without rotting.
Dig holes 3 times as deep as the bulb’s height and space them 6-12 inches apart—crowding leads to weak stems and fewer blooms. Once planted, water deeply to settle the soil, then top with 2-3 inches of mulch to protect roots from temperature swings.
Within 6-8 weeks, you’ll see shoots pushing through, and by midsummer, those blooms will be the showstopper of your garden. This method works for Asiatic, Oriental, and Trumpet lilies—just adjust planting depth slightly for larger varieties. Let’s get those bulbs in the ground!
📚 In This Guide
- What you need
- Instructions
- Tips and common mistakes
- Wrapping up and next steps
What you need
- ● Lily bulbs: Choose healthy, firm bulbs (1–2 per hole, depending on desired fullness). Opt for Asiatic, Oriental, Trumpet, or Daylily varieties based on your climate and preferences.
- ● Garden trowel or bulb planter: A sturdy, sharp-edged tool (6–8 inches deep) to dig planting holes with ease.
- ● Garden fork or spade: For loosening soil, especially in compacted or clay-heavy areas.
- ○ Compost or well-aged manure: 1–2 cups per hole to enrich soil with nutrients (optional but highly recommended for first-time plantings).
- ○ Slow-release fertilizer (optional but ideal): A balanced 10-10-10 or bulb-specific formula (1 tbsp per hole). Avoid high-nitrogen fertilizers.
- ● Mulch (e.g., straw, wood chips, or shredded leaves): 2–3 inches to retain moisture and regulate soil temperature.
- ● Watering can or hose with a gentle spray nozzle: For post-planting hydration (avoid soaking the bulbs).
- ○ Gloves (optional but practical): To protect hands from dirt and sharp bulb edges.
- ● Soil test kit: To check pH (lilies thrive in neutral to slightly acidic soil, 6.1–7.5). Adjust with lime or sulfur if needed.
- ● Bulb food (e.g., bone meal): For an extra phosphorus boost to encourage strong roots.
- ● Plant markers or stakes: To label varieties and track growth (especially useful in large gardens).
- ● Soil conditioner (e.g., peat moss or perlite): If your soil is sandy or clay-heavy, amend it for better drainage.
Step-by-step instructions for planting lily bulbs in the ground
Here's the method I rely on for planting lily bulbs—tested across seasons and climates for vibrant blooms.
🌱 Step 1: Choose the Right Time and Location
Lilies thrive when planted in early spring, about 4-6 weeks before your last frost date, or in early fall for a head start. I always check my local frost chart and mark the calendar—planting too early risks rot, while waiting too long delays blooms. Pick a spot with full sun to partial shade (at least 6 hours of sunlight daily).
Lilies need well-draining soil to prevent bulb rot. If your garden soil is heavy clay, amend it with 2-3 inches of compost mixed into the top 6 inches. Test the soil pH—lilies prefer slightly acidic to neutral soil (6.1-7.0). You'll know you've chosen well when the area feels loose and crumbly when you squeeze a handful.
🪴 Step 2: Prepare the Soil and Planting Hole
Dig a hole twice as deep as the bulb’s height (about 6-8 inches deep for most lily varieties). The rule of thumb is: "Pointy end up"—lilies have a natural orientation, and planting them upside down will stunt growth. I tap the bulb gently to release any old roots or damaged scales before placing it in the hole.
Loosen the soil at the bottom of the hole with a trowel to encourage root penetration. Space bulbs 12-24 inches apart, depending on the variety—larger lilies like Asiatic or Oriental types need more room. Add a handful of slow-release bulb fertilizer to the hole to give roots a nutrient boost as they establish.
💧 Step 3: Plant and Water for Immediate Establishment
Place the bulb in the hole with the pointy side facing up and the roots fanning out naturally. Cover it with soil, pressing gently to remove air pockets but not compacting too firmly. A light layer of mulch (1-2 inches) helps retain moisture and regulate soil temperature—just avoid piling it directly against the bulb.
Water deeply right after planting to settle the soil and encourage root contact. You’ll know it’s done right when the soil surface looks slightly firm but not rock-hard. Over the next 2-3 weeks, keep the soil consistently moist (about 1 inch of water per week) until you see new shoots emerge. This ensures the bulb focuses on root growth before sending up foliage.
☀️ Step 4: Maintain Through the Growing Season
Lilies are low-maintenance once established, but they reward attention. Fertilize lightly in early spring with a balanced, water-soluble fertilizer (10-10-10) and again after blooming to support next year’s flowers. I avoid heavy nitrogen feeds—too much foliage weakens blooms. Deadhead spent flowers to redirect energy into bulb storage for next season.
Watch for pests like lily beetles or diseases like botrytis (gray mold). If you spot chewed leaves or black spots, act fast—remove affected foliage immediately and treat with neem oil or insecticidal soap. Healthy lilies develop sturdy stems and deep green leaves by mid-summer, signaling they’re thriving.
⏰ Step 5: Prepare for Winter and Next Year’s Blooms
In late fall, cut back the foliage to ground level once it turns yellow, but leave it if frost is imminent—lilies need time to photosynthesize and store energy for next year. Mulch heavily (3-4 inches) around the base to insulate bulbs in cold climates. In USDA Zones 7-9, lilies often overwinter without protection, but Zone 6 and colder need extra care.
Mark the planting spot with stakes or a garden flag—lilies multiply aggressively, and you’ll want to avoid disturbing new offsets. By early spring, you’ll see shoots pushing through the soil, ready to bloom in 6-8 weeks. The key to long-term success? Patience and consistent care—lilies reward loyalty with years of vibrant color.
Tips & tricks for planting lily bulbs with confidence
Here's what I've learned after years of planting lilies—these little details make all the difference between a garden that thrives and one that struggles.
Timing is Everything: The 4-6 week window before your last frost date is non-negotiable for spring planting. I use a local frost calendar app to set reminders—planting too early can cause rot, while waiting too long means missed blooms. For fall planting, aim for 6-8 weeks before your first frost to give roots time to establish before winter. This timing ensures your lilies have the full growing season to develop strong roots and vibrant blooms.
Soil Preparation Secret: That 2-3 inches of compost mixed into the top 6 inches of soil isn't just decoration—it's insurance against bulb rot. I test my soil pH regularly (lilies prefer 6.1-7.0) and add perlite or sand if my native soil is too dense. The "loose and crumbly" test is foolproof: squeeze a handful—if it doesn't fall apart easily, keep amending. Proper drainage is the single most important factor for long-term lily health.
Planting Orientation Matters: The "pointy end up" rule isn't just a gardening myth—it's biological reality. Lilies grow from the top, and planting them upside down will stunt their growth. I always tap the bulb gently before planting to release any old roots or damaged scales that could harbor disease. This simple step prevents common problems that new gardeners often overlook.
Watering Wisdom: Those first 2-3 weeks after planting are critical—consistent moisture (about 1 inch per week) encourages root development without waterlogging. I use a rain gauge to track exactly how much water my garden gets naturally, then supplement with drip irrigation during dry spells. The goal is to keep the soil evenly moist but never soggy, which is why that light mulch layer is so valuable.
Pro Tips for Plant Lily Bulbs In The Ground
- Here's what I've learned after years of planting lilies—these little details make all the difference between a garden...
- Timing is Everything: The 4-6 week window before your last frost date is non-negotiable for spring planting. I use a ...
- Soil Preparation Secret: That 2-3 inches of compost mixed into the top 6 inches of soil isn't just decoration—it's in...
Frequently asked questions
Got questions about planting lily bulbs? You’re not alone! Here are some of the most common concerns—plus quick, actionable answers to help you grow stunning blooms with confidence.
When is the best time to plant lily bulbs in spring?
Plant lily bulbs in early spring (3–4 weeks before the last frost) or in fall (6–8 weeks before the first frost). Spring planting gives bulbs time to establish roots before summer heat, while fall planting allows them to naturalize. Avoid planting when the ground is frozen or waterlogged!
Can I plant lily bulbs too deep, and what happens if I do?
Yes, planting too deep (more than 8 inches) can suffocate the bulb, delaying or preventing blooms. Aim for 2–3 times the bulb’s height (e.g., a 2-inch bulb should go 4–6 inches deep). If you’ve already planted them deep, don’t worry—just water well and give them time to adjust. Shallow planting may expose bulbs to frost or pests.
How often should I water newly planted lily bulbs?
Keep the soil consistently moist but not soggy for the first 2–3 weeks after planting. Water 1–2 times per week (more in hot/dry climates) until leaves emerge. Once established, lilies are drought-tolerant, but deep watering during dry spells encourages stronger blooms. Mulch helps retain moisture!
What should I do if squirrels or animals dig up my lily bulbs?
Lily bulbs are a tasty snack for critters! Plant bulbs in wire mesh cages (bury cages 6+ inches deep) or use chicken wire around the planting area. Scatter hot pepper flakes or coffee grounds nearby—they deter diggers naturally. Avoid planting in heavily trafficked areas by pets or wildlife.
Can I plant lily bulbs in containers instead of the ground?
Use a large container (at least 12 inches deep) with drainage holes and well-draining potting mix. Plant 2–3 bulbs per container, spacing them 4–6 inches apart. Containers let you move lilies to sunny spots or sheltered areas in winter. Just ensure they get 6+ hours of sunlight daily for best blooms.
Why aren’t my lily bulbs blooming, even after planting?
Blooms may skip a year if bulbs are too young, under stress (poor soil, drought), or overcrowded. Ensure they get full sun (6+ hours/day) and rich, well-draining soil. Wait until bulbs are 2–3 years old for reliable blooms. If leaves turn yellow, reduce watering—overwatering can stunt growth!
Wrapping up and next steps
Planting lily bulbs is a rewarding way to bring bold, vibrant blooms to your garden—just follow the right timing and steps! By choosing the perfect spring planting window, preparing the soil, and spacing bulbs correctly, you’ll set the stage for stunning flowers year after year. 🌸
Now that you’re ready to dig in, grab those bulbs and get started—your future garden will thank you! For even more tips, check out our guide on caring for lilies after planting to keep them thriving.