
Planting
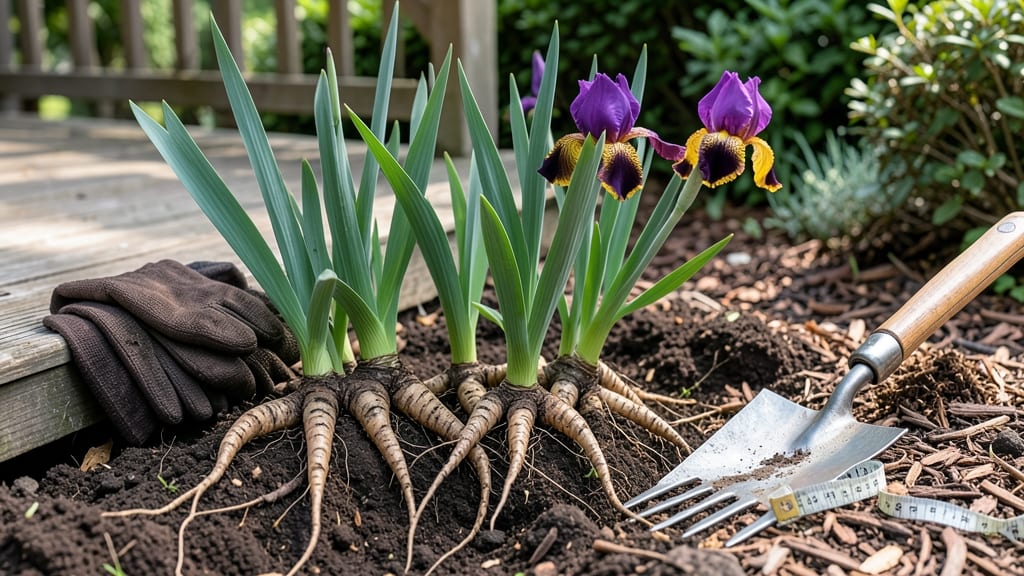
Planting irises in the ground transforms your spring garden into a riot of color—but only if you get the rhizomes right. 🌸 I’ve split clumps that flopped and others that bloomed like crazy, and the difference comes down to soil prep, spacing, and knowing which way those knobby roots face.
The secret starts with well-draining soil—irises hate soggy feet. Mix in compost or coarse sand if your soil packs like clay, and choose a spot with full sun (at least 6 hours daily).
Dig a hole wide enough to spread the rhizomes flat, with the top third exposed—this prevents rot while letting them soak up light.
After planting, water lightly to settle the soil, then step back. In 2-3 weeks, you’ll see new shoots pushing through. The first year is all about roots; by next spring, you’ll have bold, sword-like foliage and clusters of blooms that last for weeks.
Here’s the kicker: irises thrive with almost no maintenance. Divide clumps every 3-4 years when blooms dwindle, and watch them multiply. No fertilizers, no fuss—just pure, reliable color season after season.
📚 In This Guide
- What you need
- Instructions
- Tips and common mistakes
- Wrapping up and next steps
What you need
- ● Iris rhizomes: Healthy, firm clumps (1-3 per planting spot, depending on desired fullness). Look for rhizomes with thick, fleshy roots and no signs of rot or soft spots.
- ● Garden trowel or spade: A sharp, sturdy tool for digging and planting.
- ● Garden gloves: To protect your hands from dirt and sharp rhizome edges.
- ● Compost or well-aged manure: 1-2 cups per planting hole to enrich the soil.
- ○ Garden lime or sulfur: Optional but helpful if your soil is highly acidic or alkaline (irises prefer slightly alkaline soil, pH 6.0-7.0).
- ○ Mulch (optional but recommended): Straw, wood chips, or pine needles (2-3 inches) to retain moisture and suppress weeds.
- ● Watering can or hose with a gentle spray nozzle: For post-planting hydration.
- ● Soil test kit: To check your soil’s pH and nutrient levels before planting.
- ● Fungicide (copper-based): A preventive spray to guard against thrip damage or fungal diseases.
- ● Stakes or labels: To mark newly planted rhizomes if you have a large garden.
- ● Pruning shears: For trimming dead foliage after planting (if needed).
Step-by-step instructions for planting irises in the ground
Here’s how to plant irises so they multiply and bloom boldly for years—no fancy tools needed.
🪴 Step 1: Choose the Right Location and Prepare the Soil
Irises thrive in full sun—at least 6 hours daily—and well-draining soil. I dig a hole about 6 inches deep and 12 inches wide for each rhizome, spacing them 18-24 inches apart in rows. If your soil is heavy clay, mix in 2-3 inches of coarse sand or perlite to improve drainage.
Loosen the soil to a depth of 12 inches with a garden fork, breaking up any compacted layers. Irises hate soggy roots, so if your yard floods in spring, plant them on a slight mound. A gentle slope helps excess water run off instead of pooling around the rhizomes.
🌱 Step 2: Split and Position Rhizomes Correctly
Dig up your iris clump and separate it into smaller sections, ensuring each piece has at least one fan of leaves and a healthy rhizome. I use a sharp knife to cut through the roots if they’re tangled. Discard any rhizomes that look mushy, shriveled, or have black spots—these won’t regrow.
Place each rhizome in the hole so half of it is exposed above the soil. The top should face upward (it’ll look like a flattened football). If you bury it too deep, the rhizome may rot; if you leave it too high, it’ll dry out. A good rule: The top third of the rhizome should peek out after planting.
💧 Step 3: Plant and Water Without Overdoing It
Backfill the hole with soil, pressing lightly to secure the rhizome but not packing it down. Water deeply right after planting—about 1 gallon per rhizome—to help the roots settle. After that, let the soil dry out completely before watering again. Overwatering at this stage is the fastest way to kill new plantings.
I mulch around the base with 2 inches of gravel or coarse bark to keep moisture levels stable and deter weeds. Avoid organic mulch like wood chips, which can smother the rhizome over time. Within 4-6 weeks, you’ll see new growth—thin, grass-like leaves signaling the plant is re-establishing.
☀️ Step 4: Maintain for Long-Term Blooms
Irises are low-maintenance once established, but they need full sun and minimal interference. Fertilize lightly in early spring with a balanced 10-10-10 formula, using only ½ teaspoon per plant. Too much nitrogen makes them grow leaves instead of flowers.
Deadhead spent blooms by cutting the flower stalk at the base, but leave the leaves until they turn yellow naturally in late summer. This ensures the rhizome stores enough energy for next year’s blooms. Divide clumps every 3-5 years in early fall—they’ll reward you with even more dramatic spring displays.
Tips & tricks for planting irises like a pro
Planting irises right the first time means fewer headaches later—and more spectacular blooms. Here’s what I’ve learned after years of trial and error (and a few sad, rotted rhizomes).
Sunlight Secret: That 6 hours of full sun minimum isn’t just a suggestion—it’s non-negotiable for vibrant blooms. If your yard has partial shade, plant irises where they’ll get the most sun possible. I’ve seen irises in morning sun but afternoon shade still perform well, but they’ll never match the bold color of those in full sun all day. Trust me, the difference is dramatic.
Soil Prep Hack: When loosening soil to 12 inches deep, don’t just poke around—actually break up those compacted layers with a garden fork. Irises hate sitting in soggy soil, so if your yard floods in spring, create a slight mound for planting. Think of it like giving your rhizomes a tiny hill to sit on during rainy seasons. It’s a small effort that prevents years of root rot.
Rhizome Positioning: The "top third exposed" rule is your best friend, but here’s the visual trick: After planting, the rhizome should look like it’s wearing a tiny hat—just the crown peeking above soil. If it looks buried like a treasure, it’ll rot. If it’s sitting high like a pancake, it’ll dry out. That little bit of exposure is everything for happy rhizomes.
Watering Wisdom: That initial 1 gallon per rhizome is crucial, but here’s what nobody tells you—after that first watering, let the soil dry out completely before watering again. I’ve killed more irises by overwatering in the first month than by anything else. Think of it like giving your plants a drink, then letting them take a nap in the sun.
Pro Tips for Plant Irises In The Ground
- Planting irises right the first time means fewer headaches later—and more spectacular blooms. Here’s what I’ve learne...
- Sunlight Secret: That 6 hours of full sun minimum isn’t just a suggestion—it’s non-negotiable for vibrant blooms. If ...
- Soil Prep Hack: When loosening soil to 12 inches deep, don’t just poke around—actually break up those compacted layer...
Frequently asked questions
Got questions about planting irises? You’re not alone! Here are answers to the most common concerns—so you can dig in with confidence and grow stunning blooms.
When is the best time to plant irises?
Plant irises in early fall (6–8 weeks before your first frost) or late winter/early spring (as soon as the ground is workable). Fall planting gives roots time to establish before winter, while spring planting works in warmer climates. Avoid planting in extreme heat or freezing temps!
How often should I divide and replant iris clumps?
Divide iris clumps every 3–5 years to prevent overcrowding and boost blooms. Look for signs like fewer flowers or thinning foliage. Spring (after blooming) or fall (before frost) are ideal times. Just ensure each division has healthy fans (leaf clusters) and roots!
Why aren’t my irises blooming?
Common culprits include overcrowded clumps, poor sunlight (they need full sun!), or not enough nutrients. Check if your irises are getting 6+ hours of direct sun and feed them with low-nitrogen, phosphorus-rich fertilizer in early spring. Dividing old clumps often revives blooms too!
Can I plant irises in containers instead of the ground?
Yes! Irises thrive in well-draining containers with a mix of potting soil and perlite/sand. Use pots with drainage holes and replant every 2–3 years to refresh the soil. Just ensure they get plenty of sun and water—avoid soggy soil to prevent root rot.
Do irises need special winter care?
Most irises are hardy, but in Zone 5 or colder, add a 2–3 inch mulch layer of straw or leaves after the ground freezes. Cut back dead foliage in late winter, but leave healthy leaves until spring—they feed the rhizomes! In mild climates, no extra care is needed.
Wrapping up and next steps
Planting irises is a rewarding way to bring vibrant color and texture to your garden—and you’ve got all the clump-splitting secrets to make it happen! 🌸 With the right soil, spacing, and timing, your irises will thrive and reward you with bold blooms year after year.
Now that you’re ready to dig in, why not share your newfound knowledge? Tag us in your before-and-after photos or invite a fellow gardener to try this easy method together. Happy planting!