
Planting
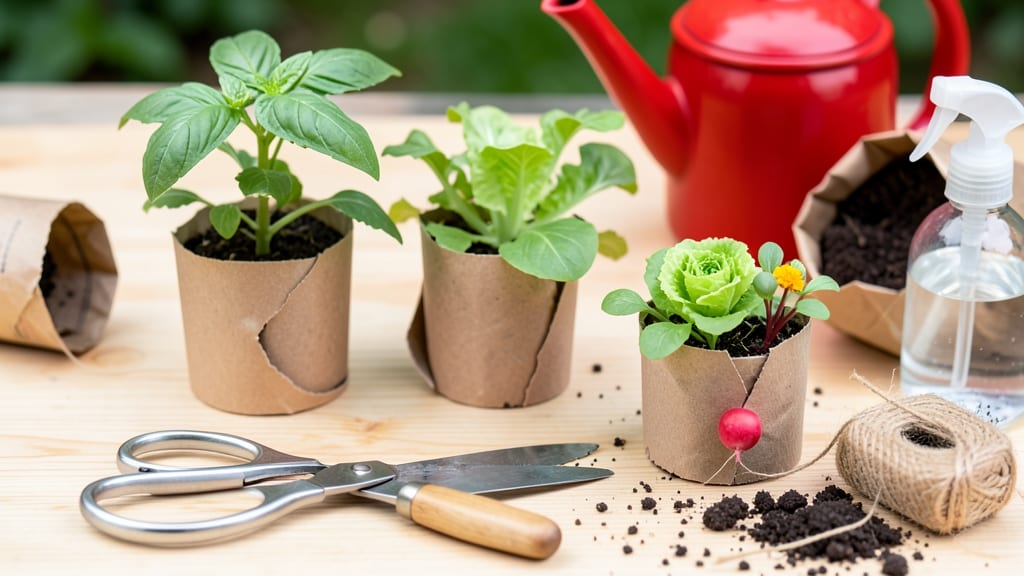
Creating newspaper plant pots turns trash into thriving seed starters in 10 minutes—no special tools or skills required. 🌱 I've made hundreds of these over the years, and they've become my go-to for starting tomatoes, peppers, and herbs without breaking the bank or harming the planet.
The magic lies in the layers: three sheets of newspaper folded just right create sturdy pots that hold moisture while allowing roots to breathe. Most people worry about structural strength, but when assembled correctly, these pots hold up beautifully until transplanting time.
The best part? They break down completely in the soil, leaving zero waste behind. You'll end up with a self-contained growing system that keeps seeds warm, retains moisture perfectly, and protects delicate roots during the critical early stages.
The pots even double as a handy transplanting tool when it's time to move seedlings outdoors. Perfect for beginners, eco-conscious gardeners, or anyone tired of plastic pot waste. Here's exactly how to make them without a single mistake.
📚 In This Guide
- What you need
- Instructions
- Tips and common mistakes
- Wrapping up and next steps
What you need
- ● Newspaper: 4-6 sheets (standard broadsheet size, ~17" x 22"). Avoid glossy sections—they can repel water.
- ● Scissors: Sharp pair for clean cuts (avoid dull blades that tear paper).
- ● Water: A spray bottle or small cup for dampening.
- ● Twine or string: ~12 inches (for securing the pot). Organic twine works best.
- ● Potting soil: Seed starter mix or well-draining soil (avoid heavy garden soil).
- ● Seeds or seedlings: Your chosen plants (herbs, flowers, or veggies).
- ● Plastic wrap or aluminum foil: To line the pot (extends lifespan by 1-2 weeks).
- ● Compost or worm castings: Mix into soil for nutrient boost.
- ● Acrylic paint or markers: Decorate pots for a fun touch (use non-toxic, water-based options).
- ● Newspaper glue or flour paste: Reinforce seams if pots feel flimsy.
Step-by-Step instructions for making newspaper plant pots
Here's how to create sturdy, biodegradable pots in minutes using just a few household items.
🪴 Step 1: Gather and Prepare Your Materials
You'll need 4 sheets of newspaper (standard broadsheet size works best), a small bowl of water, and a flat work surface. I like to use the comics section because the thicker paper holds its shape better. Tear the newspaper into strips about 2 inches wide—this creates the perfect balance between strength and flexibility.
Fold each strip in half lengthwise, then unfold it. This creates a crease down the center that helps hold the pot together. Lay the strips side by side on your work surface, overlapping the ends by about ½ inch. You should have a long, continuous strip about 2 inches wide and 3-4 feet long depending on your paper size.
💧 Step 2: Soak and Shape the Newspaper
Pour the water into the bowl and dip each newspaper strip into it, pressing gently to saturate the entire surface. You want the paper damp but not dripping—it should hold its shape when you squeeze it. I usually let the strips soak for about 10-15 seconds each before laying them out again.
Once all strips are damp, roll them into a spiral starting from one end, keeping the crease on the outside. The overlapping ends should meet at the top of your pot. Press gently along the seam to seal it. For a 4-inch pot, you'll need about 12-14 inches of rolled newspaper. If you want smaller pots, just roll less length before sealing.
☀️ Step 3: Strengthen and Dry the Pot
Here's the thing—newspaper pots need reinforcement to hold their shape during watering. After rolling, gently press the entire pot between your palms to compress it slightly. This makes the walls sturdier. Then, wrap a second strip around the outside, overlapping the seam by about ½ inch and pressing firmly.
Let the pot dry completely—this takes about 1-2 hours depending on humidity. You'll know it's ready when it feels firm to the touch and holds its shape when you gently squeeze it. Place them on a wire rack or upside-down bowl to dry evenly. I always make a few extra pots while I wait—they're useful for backup starters!
🌱 Step 4: Fill and Plant Your Seedlings
Once dry, fill each pot with your seed-starting mix (not regular garden soil) up to about ½ inch from the top. Press the soil down lightly with your finger—this removes air pockets and creates good contact between the pot and soil. Plant your seeds according to the packet instructions, then water gently until the soil is evenly moist.
Place the pots in a seedling tray or directly in your garden bed. The beauty of newspaper pots is that you can plant them directly into the ground—they'll break down naturally in about 4-6 weeks, eliminating transplant shock. Just make sure to water them regularly, as the newspaper will start to decompose faster than traditional pots.
⏰ Step 5: Monitor and Transition to Soil
Check your pots every few days to ensure they're holding their shape. If the sides start to sag, it's time to transplant. You'll know it's ready when you can gently squeeze the pot and feel resistance—this means the roots have integrated with the paper.
To transplant, simply push the entire pot into the ground, newspaper and all. Water thoroughly after planting. The newspaper will provide temporary moisture retention and nutrients as it breaks down. I've found that seedlings grown in newspaper pots establish 2-3 days faster than those transplanted from plastic containers.
Tips & tricks for perfect newspaper plant pots
These simple tricks will help you create sturdy, long-lasting pots that actually work for your seedlings.
Paper Selection: Not all newspapers are created equal! I've found that comics pages or glossy inserts hold their shape better than standard newsprint. If you're using regular newspaper, look for thicker sections or use two layers for extra reinforcement. The 2-inch width mentioned in Step 1 is ideal because it gives you that perfect balance between flexibility and strength.
Soaking Secret: The 10-15 seconds of soaking in Step 2 is crucial—don't skip it! If your strips feel dry after soaking, give them another quick dip. Too much water makes the paper soggy and weak, while too little won't hold the shape. I like to test by squeezing a strip between my fingers—it should hold together but still be pliable. This ensures your pots won't fall apart when you water them later.
Drying Strategy: That 1-2 hour drying time in Step 3 can feel like forever, but patience pays off. I've learned the hard way that rushing this step leads to pots that collapse when planted. For faster drying, place your pots in a warm spot (like near a sunny window) but avoid direct sunlight which can cause uneven drying. A fan on low speed can also help circulate air without damaging the fragile structure.
Planting Hack: Here's what nobody tells you—after filling your pots with seed-starting mix in Step 4, press down gently with your finger to create good soil contact. This prevents air pockets that can dry out your seeds. And for extra moisture retention, I like to place my pots in a shallow tray of water for about 10 minutes before planting seeds. This gives your seedlings a head start with consistent moisture.
Pro Tips for Make Newspaper Plant Pots
- These simple tricks will help you create sturdy, long-lasting pots that actually work for your seedlings.
- Paper Selection: Not all newspapers are created equal!
- Soaking Secret: The 10-15 seconds of soaking in Step 2 is crucial—don't skip it!
Frequently asked questions
Got questions about crafting newspaper plant pots? You’re not alone! Here are answers to the most common queries to help you grow with confidence—and zero stress.
How long do newspaper pots last before breaking down?
Newspaper pots typically last 4–6 weeks in moist soil before decomposing. For faster breakdown, use uncoated newsprint (avoid glossy sections). To extend their life, water lightly and plant seedlings gently to minimize damage. If they crumble too soon, try adding a thin layer of peat moss inside for extra structure.
Can I reuse old newspaper pots for a second planting?
While you can reuse them, it’s not ideal. Old pots may weaken, tear, or harbor mold. Instead, flatten and compost used pots—they’ll enrich your soil! For a quick fix, layer a fresh sheet over the old one to reinforce it. Pro tip: Save scraps for mulch or seed-starting liners in future batches.
How soon can I transplant seedlings from newspaper pots?
Transplant when seedlings have 2–3 true leaves (usually 3–4 weeks after sowing). Gently squeeze the pot to check for root growth—if roots circle the bottom, it’s time! Don’t wait too long, or roots may get root-bound. Water the pot 1 hour before transplanting to reduce stress on delicate roots.
What’s the best type of newspaper to use?
Stick to black-and-white, uncoated newsprint—avoid colored or glossy sections (they contain chemicals that may harm plants). Tabloids or inserts work too! Pro tip: If you’re unsure, fold a small test pot and soak it for 24 hours. If it holds shape without leaking ink, it’s safe.
Why are my newspaper pots falling apart too quickly?
Three likely culprits:
- Overwatering: Soggy pots weaken fast. Let the soil dry slightly between waterings.
- Thin layers: Use 3–4 sheets folded tightly for durability.
- Coated paper: Glossy or colored ink can degrade faster. Stick to plain newsprint.
If they’re still fragile, add a splash of diluted white vinegar to the mix when folding—it acts as a natural binder.
Wrapping up and next steps
Creating newspaper plant pots is a simple, eco-friendly way to give your seeds a head start while reducing waste! 🌱 With just a few sheets of newspaper and a little patience, you’ll have sturdy, biodegradable pots ready for planting.
Whether you’re a seasoned gardener or just starting out, this method proves that sustainability and gardening go hand in hand.
Now that you’re armed with the know-how, why not take the next step? Try experimenting with different plant varieties or even upcycle old newspapers from your recycling bin. Happy planting—and watch your green thumb grow! 🌿