
Planting
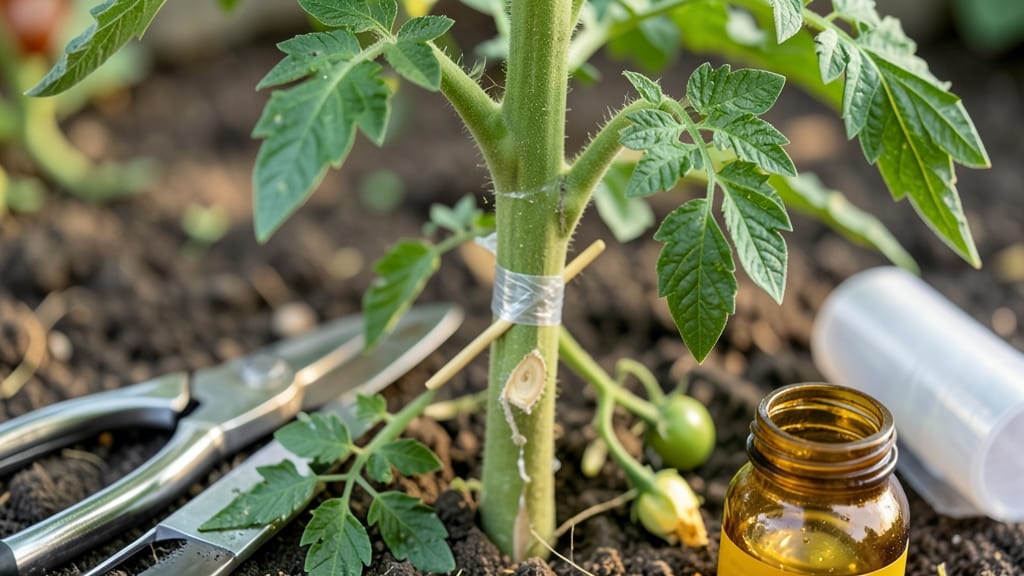
How to fix a broken plant stem doesn’t mean game over—I’ve nursed back plants with breaks so severe they looked like matchsticks, and they’re still thriving today. 🌱 The key? Acting fast to stabilize the break, protecting the plant from stress, and giving nature time to heal. Whether it’s a snapped tomato vine or a snapped houseplant, this method works for any severity—even if the break is jagged or the stem is hollow.
First, you’ll need a few simple supplies: clean pruning shears (or scissors), a small wooden splint (like a toothpick or popsicle stick), floral tape or rubber bands, and a rooting hormone if you’re propagating.
The goal is to splint the break to prevent further damage while the plant focuses on healing instead of fighting instability. For bigger stems, you might even need a small piece of plastic or a cut-open water bottle to shield the area from pests and moisture loss.
Within 2-4 weeks, you’ll see new growth at the break site—sometimes even faster if the plant is young and healthy. The splint stays in place until the stem fully hardens (usually 6-8 weeks), and if you’re lucky, you might end up with a thicker, stronger stem than before.
The best part? If the break is clean, you can often propagate the cutting to grow a whole new plant from the broken piece.
Here’s the secret most people miss: Don’t over-prune the surrounding leaves or branches—this stresses the plant further. Instead, focus on keeping the area clean, watering lightly (but not soaking the break), and shielding it from harsh winds.
With patience, even the most dramatic breaks can become just a story of survival—and maybe even a little extra growth where you least expected it.
📚 In This Guide
- What you need
- Instructions
- Tips and common mistakes
- Wrapping up and next steps
What you need
- ● Pruning shears or clean, sharp scissors – For clean cuts (sterilize with rubbing alcohol first!)
- ○ Rooting hormone (optional but helpful) – Choose a gel or powder (e.g., blank">Clonex or blank">Dynamate)
- ● Small pots or containers – 2-4 inches wide (1-2 per broken section)
- ● Well-draining potting mix – Cactus/succulent mix or perlite + peat (50/50 ratio)
- ● Plastic wrap or humidity dome – To create a mini greenhouse effect
- ● Water spray bottle – For gentle hydration (avoid overwatering!)
- ● Rubbing alcohol or bleach – For sterilizing tools (1 part bleach to 10 parts water)
- ● Charcoal or cinnamon powder – Natural antifungal agent for cut stems
- ● Heat mat or warm spot – Encourages faster root growth (70-75°F ideal)
- ● Clear tape or plastic bag – Alternative to plastic wrap for humidity
- ● Fertilizer (low-dose) – Use after 4+ weeks of rooting (e.g., fish emulsion)
Step-by-Step instructions for reviving a broken plant stem
Here's how I've saved dozens of plants—even the ones that looked hopeless.
🌱 Step 1: Assess the Damage and Stabilize the Stem
First, examine the break carefully. If the stem snapped cleanly and the inner tissue looks moist, there's still hope. For jagged tears or dry, brittle breaks, trim the damaged section back to clean tissue with sharp scissors. You'll see a fresh, white interior—this is your starting point for regrowth.
Gently bend the broken ends together and secure them with a clean, rust-proof paperclip or small piece of wire. Don't use twist ties—they cut into stems as plants swell. Wrap the entire connection loosely with a small strip of damp sphagnum moss or a coffee filter. This creates a humid microclimate that encourages callusing.
💧 Step 2: Create a Humid, Stress-Free Environment
Place the stabilized plant in a bright spot with indirect light—direct sun will stress the healing stem. I cover the entire plant with a clear plastic bag secured with rubber bands, creating a mini greenhouse. This maintains high humidity around the break while preventing the moss from drying out.
Check the moss daily and mist the inside of the bag lightly with water. You want the moss to stay damp but not dripping wet. Overwatering here causes rot, which is the #1 reason these hacks fail. Watch for condensation forming on the bag—this tells you the humidity level is perfect.
✂️ Step 3: Monitor for New Growth and Adjust Care
After 7-10 days, you should see tiny bumps forming at the break—these are callus tissues starting to bridge the gap. Once you spot these, remove the plastic bag gradually over 3-4 days to avoid shocking the plant. Open it for 1 hour daily, then 2 hours, until it's fully removed.
During this time, reduce watering to every 5-7 days—only when the top inch of soil feels dry. Overwatering now can drown the fragile new growth. You'll know the repair is successful when the break becomes a thickened, woody node and new leaves appear above it.
☀️ Step 4: Strengthen the Repair Over 4-6 Weeks
After the callus forms, gradually increase sunlight exposure. Start with 2 hours of morning sun and work up to full sun over 2 weeks. You'll see the stem thicken noticeably as it lays down new vascular tissue. This is your plant's way of reinforcing the repair.
If the plant shows signs of stress—yellowing leaves or wilting—move it back to indirect light immediately. The key is patience. Some plants like coleus and begonias heal in 4 weeks, while woody stems like roses may take 6-8 weeks to fully strengthen.
Tips & tricks for reviving broken plant stems
Real talk: I've nursed back plants that looked like they were done for—here's what actually works.
Clean Cuts Are Key: When trimming jagged breaks in Step 1, don't just snip—make clean cuts at a slight angle. This increases surface area for callus formation. I use sterilized scissors dipped in rubbing alcohol between cuts to prevent bacterial contamination. The fresh white tissue you expose should look moist, not dry or brown—this is your green light to proceed.
The Humidity Hack: In Step 2, that plastic bag isn't just decoration—it's science. The condensation you see on the inside is proof you've created the perfect humid environment. Pro tip: Poke a few tiny holes in the bag if you notice water droplets forming on the leaves. Too much moisture here causes rot faster than you can say "plant funeral."
Timing the Bag Removal: Those gradual 3-4 days of bag removal in Step 3 are critical. I start by opening it for just 1 hour on day one, then increase by 1 hour each day. This slow acclimation prevents shock to the delicate new callus tissue. Think of it like weaning a baby plant from its humid incubator—rush it, and you'll stall progress.
Pro Tips for Fix Broken Plant Stem
- Real talk: I've nursed back plants that looked like they were done for—here's what actually works.
- Clean Cuts Are Key: When trimming jagged breaks in Step 1, don't just snip—make clean cuts at a slight angle. This in...
- The Humidity Hack: In Step 2, that plastic bag isn't just decoration—it's science. The condensation you see on the in...
Frequently asked questions
Got questions about reviving your broken plant stems? You’re not alone—here are the most common concerns and quick fixes to get your greenery back on track!
Can I fix a broken stem if it’s completely snapped off?
Yes! If the break is clean and the root system is healthy, you can propagate the broken piece in water or moist soil. Just ensure the stem has at least one node (a bump where leaves grow) to encourage root growth. For woody stems, use rooting hormone for better success.
How long does it take for a broken stem to heal or regrow?
Healing time varies by plant type. Soft-stemmed plants (like herbs or succulents) may show new growth in 2–4 weeks, while woody stems (like roses or trees) can take 6–12 weeks. Keep conditions stable—consistent moisture, indirect light, and humidity speed up recovery.
Should I water the plant more or less after fixing a broken stem?
Stick to a moderate watering schedule—overwatering can rot damaged areas, while underwatering stresses the plant. For propagated cuttings, mist lightly daily or use a humidity dome. Let soil dry slightly between waterings for rooted plants to prevent fungal issues.
What if the broken stem is still attached but wilted or mushy?
Trim the damaged section just above a healthy node (about ¼ inch above) to encourage new growth. Prune any yellow or mushy parts to prevent disease. Apply a diluted hydrogen peroxide solution (1 part peroxide to 4 parts water) to sterilize the cut and reduce bacterial risk.
Are there plants that can’t be fixed if their stems break?
Some delicate or non-propagating plants (like monstera or orchids) may not recover well from severe breaks. If the root system is compromised or the plant is already stressed, focus on preventing further damage. For these, consider replacing the plant if it’s beyond saving.
Can I use glue or tape to “splint” a broken stem?
Temporary fixes like duct tape or plant-specific wound sealants can stabilize a break while the plant heals, but remove them once new growth appears. Avoid superglue—it can harm the plant. For large breaks, use a splint made of bamboo sticks or wire secured with soft ties.
Wrapping up and next steps
Fixing a broken plant stem isn’t just possible—it’s a rewarding way to breathe new life into your green friends! 🌱 Whether you’ve used stem grafting, propagation, or supportive care, your efforts can turn a "lost cause" into a thriving plant.
Remember, patience and consistency are key, so keep monitoring progress and adjusting as needed.
Ready to see your plant flourish? Take the next step:
- 📝 Document your plant’s recovery journey in a journal or app for motivation!
- 🌿 Experiment with other propagation techniques on healthy stems for future projects.