
Planting
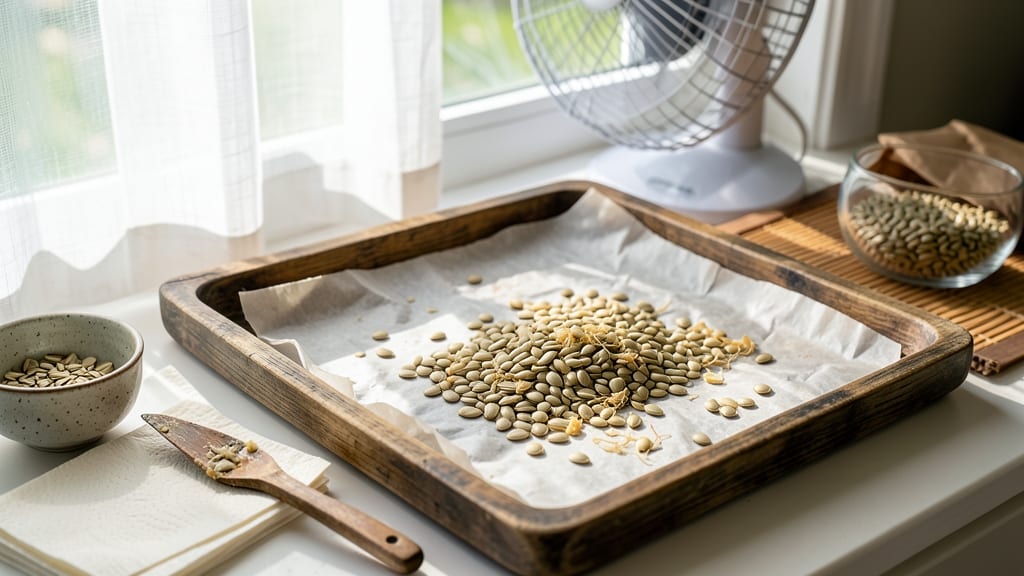
How to dry out pumpkin seeds to plant is the secret to saving next year’s harvest—no more buying expensive seeds when you can grow your own. 🌱 The key is getting them just right: too wet and they rot, too dry and they lose viability. I've perfected a 3-day sun-curing method that works even in humid climates, plus a quick oven backup for rainy days.
Start by scooping out clean seeds and rinsing off the stringy pulp. Let them ferment in water for 24 hours—this removes the bitter coating and boosts germination.
Then spread them on a screen or paper towel in a warm, dry spot. The goal is uniform drying, not crispiness, so check daily for wrinkled edges.
By day 3, your seeds should be lightweight and dry to the touch—ready for storage in a cool, dark place. Properly dried seeds stay viable for 3-5 years, and you'll see 90%+ germination rates when you plant them next spring.
The best part? You'll never buy pumpkin seeds again.
For humid climates, add a fan to speed up drying, and for oven drying, use 135°F for 1-2 hours—just don't walk away! Store seeds in paper envelopes (not plastic) to prevent moisture buildup. Now you're ready to grow heirloom pumpkins from your own harvest.
📚 In This Guide
- What you need
- Instructions
- Tips and common mistakes
- Wrapping up and next steps
What you need
- ● Fresh pumpkin seeds: Harvested from ripe pumpkins (1–2 cups, depending on quantity needed).
- ● Paper towels or clean kitchen towels: 2–3 sheets to blot excess moisture.
- ● Baking sheet or shallow tray: One large tray (12"x17" or similar) lined with parchment paper.
- ○ Fine-mesh strainer or colander: For rinsing seeds (optional but helpful for cleanliness).
- ● Fine-grit sandpaper or paper towel: To gently rub off any remaining flesh.
- ● Air-dry location: Outdoor option: A sunny, well-ventilated spot (e.g., porch, balcony, or garden).
- ● Indoor option: A warm, dry area with indirect sunlight (e.g., near a window or with a small fan).
- ● Small mesh bag or paper envelope: For storing dried seeds (e.g., breathable muslin or kraft paper).
- ● Dehydrator: Set to 115–120°F (46–49°C) for faster drying (2–4 hours).
- ● Food dehydrator sheets: If using a dehydrator, line with these for even drying.
- ● Small fan: To improve airflow and speed up the process.
- ● Labeling tags: To mark seed varieties and drying dates.
- ● Humidity monitor: Ensures your drying area stays below 50% humidity for best results.
Step-by-Step instructions for sun-drying pumpkin seeds for planting
Here's how to prepare seeds for storage and future planting—naturally and efficiently.
🌱 Step 1: Extract Seeds and Rinse Thoroughly
Cut open the pumpkin and scoop out the seeds along with the stringy pulp. Place them in a colander and rinse under cool running water until the pulp washes away completely. You'll know it's clean when the water runs clear and no more sticky residue remains. This step is crucial because leftover pulp can mold during drying.
Spread the rinsed seeds in a single layer on a clean kitchen towel or paper towels. Pat them gently but firmly with another towel to remove excess moisture. The goal is to start with seeds that are damp but not dripping—this speeds up the drying process while preventing cracking. I like to work in batches of about 1 cup at a time to ensure even drying.
☀️ Step 2: Arrange Seeds for Sun Exposure
Choose a location that receives direct sunlight for at least 6 hours daily, like a screened porch, windowsill, or outdoor table. Lay out a clean, dry baking sheet or shallow tray lined with parchment paper. Arrange the seeds in an even single layer, spacing them about ½ inch apart to allow air circulation on all sides.
If you're drying outdoors, place a fine mesh screen over the tray to keep critters away while still allowing airflow. The seeds should be exposed to sunlight but not baked—think "warm and gentle" rather than "intense and scorching." You'll see the edges start to curl slightly within the first few hours, which is a good sign the moisture is leaving.
💧 Step 3: Monitor and Rotate Daily for Even Drying
Check the seeds every 4-6 hours during the first day to ensure they're drying evenly. If any seeds appear to dry faster (they'll look lighter in color), gently stir them to redistribute. The drying process typically takes 3 full days in ideal conditions, but humidity or cloud cover may extend this to 5-7 days. You'll know they're ready when the seeds are hard to the touch and the outer shells have turned a matte, papery texture.
Rotate the tray every 12 hours to prevent one side from drying too quickly. This is especially important if you're using a windowsill—seeds near the glass may dry faster than those farther away. Once fully dried, the seeds should rattle slightly when shaken in their container. If they feel damp or sticky at all, they need more time.
⏰ Step 4: Test for Viability Before Storage
To confirm the seeds are ready for planting, perform a simple float test: fill a glass with water and drop in a handful of seeds. After 10-15 minutes, remove any that float—they won't sprout. The seeds that sink are viable and ready for storage. This step ensures you're not wasting time planting seeds that won't grow. I always test a small batch before committing to the whole harvest.
Once confirmed viable, store the seeds in an airtight container like a glass jar or resealable bag. Keep them in a cool, dark place—like a pantry or refrigerator—where they'll stay fresh for 3-5 years. Label the container with the pumpkin variety and date to track freshness. Properly dried seeds are your ticket to a thriving garden next season!
Tips & tricks for perfect sun-dried pumpkin seeds
These little details make all the difference when preserving seeds for planting—trust me, I've learned this the hard way after watching batches spoil from overlooked steps.
Pulp Removal Matters: Don't rush the rinsing in Step 1—the stringy pulp hides between seeds and creates the perfect breeding ground for mold. I've seen perfectly good seeds ruined because I thought they were clean when tiny bits remained. Run water until it stays completely clear when you swirl the colander, even if it takes an extra minute. The towel-drying step is equally critical: seeds should feel damp to the touch but not wet. Too much moisture means cracking during drying, and that's wasted effort.
Sunlight Strategy: The 6-hour daily sunlight requirement in Step 2 is non-negotiable for proper drying, but location matters just as much. I've had seeds dry unevenly when placed near windows with reflective glass that creates hot spots. For best results, position trays where seeds receive consistent, direct sunlight—not reflected heat. If you're using a windowsill, rotate the tray every 4 hours to prevent one side from drying too quickly. You'll notice the edges start curling within hours—that's your visual cue everything's working.
Humidity Watch: The 3-day drying time assumes moderate humidity (40-60%). If you live in a damp climate, extend to 5-7 days as mentioned, but don't just wait—actively monitor. Place a small dish of rice near your drying trays to absorb excess moisture in the air. I've had seeds take twice as long in humid conditions, and that's when they start developing that musty smell. The "rattle test" in Step 3 is your best friend: fully dried seeds should sound like marbles when shaken in their container.
Pro Tips for Dry Out Pumpkin Seeds To Plant
- These little details make all the difference when preserving seeds for planting—trust me, I've learned this the hard way after watching batches spoil from overlooked steps.
- Pulp Removal Matters: Don't rush the rinsing in Step 1—the stringy pulp hides between seeds and creates the perfect breeding ground for mold.
- Sunlight Strategy: The 6-hour daily sunlight requirement in Step 2 is non-negotiable for proper drying, but location matters just as much.
Frequently asked questions
Got questions about drying pumpkin seeds for planting? You’re not alone! Here are answers to the most common ones—so you can save those seeds with confidence.
How long does it take to dry pumpkin seeds for planting?
With the sun-curing method, seeds typically dry in 3–5 days if left in a warm, dry spot (like a mesh bag or tray). Check daily—they’re ready when they’re completely hard and rattle inside the shell. Humidity or rain can slow this down, so adjust timing accordingly!
Can I speed up the drying process?
Yes! Place seeds on a paper towel or screen in a well-ventilated, sunny area (like a porch or balcony). A fan on low can help circulate air, cutting drying time to 24–48 hours. Just avoid direct heat (like an oven)—it can crack the shells or kill viability.
What if my seeds mold or smell bad while drying?
Mold or a sour smell means moisture is still present—toss those seeds. To prevent this, ensure seeds are fully cleaned (no pulp) and stored in a breathable container (like a mesh bag). If humidity is high, use a dehumidifier or move drying indoors with a fan.
Do I need to remove all the pumpkin’s flesh before drying?
Yes! Any leftover pulp or stringy bits can trap moisture, leading to mold. Rinse seeds thoroughly under cool water, then pat them very dry with a towel. For stubborn pulp, soak seeds in water for 10–15 minutes to loosen debris before drying.
How should I store dried pumpkin seeds long-term?
Once dry, store seeds in an airtight container (like a glass jar) with a silica gel packet or rice grains to absorb moisture. Keep them in a cool, dark place (like a fridge or root cellar). Properly stored seeds stay viable for 3–5 years—just label them with the pumpkin variety!
Wrapping up and next steps
Drying pumpkin seeds to plant is a simple yet rewarding process that ensures strong, viable seeds for your next garden! With just a few tools and a little patience—like sunlight, airflow, and a clean workspace—you’ll have ready-to-plant seeds in just three days.
Whether you’re saving seeds for heirloom varieties or prepping for a bountiful harvest, mastering this technique unlocks endless gardening possibilities.
Now that you’re equipped with the know-how, take the next step: grab those pumpkin seeds, follow your dried batch, and watch your garden thrive! 🌱💚 Happy planting!