
Planting
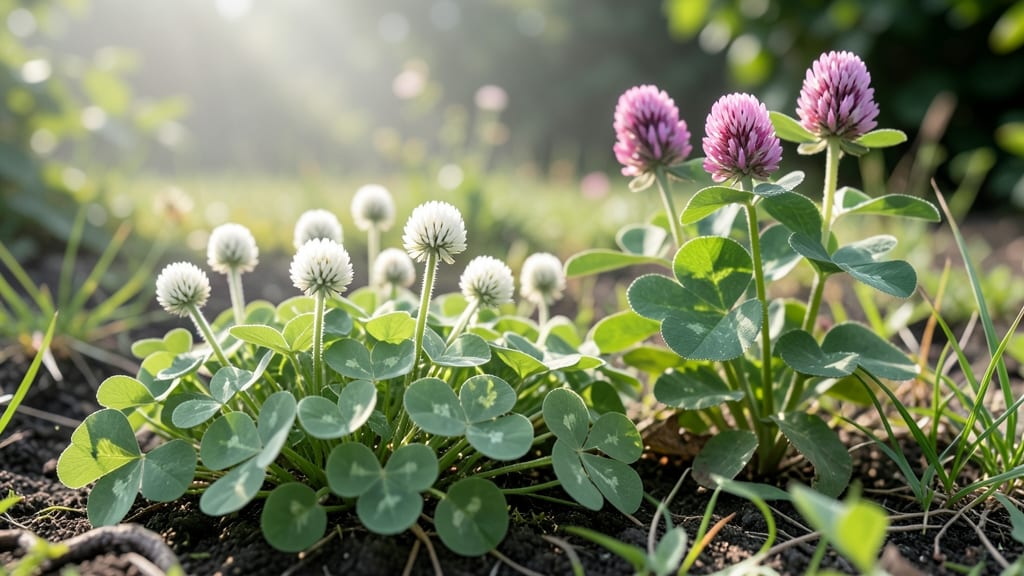
How to care for the clover plant isn’t just about survival—it’s about growing a lush, sun-drenched ground cover that transforms your yard into a pollinator paradise. 🌿 I’ve watched clover turn bare spots into vibrant green carpets, fix nitrogen in the soil, and outcompete weeds without a single herbicide. The key? Matching its love of sun with the right soil and watering rhythm. Most gardeners overwater clover, drowning its shallow roots—but it thrives on 1-2 inches of water weekly once established. Amend heavy clay with compost to prevent waterlogging, and fertilize only if your soil tests poor. The plant’s trifoliate leaves are nature’s lawn alternative, staying green even in drought once roots establish. By summer’s end, you’ll have a self-sustaining ground cover that chokes out weeds, supports bees, and recovers from foot traffic. The secret? Mow occasionally to control height, but never scalping—clover bounces back faster than grass. Perfect for sunny lawns, slopes, or pollinator gardens. Let’s get yours thriving!
📚 In This Guide
- What you need
- Instructions
- Tips and common mistakes
- Wrapping up and next steps
What you need
- ● Clover seeds – Choose between white clover (Trifolium repens), red clover (Trifolium pratense), or crimson clover (Trifolium incarnatum), depending on your climate and needs. Purchase 1-2 lbs for a small garden or 5+ lbs for larger coverage.
- ● Well-draining potting soil or garden soil – A mix of 60% topsoil, 30% compost, and 10% perlite/sand works best for optimal aeration and moisture retention.
- ● Sunny planting location – Clover thrives in full sun (6+ hours of direct sunlight daily). Ensure the spot gets ample light.
- ● Watering can or hose with a gentle spray nozzle – Clover prefers 1 inch of water per week, but avoid waterlogging.
- ○ Fertilizer (optional but helpful) – A balanced, low-nitrogen fertilizer (10-10-10 or 5-10-10) applied every 6-8 weeks promotes healthy growth.
- ● Garden trowel or hand shovel – For digging small holes or transplanting seedlings.
- ● Rake or hoe – To loosen soil and remove weeds before planting.
- ● Mulch (straw or wood chips) – Helps retain moisture and suppress weeds. Use 1-2 inches of mulch after planting.
- ● Pruners or shears – For trimming dead or overgrown stems to encourage bushier growth.
- ● pH testing kit – Clover prefers slightly acidic to neutral soil (pH 6.0-7.0). Adjust with lime (to raise pH) or sulfur (to lower pH) if needed.
- ● 🌡️ Best planting time: Early spring or late summer for optimal germination.
- ● ✨ Companion plants: Pair clover with grasses or legumes for a low-maintenance, nitrogen-rich lawn.
- ● 🎯 Container gardening? Use a pot with drainage holes and at least 6-inch depth for each plant.
Step-by-Step guide to thriving clover care
Sun-loving clover thrives with the right balance of light, soil, and maintenance—here's how to keep it lush and vibrant.
☀️ Step 1: Position for Maximum Sunlight
Clover demands 6-8 hours of direct sunlight daily for optimal growth. I always place mine in the southernmost part of the yard where morning sun transitions to afternoon warmth. If your garden gets limited sunlight, a south-facing window or grow light setup works—but expect slower growth and less vibrant foliage.
Watch for signs of stress: leaves turning pale yellow or stretching toward light mean it’s not getting enough sun. If this happens, relocate the plant immediately or supplement with a grow light 12-14 inches above for 14 hours daily. Clover’s deep green, trifoliate leaves will perk up within a week of proper light exposure.
💧 Step 2: Water Deeply but Infrequently
Clover has deep roots and hates soggy soil, so I water once a week during dry spells, letting the soil dry out completely between waterings. Stick your finger 2 inches into the soil—if it feels dry, it’s time to water. Overwatering leads to root rot, which turns leaves brown and mushy.
When watering, aim for the base of the plant and avoid wetting the leaves to prevent fungal diseases. A drip irrigation system or soaker hose works best, delivering moisture slowly and evenly. You’ll know you’ve got it right when the top 1-2 inches of soil feel damp but not saturated.
🌱 Step 3: Maintain Soil Health and Fertility
Clover prefers well-draining, slightly acidic soil with a pH between 6.0 and 7.0. I mix in compost or aged manure in the spring to boost nutrients without overfeeding. Too much fertilizer burns the roots, causing yellowing leaves and stunted growth.
Here’s the trick: spread a thin layer of compost around the base of the plant in early spring, then lightly scratch it into the top inch of soil. This encourages root growth without overwhelming the plant. Mulch with straw or wood chips to retain moisture and suppress weeds—just keep it 2 inches away from the stems to prevent rot.
✂️ Step 4: Prune and Encourage Bushy Growth
Regular pruning keeps clover dense and prevents it from becoming leggy. I trim back one-third of the plant’s height in early spring and again after flowering to promote new growth. Use clean, sharp shears to cut just above a set of leaves, always making cuts at a 45-degree angle to prevent water from pooling.
Deadhead spent flowers to redirect the plant’s energy into leaf production rather than seed development. You’ll notice fresh, vibrant new growth within 2-3 weeks of pruning. If clover spreads too aggressively, dig up unwanted patches in late summer to control its expansion.
⏰ Step 5: Prepare for Seasonal Changes
Clover is hardy and tolerates a range of temperatures, but it goes dormant in extreme cold. In late fall, cut back the plant to 2 inches above the ground and mulch heavily to protect the roots. Most varieties survive winter in USDA zones 4-9, but if you’re in a colder climate, consider growing clover as an annual.
In early spring, remove the mulch and trim any dead or damaged growth. Fertilize lightly with a balanced 10-10-10 formula to jumpstart new growth. You’ll see fresh shoots emerge within 3-4 weeks, signaling it’s ready for another season of vibrant, sun-loving care.
Tips & tricks for perfect clover plant care
These essential insights will help you cultivate thriving clover that stays vibrant all season long.
Light Optimization: The 6-8 hours of sunlight requirement is non-negotiable for clover's health. I've found that positioning plants near a south-facing fence or wall maximizes their exposure. For indoor growers, rotate your clover plant every 3-4 days to ensure even light exposure on all sides. This prevents the leaves from stretching unevenly toward the light source, which can make them look leggy and weak.
Watering Wisdom: When checking soil moisture in Step 2, I recommend using a soil moisture meter for precision—especially in clay soils that can hold water longer. The "2 inches dry" test works well, but clay soils may need watering every 10-12 days instead of weekly. Always water in the morning to allow foliage to dry completely before evening, reducing fungal disease risks. The damp-but-not-saturated soil guideline is particularly important during humid summers.
Soil pH Secret: While the ideal pH range is 6.0-7.0, I've noticed clover tolerates slightly more acidic soil (down to 5.5) better than alkaline conditions. Test your soil annually—many garden centers offer inexpensive test kits. If your soil is too alkaline, mix in peat moss or sulfur to adjust gradually. The compost application in Step 3 should be done when soil temperatures reach at least 60°F for best microbial activity.
Pruning Precision: When trimming back one-third of the plant's height in Step 4, focus on removing the oldest growth first. This encourages new shoots to emerge from the base where the plant is most vigorous. For aggressive spreaders like white clover, I recommend using a sharp spade to create a shallow barrier trench around the planting area—this prevents underground runners from encroaching on other plants without harming the clover itself.
Pro Tips for Care For Clover Plant
- These essential insights will help you cultivate thriving clover that stays vibrant all season long.
- Light Optimization: The 6-8 hours of sunlight requirement is non-negotiable for clover's health.
- Watering Wisdom: When checking soil moisture in Step 2, I recommend using a soil moisture meter for precision—especially in clay soils that can hold water longer.
Frequently asked questions
Got questions about keeping your clover thriving? Here are some of the most common ones—and their answers—to help you grow lush, vibrant clover with ease!
How often should I water my clover plant?
Water your clover moderately—about 1 inch per week, either from rainfall or manual watering. Overwatering can drown roots, while underwatering stresses the plant. Let the top inch of soil dry out between waterings for best results. Pro tip: Well-draining soil prevents soggy roots!
Can clover survive in full shade?
While clover tolerates partial shade, it thrives best in full sun (6+ hours daily). In shady spots, growth may slow, and blooms could be sparse. If your yard is shady, opt for white clover, which adapts slightly better than red or Dutch clover.
Why is my clover turning yellow?
Yellowing clover often signals overwatering, poor drainage, or nutrient deficiency. Check for:
- Mushy stems: Too much water or compacted soil.
- Pale leaves: Needs iron or nitrogen (try a light fertilizer).
- Brown edges: Underwatering or drought stress.
Is clover invasive? How do I control its spread?
Clover spreads via rhizomes and seeds, so it can become aggressive in lawns. To manage it:
- Mow high (3–4 inches) to weaken growth.
- Hand-pull young plants before they root deeply.
- For lawns, overseed with grass to outcompete clover.
Can I grow clover indoors?
Clover is not ideal for indoor pots—it needs outdoor sunlight and space to spread. However, you can try microgreens (young clover shoots) indoors under grow lights for 1–2 weeks. For full plants, stick to containers outdoors with well-draining soil.
What’s the best time to harvest clover for tea or salads?
Harvest young leaves and flowers in the morning after dew dries (before 10 AM) for peak flavor. Avoid harvesting more than 1/3 of the plant at once to ensure regrowth. Use organic clover (no pesticides) for edible use!
Wrapping up and next steps
Caring for a clover plant is simpler than you think—just a little sun, water, and love go a long way! 🌿 With the right soil, spacing, and seasonal adjustments, your clover will thrive year-round, adding lush greenery and even pollinator-friendly blooms to your garden.
Now that you’re equipped with expert tips, there’s no better time to roll up your sleeves and get planting.
Ready to watch your clover flourish? Start small—pick a sunny spot, prep the soil, and plant your first clover seeds or plugs today. Before you know it, you’ll be enjoying a vibrant, low-maintenance garden that’s as rewarding to grow as it is beautiful to behold! 🌱