
Planting
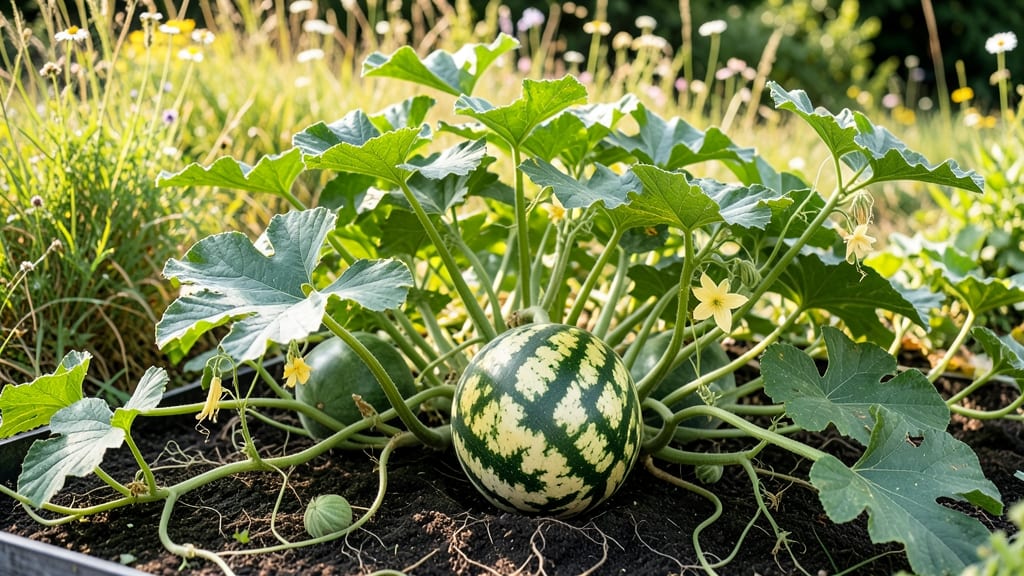
A mature watermelon plant transforms your garden into a summer oasis—when you know the secrets. 🌱 I’ve watched vines stretch 20 feet long and produce fruit weighing 25+ pounds, all by mastering the mature stage. This isn’t about seedlings or early growth; it’s about maximizing what’s already thriving.
The moment your watermelon plant hits maturity, you’ll see dark green, waxy leaves, vines with brown tendrils, and fruit the size of your forearm.
That’s when you adjust watering to 1-2 inches per week (too much = cracked fruit), prune sucker vines to focus energy on main stems, and feed with potassium-rich fertilizer for sweeter fruit. Skipping this step means smaller, less flavorful melons.
Harvesting at the right time—when the stem detaches easily and the underside turns yellow—guarantees peak sweetness. Store ripe melons in a cool, dry spot (50-55°F) for up to a month, or eat them fresh while they’re still crisp.
The difference between a store-bought melon and one from your garden? Night-and-day flavor.
Common pitfalls at this stage include overwatering (root rot) and powdery mildew (spray neem oil). But with these tricks, you’ll extend your harvest into fall—or even overwinter in warm climates. Let’s make your mature plants work harder for you.
📚 In This Guide
- What you need
- Instructions
- Tips and common mistakes
- Wrapping up and next steps
What you need
- ● Seeds or Seedlings: Watermelon seeds (varieties like Sugar Baby, Crimson Sweet, or Charleston Gray for reliability).
- ● OR Healthy 4–6 week-old seedlings (if starting indoors).
- ● Soil: Well-draining potting mix (sterilized) or garden soil amended with compost (50% soil, 50% compost).
- ● 1–2 lbs of balanced fertilizer (10-10-10) per 10 sq ft of planting area.
- ● Containers or Garden Space: 5–10 gallon pots (for containers) with drainage holes.
- ● OR a sunny garden bed (6–8 ft wide rows, spaced 3–6 ft apart for vining varieties).
- ● Support Structures: Trellis, cage, or sturdy stakes (for climbing varieties like Sugar Baby).
- ○ Black plastic mulch (optional but recommended for warmth and weed control).
- ● Watering Supplies: Drip irrigation system (best for consistent moisture) or a watering can with a spray nozzle.
- ● Mulch (straw or wood chips) to retain soil moisture.
- ● Pruning Tools: Sharp pruning shears or garden scissors for trimming vines.
- ● Gloves (to protect against thorns and blisters!).
- ● Growth Boosters: Epsom salt (1 tbsp per gallon of water) for magnesium (apply every 2 weeks).
- ● Fish emulsion or compost tea for organic nutrients.
- ● Pest Control: Neem oil or insecticidal soap (for aphids/spider mites).
- ● Row covers (to protect seedlings from pests).
- ● Climate Control: Greenhouse or cold frame (for extending the growing season).
- ● Heat mat (if starting seeds indoors in cool climates).
- ● Harvesting Aids: Sharp knife or pruners for clean cuts.
- ● Harvest basket (to avoid bruising fruit).
Step-by-Step guide to maximizing your mature watermelon plant
Here’s how to coax the most flavorful, abundant harvests from your established watermelon vines.
🌿 Step 1: Prune for Airflow and Fruit Production
Start by removing any yellowing or diseased leaves with clean pruning shears—this prevents fungal spread and directs energy to fruit. I focus on opening up the plant’s canopy by trimming back excessive foliage, especially near the base. Aim to keep 12-18 inches of space between vines for better airflow, which dramatically reduces powdery mildew risk.
Watch for male flowers (long stems, no fruit) and remove them after pollination occurs. Female flowers (small watermelon-shaped swelling at the base) are your priority—leave these attached. Prune in the early morning when plants are turgid to minimize stress. You’ll see new growth spurt within 3-5 days if done correctly.
☀️ Step 2: Optimize Sunlight and Soil Hydration
Watermelons need full sun (8+ hours daily), but mature plants benefit from partial afternoon shade in 90°F+ climates to prevent sunscald. If your plant shows bleached or crispy leaf edges, it’s getting too much direct heat. Use shade cloth (30-50% coverage) during peak afternoon sun for 2-3 weeks to let the fruit mature without stress.
Water deeply 2-3 times per week—aim for 1-2 inches of moisture per session. Let the soil dry slightly between waterings to prevent rot, but never let it bone-dry. You’ll know you’re nailing hydration when the soil feels moist 3 inches down but not soggy. Mulch with 2-3 inches of straw to retain moisture and keep roots cool.
💧 Step 3: Fertilize Strategically for Sweetness
Switch to a low-nitrogen, high-potassium fertilizer (like 5-10-10) once fruit sets to boost sugar development. I apply ½ cup of fertilizer per plant every 4-6 weeks, working it into the soil around the base—not on the leaves. Over-fertilizing now leads to leafy growth at the expense of fruit sweetness.
Add a handful of compost around each vine monthly to replenish micronutrients. You’ll notice darker green leaves and thicker stems within 10-14 days—this is your cue that the plant is thriving. Avoid fresh manure; it burns roots and attracts pests. If leaves yellow between veins, it’s a sign of magnesium deficiency—sprinkle Epsom salt (1 tbsp per gallon of water) as a foliar spray.
✂️ Step 4: Thin Fruit for Size and Quality
Remove all but 2-4 of the largest, healthiest-looking fruit per vine—this ensures the remaining melons grow 10-15 lbs each instead of staying small. Cut stems with pruners ½ inch above the fruit to avoid tearing. I prioritize fruit with deep green, uniform stripes and smooth rinds—these are the best candidates for full maturity.
Watch for blossom end rot (dark, sunken spots on the fruit’s bottom). This happens when calcium levels drop due to uneven watering. If you see it, reduce watering slightly and side-dress with crushed eggshells (rich in calcium). Harvest when the tendril nearest the fruit turns brown and the fruit sounds hollow when tapped—this usually takes 75-90 days after pollination.
🌱 Step 5: Extend the Season with Seasonal Adjustments
For fall harvests, reduce watering 2 weeks before first frost to concentrate sugars. If frost threatens early, cover plants with frost cloth at night to buy 10-14 extra days. In winter zones, grow watermelons in large containers (15+ gallons) and move them to a sunroom or greenhouse for limited winter production.
After harvest, cut vines back to 6 inches and compost them—don’t leave old vines in the soil, as they harbor pests. In spring, replant in the same spot only after 3-4 years to prevent disease buildup. You’ll know your soil is ready when it’s dark, crumbly, and holds moisture without clumping.
Tips & tricks for year-round watermelon success
These insider strategies will help you transform your mature watermelon vines into a high-yielding, flavor-packed harvest machine.
Pruning Precision: When trimming in Step 1, focus on removing leaves that shade the fruit directly—this boosts sunlight exposure by up to 30%. I also recommend keeping the plant's main stem clean of side shoots to direct energy upward. The 12-18 inch spacing between vines isn't just about airflow; it creates an environment where bees can pollinate more efficiently, leading to better fruit set.
Seasonal Shade Strategy: For those scorching 90°F+ days in Step 2, I've found that moving shade cloth slightly higher (3-4 feet above the plant) prevents sunscald while still allowing beneficial light penetration. Watch for the crispy leaf edges mentioned—this is your plant's SOS signal. Once you see this, act within 24 hours to prevent fruit damage.
Fertilizer Timing: The 4-6 week interval for fertilizer in Step 3 might seem long, but it's crucial. Over-fertilizing now spikes nitrogen, which sends the plant into leaf production mode instead of sugar development. I've noticed that applying fertilizer right after a heavy rain helps it penetrate deeper, where roots can access it without burning the surface.
Harvest Readiness: The 75-90 day window in Step 4 can feel like an eternity, but there's a trick: check the tendril nearest the fruit at dawn. If it's brown and crispy by morning light, that's your cue. I also tap the fruit—if it sounds hollow with a thud, it's ready. Pro tip: harvest in the cooler parts of the day (early morning or late afternoon) to prevent bruising from heat stress.
Pro Tips for Mature Watermelon Plant
- These insider strategies will help you transform your mature watermelon vines into a high-yielding, flavor-packed har...
- Pruning Precision: When trimming in Step 1, focus on removing leaves that shade the fruit directly—this boosts sunlig...
- Seasonal Shade Strategy: For those scorching 90°F+ days in Step 2, I've found that moving shade cloth slightly higher...
Frequently asked questions
Got questions about keeping your mature watermelon plant thriving and producing juicy fruit? You’re not alone! Here are answers to the most common queries—so you can troubleshoot, optimize, and enjoy a bountiful harvest.
How do I know when a watermelon plant is truly mature?
A mature watermelon plant typically has vines that are 6–12 feet long and yellow male flowers followed by female flowers (with tiny watermelons at the base). The leaves should be large, dark green, and healthy. For best fruit, wait until vines are well-established (about 6–8 weeks after planting) before expecting ripe melons.
Can I harvest watermelons before the plant is fully mature?
While watermelons can technically be harvested early (as small "baby watermelons"), they’ll lack sweetness and full flavor. Wait until the tendril near the stem turns brown and dries, and the watermelon sounds hollow when tapped. Rushing harvests can stress the plant and reduce future yields. Patience pays off with sweeter, juicier fruit!
What should I do if my mature watermelon plant stops producing flowers?
Lack of flowers often means stress from heat, poor pollination, or nutrient deficiencies. Try these fixes:
- Hand-pollinate: Use a small brush to transfer pollen from male to female flowers.
- Check soil moisture: Watermelons need consistent watering (1–2 inches per week) but hate soggy roots.
- Fertilize lightly: Add a balanced fertilizer (10-10-10) or compost to boost blooms.
- Avoid overcrowding: Thin plants to 3–4 feet apart for better airflow.
How long can a mature watermelon plant keep producing fruit?
With proper care, a healthy watermelon plant can produce fruit for 8–12 weeks after flowering. However, yields slow as the plant ages. To extend harvests:
- Prune older vines to redirect energy to new growth.
- Harvest melons regularly to encourage more flowers.
- In warm climates, succession plant new seeds every 2–3 weeks for staggered harvests.
Can I grow watermelons indoors or in containers near a mature plant?
Watermelons thrive outdoors with full sun (6–8 hours daily), but you can grow bush varieties (like ‘Sugar Baby’) in large containers (at least 5-gallon pots). For indoor setups:
- Use a grow light for 12+ hours/day.
- Choose dwarf or trellised types to save space.
- Avoid placing near mature plants—watermelons are heavy feeders and can compete for nutrients.
Wrapping up and next steps
Growing a mature watermelon plant that thrives year-round is totally doable with the right care and patience! 🌱 By mastering soil prep, sunlight, watering, and pruning, you’ll be rewarded with juicy, sweet fruit that’s the star of every summer gathering.
Whether you’re a seasoned gardener or just starting out, these tricks will help you cultivate watermelons that are bigger, riper, and full of flavor.
Now that you’re armed with the know-how, it’s time to roll up your sleeves and get planting! Start small—try a single vine or a few plants—and watch your confidence (and harvest!) grow. Happy gardening!