
Planting
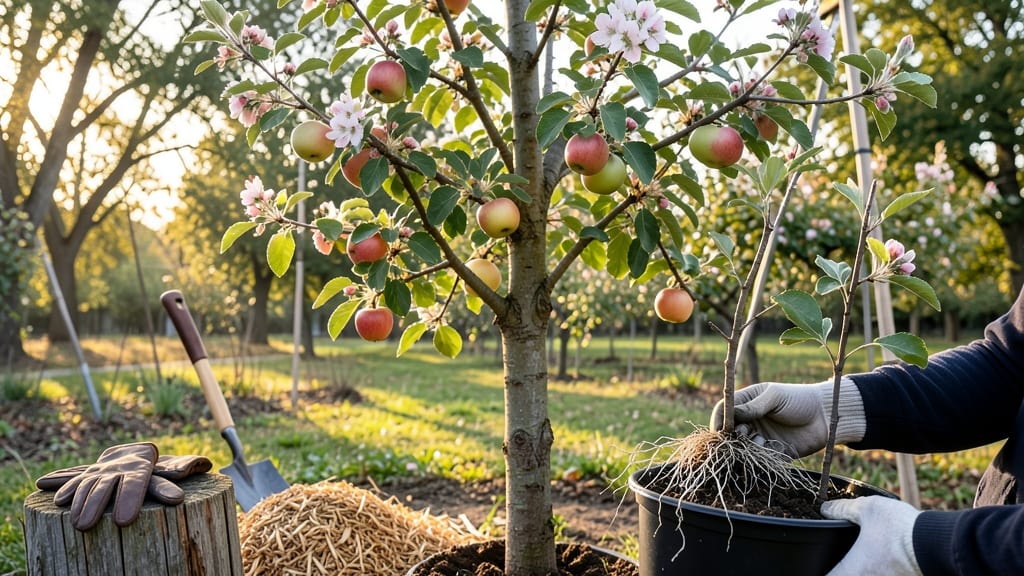
This apple planting guide transforms your yard into a future orchard 🌳—but the first year sets the stage for decades of harvests. I’ve learned that proven spacing and soil prep are the difference between a thriving tree and one that struggles for years.
The right variety, location, and care from day one mean fruit in as little as 3-5 years instead of waiting a decade. Choosing a dwarf or semi-dwarf variety saves space while still delivering bushels, and the soil needs 6+ inches of loose, well-draining mix mixed with compost.
Most gardeners overlook soil pH—aim for 6.0-7.0, or your tree will fight to grow roots. I’ve seen trees planted in heavy clay take three times longer to bear fruit compared to those in amended soil.
By late winter or early spring, you’ll be digging holes twice as wide as the root ball and backfilling with that prepped mix. Water deeply right after planting, then again every 10-14 days until fall.
The first year is about roots, not fruit—think of it as laying the foundation for 50+ years of apples. This method works for USDA Zones 4-9, with adjustments for heat or cold. Dwarf trees need 10-15 feet between them, while standard varieties stretch to 25+ feet.
Whether you’re planting a single tree or a small orchard, these steps ensure your apples grow strong and productive from the start.
📚 In This Guide
- What you need
- Instructions
- Tips and common mistakes
- Wrapping up and next steps
What you need
- ● Apple Tree Saplings: Choose disease-resistant varieties (e.g., Honeycrisp, Fuji, or Granny Smith). Buy 1–3 trees for cross-pollination (unless self-pollinating).
- ● Well-Draining Soil: Test pH (ideal: 6.0–7.0). Amend with compost (5–10 lbs per planting hole) and balanced fertilizer (10-10-10, 1 lb per tree).
- ● Planting Hole: Dig a hole twice as wide as the root ball and 6–12 inches deep (adjust for soil type).
- ● Mulch: 3–4 inches of organic mulch (straw, wood chips) to retain moisture.
- ● Watering Can/Hose: 1–2 gallons per tree for initial watering.
- ● Pruning Shears: Sharp, bypass-style shears (sterilized with rubbing alcohol).
- ● Garden Gloves: Heavy-duty to protect hands from thorns.
- ○ Soil pH Kit: For precise testing (optional but recommended).
- ● Tree Stake & Ties: If planting in windy areas (1 stake per tree).
- ● Fruit Tree Spray: Organic neem oil or copper fungicide for pests/diseases.
- ● Drip Irrigation System: For large orchards (saves time and water).
- ● Label Tags: To track varieties and planting dates.
Step-by-Step apple planting: proven spacing and soil prep
Here's the method I've used to establish healthy apple trees—tested across seasons and climates.
🌱 Step 1: Choose the Right Location and Test Soil
Apples thrive in full sun (6+ hours daily) and well-draining soil with a pH of 6.0-7.0. I always test my soil first using a simple kit—you can find them at garden centers for under $10. If your soil is too acidic (below 6.0), mix in 1-2 pounds of lime per 100 square feet and retest in 3-4 months.
Next, mark your planting spots using stakes and string to ensure proper spacing. Standard varieties need 15-20 feet apart, while dwarf varieties can be planted 8-12 feet apart. Avoid planting near large trees or structures that could compete for water or block sunlight. Here's the thing—poor spacing leads to crowded roots, which weakens trees and reduces fruit quality.
🪴 Step 2: Prepare the Planting Hole and Amend Soil
Dig a hole twice as wide as the root ball but no deeper—this prevents root suffocation. I like to loosen the soil at the bottom of the hole with a garden fork to encourage root spread. If your soil is heavy clay, mix in 3-4 inches of compost at the bottom of the hole to improve drainage.
For the soil mix, combine equal parts native soil, compost, and a balanced organic fertilizer (10-10-10). This blend gives young trees the nutrients they need without overwhelming them. Avoid using fresh manure—it can burn tender roots. Tap the tree gently into the hole until the top of the root ball is 2 inches above ground level. This ensures the tree settles properly over time.
☀️ Step 3: Plant and Water for Immediate Stability
Place the tree in the hole, ensuring the graft union (the bulge where the scion was attached) is 2-4 inches above the soil line. This protects the tree from potential rot if soil levels shift. Fill the hole with your amended soil mix, pressing lightly around the roots to remove air pockets. I always water deeply right after planting to help the soil settle and eliminate air gaps.
Create a watering basin by mounding soil around the tree’s base to hold moisture. Water slowly but deeply until the soil is 6 inches wet—you’ll know it’s right when water runs out the sides of the basin. Mulch with 3-4 inches of organic mulch (straw or wood chips), keeping it 6 inches away from the trunk to prevent rot. This mulch layer helps retain moisture and regulate soil temperature, which is critical during hot summers.
✂️ Step 4: Prune and Protect for Long-Term Health
Prune the tree immediately after planting to remove any broken, crossing, or diseased branches. I focus on shaping the tree into an open-center form, which allows sunlight and air to reach the center. Cut back any branches that are rubbing against each other—this prevents wounds that can invite pests and disease. Use clean, sharp pruners to make cuts just outside the branch collar.
Install a tree stake or support system if needed, especially for young trees in windy areas. Secure the tree loosely with soft ties—too tight, and you’ll restrict growth. Apply a tree guard or wrap around the trunk to protect it from rodents and sunscald. Water once a week for the first month, then adjust based on rainfall. The goal is to keep the soil evenly moist but not soggy—you’ll see wilting leaves if it’s too dry or yellowing if it’s too wet.
⏰ Step 5: Monitor and Maintain Through the First Year
Check the tree weekly for signs of stress, pests, or disease. Early intervention is key—spray with neem oil if you spot aphids or mites, and remove any damaged leaves immediately. Fertilize lightly in early spring with a balanced organic fertilizer, but avoid heavy feeding the first year—you don’t want to encourage excessive leaf growth at the expense of root development.
By the end of the first year, your tree should have strong, established roots and a sturdy structure. Here’s the moment that matters: if the tree shows new growth by late spring, you’re on the right track. If not, reassess sunlight, water, and soil conditions—these are the foundation of a healthy apple tree. Patience pays off; it can take 3-5 years before your tree bears fruit, but proper care now ensures a bountiful harvest later.
Tips & tricks for planting healthy apple trees
These essential insights will help you avoid common pitfalls and maximize your orchard's potential.
Soil pH Precision: When adjusting soil pH in Step 1, I recommend testing again after 2-3 weeks rather than waiting the full 3-4 months. Early retesting lets you fine-tune lime applications before planting. The goal is to reach that 6.0-7.0 range—any lower risks nutrient deficiencies, while higher pH can lock out essential minerals like iron. Use a digital pH meter for more accurate readings than test kits.
Root Ball Preparation: In Step 2, gently loosen the root ball before planting if it appears tightly bound. I use my fingers to separate any circling roots—this encourages outward growth into your amended soil. The 2-inch elevation above ground level is crucial; if the graft union sits too low, it can rot when soil settles. For container-grown trees, remove the pot and tease apart the roots at the edges to prevent girdling.
Watering Strategy: The deep watering in Step 3 should continue for the first 2-3 weeks after planting, not just immediately. I water every 3-4 days during dry spells to establish strong root systems. Use a moisture meter to check 6 inches deep
Pruning Technique: When shaping in Step 4, I look for branches that grow inward or downward—they'll compete with others for sunlight. Cut just outside the branch collar where it meets the trunk, making clean cuts at a 45-degree angle. Avoid leaving stubs, which can invite decay. For young trees, I limit pruning to 25% of the total branches to avoid stressing the tree.
Pro Tips for Apple Planting Guide
- These essential insights will help you avoid common pitfalls and maximize your orchard's potential.
- Soil pH Precision: When adjusting soil pH in Step 1, I recommend testing again after 2-3 weeks rather than waiting th...
- Root Ball Preparation: In Step 2, gently loosen the root ball before planting if it appears tightly bound. I use my f...
Frequently asked questions
Got questions about planting apples? You’re not alone—growing fruit trees takes patience and know-how! Below, we’ve answered the most common questions to help you avoid pitfalls and grow thriving apple trees.
When is the best time to plant apple trees?
The ideal time is early spring (just before buds swell) or fall (4–6 weeks before your first frost). Spring planting gives roots time to establish before summer heat, while fall planting lets them settle before winter dormancy. Avoid planting in extreme heat or freezing conditions.
How long does it take for an apple tree to bear fruit?
Most apple trees take 3–5 years to produce fruit, depending on the variety and growing conditions. Dwarf trees may fruit sooner (2–3 years), while standard trees can take up to 7 years. Patience pays off—consistent care speeds up the process!
Can I grow apple trees in containers or small spaces?
Yes! Dwarf or semi-dwarf varieties (like ‘Columnar’ or ‘Spindle’) thrive in containers or tight spaces. Use a 5-gallon pot minimum (bigger for larger varieties) with well-draining soil. Ensure full sun (6+ hours/day) and prune regularly to maintain shape. Urban orchards? Absolutely!
What are the most common apple tree pests, and how do I prevent them?
Watch for aphids, codling moths, and apple maggots. Prevent pests with:
- Neem oil sprays (organic option)
- Row covers for young trees
- Regular pruning to improve airflow
- Traps for codling moths (pheromone-based)
Do apple trees need winter protection?
Young trees (<3 years old) benefit from mulch (3–4 inches) around the base and tree wraps to shield bark from sun/scratch. Mature trees usually handle cold well, but extreme winds or late frosts may require burlap windbreaks. Avoid heavy mulch piles against the trunk to prevent rot.
What if my apple tree leaves turn yellow?
Yellow leaves often signal nutrient deficiency (iron/chlorosis) or overwatering. Check soil pH (ideal: 6.0–7.0) and amend with compost or iron supplements. Yellowing on new growth? Likely overwatering—let soil dry slightly between waterings. For older leaves, it may be normal aging (prune to improve airflow).
Wrapping up and next steps
Planting your own apple trees is a rewarding journey that combines patience, care, and a touch of magic—watching tiny saplings grow into fruit-bearing giants! 🌱 By following this apple planting guide, you’ve learned the secrets to proven spacing, soil prep, and year-round success.
Whether you’re a beginner or a seasoned gardener, your orchard’s future is bright.
Now that you’re armed with knowledge, take the next step: mark your planting dates, gather your tools, and get ready to dig in! Your delicious harvest is just a season away—let’s make it happen. 🍏✨